
Projector drawing technique
An art projector throws an enlarged image straight onto your paper, canvas, or wall so you can trace it at any size, and for two hundred years it has been the fastest way to scale a small reference up onto a large surface. This guide covers all three kinds — the opaque projector, the episcope, and the modern digital projector — how to set one up and trace with it, how to beat the keystone distortion that ruins most first attempts, and where a projector still wins. It also covers the modern alternative that does the same job with no dark room and no bulky hardware: augmented-reality tracing through the phone already in your pocket.
One of the guides behind the 82 composition overlays every visual artist should know and use.
- What it is
- Trace a projected image at any size
- Ancestor
- The camera obscura, described antiquity onward
- The classic flaw
- Keystone distortion
- Best for
- Murals, signs, large canvases
- Typical cost
- $40–$400+ for a usable projector
- Modern alternative
- AR tracing — no dark room
In short
- The projector drawing technique throws an enlarged image of a photo onto a surface so you can trace its outline at any size. It is the traditional way to scale a small reference up onto a mural, a sign, or a large canvas fast.
- There are three kinds: the opaque projector (reflects light off a physical print), the episcope (the classic opaque projector for flat originals), and the digital projector (takes the file straight from a laptop or phone).
- Its one persistent flaw is keystone distortion — a projector not square to the surface throws a trapezoid, and every proportion you trace inherits the stretch. Square the hardware; do not rely on software correction.
- A projector trains your eye very little, needs a dark room and a real cash outlay, and does one job. The free Grid Maker Pro tool handles the grid method in a browser; a projector or an AR app handles large surfaces.
- The modern art projector alternative is AR tracing: lock a reference over your real surface through a phone camera, in daylight, with no bulky projector and no keystone fuss. The Grid Maker Pro AR app does exactly this, and it is a separate product — the free web tool stays free forever.
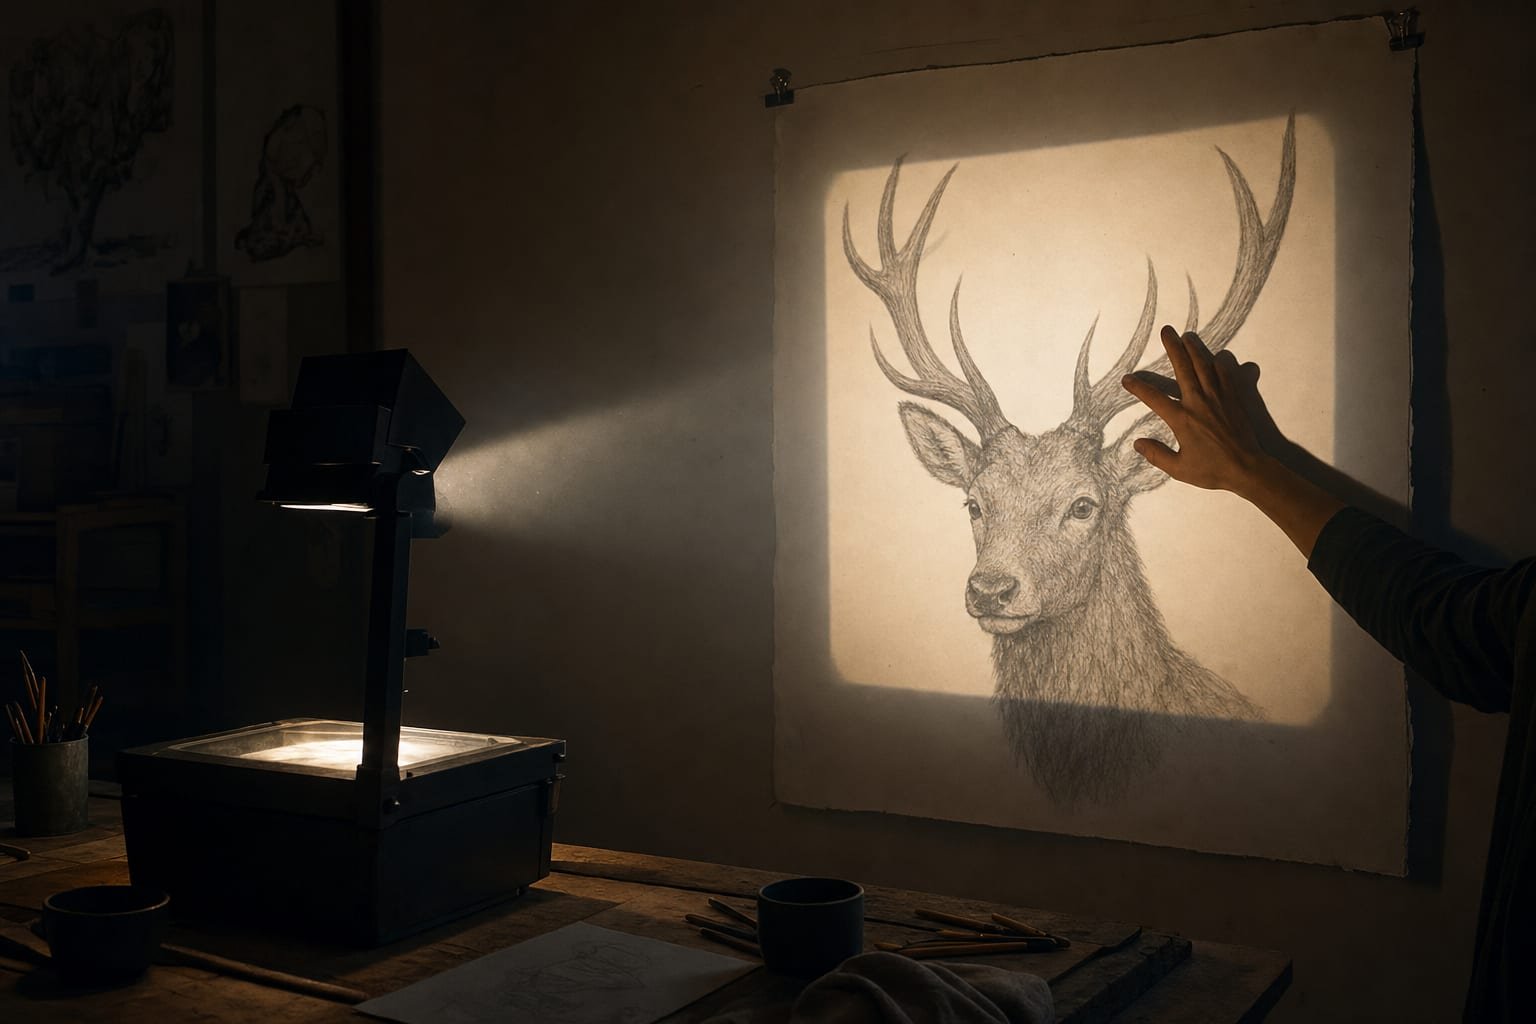
What the projector drawing technique is, and where it came from
The projector drawing technique solves a single, old problem: how to get an image onto a surface much larger than the original, quickly and at the right proportions. Instead of measuring and copying by hand, you let optics do the enlargement — a lamp and a lens throw the image onto the wall or canvas, scaled to whatever size you place the projector at, and you trace the outline you see. It is the only pre-digital transfer method that enlarges and traces in a single step, which is why muralists, sign painters, and scenic artists have leaned on it for generations.
The idea is far older than any electric projector. Its direct ancestor is the camera obscura — literally "dark chamber" — the observation, known since antiquity and described in detail by the eleventh-century scholar Ibn al-Haytham, that light passing through a small hole into a darkened room projects an inverted image of the scene outside onto the opposite wall.1 Add a lens and a mirror and the image brightens and turns right-way-up. Renaissance and later artists used portable camera-obscura boxes to project a scene onto paper for tracing, and the device sits at the centre of long-running debates about how the old masters achieved their optical accuracy.2
The next step toward the modern art projector was the magic lantern, developed in the seventeenth century — a lamp, a lens, and a painted glass slide that projected an enlarged image onto a wall for entertainment and instruction.3 It is the direct optical grandparent of every slide projector and, eventually, the digital projector. When the magic lantern's projection principle was turned toward opaque originals — reflecting light off a solid picture rather than shining it through a transparent slide — the result was the opaque projector, the machine most people picture when they hear "art projector."4
The painter David Hockney made the most provocative modern argument about this lineage in Secret Knowledge: Rediscovering the Lost Techniques of the Old Masters, published in 2001. Working with the optical physicist Charles Falco, Hockney argued that artists from roughly 1420 onward used lenses, mirrors, and projection to achieve the sudden leap in optical accuracy visible in early Netherlandish and later painting.2 The thesis is contested, but the underlying point is not: projection is not a modern shortcut grafted onto a pure tradition. Throwing an image and tracing it has been part of picture-making for centuries. The electric art projector is only the convenient, plug-in version of a very old idea.
With the history in place, the rest of this guide is practical. We will look at the three kinds of projector an artist actually meets, walk through setting one up and tracing with it, deal squarely with keystone distortion, weigh the honest pros and cons, compare projection against the other transfer methods, and end with the modern AR alternative and where a projector still earns its place.
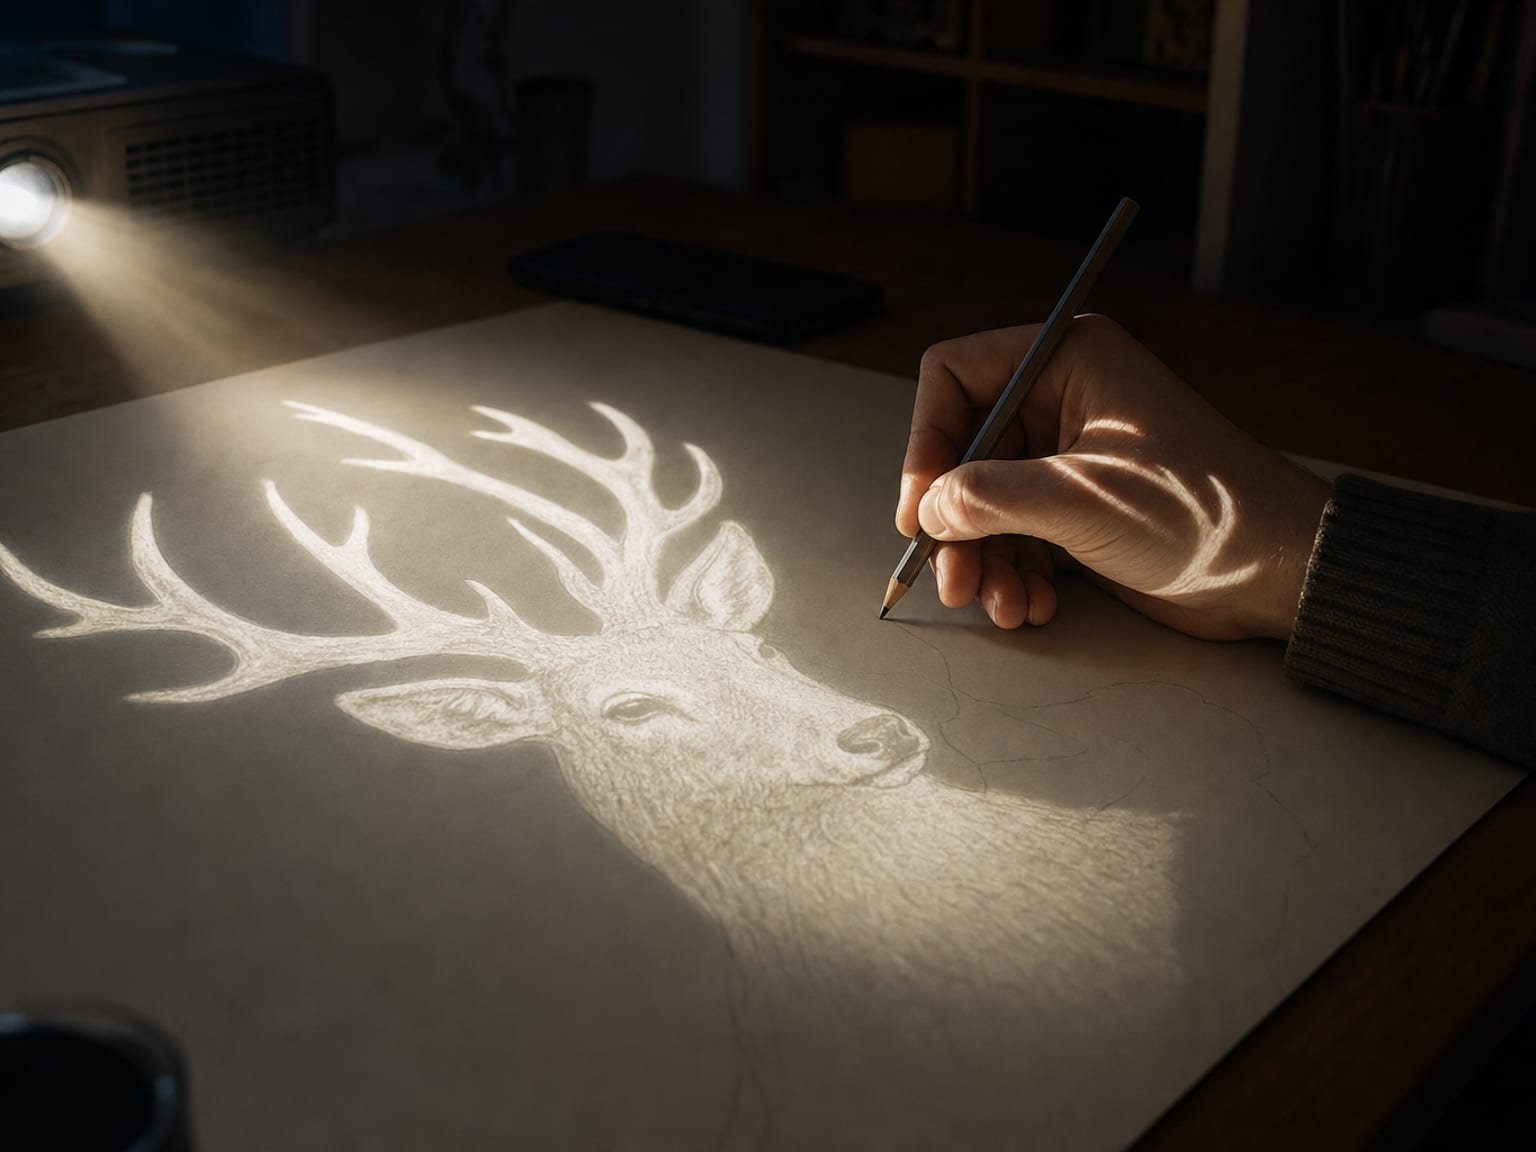
The three kinds of art projector
"Art projector" is a loose label covering three fairly different machines. Choosing between them comes down to what your original is — a physical print or a digital file — and how bright a projected image you need. It helps to know which one people mean.
The opaque projector
An opaque projector shines a bright lamp onto a physical, non-transparent original — a photo, a page from a book, a small sketch — and reflects that image off a mirror and through a lens onto the wall, enlarged. Because it works from solid originals rather than transparent slides, it needs no computer and no printing to file: you slide the picture in and it appears on the wall.4 The trade is brightness. Reflecting light off an opaque surface loses a great deal of it, so opaque projectors give a dimmer image than digital ones and demand a properly darkened room. Most also accept only small originals — a postcard or a photograph, not a full sheet.
The episcope
The episcope is, in strict terms, the classic opaque projector for flat originals, and the word is often used interchangeably with "opaque projector."4 Historically the related epidiascope could project both opaque and transparent material. For a working artist the distinction rarely matters: an episcope is the tabletop box you drop a photo into to throw it, enlarged, onto a wall. It is the cheapest way into projection and the one most often sold to hobbyists and children, which is also why the cheap ones are dim and soft at the edges.
The digital projector
A digital projector takes the image straight from a laptop, phone, tablet, or memory card and projects it — the same machine used for slideshows and home cinema. For artists it is now the most practical choice: it is far brighter than an opaque projector, it takes any file at any size without printing, and you can flip, invert, adjust the contrast, or reduce the image to a line drawing on the device before you throw it.5 The trade is that you need the image on a device and a projector bright enough for your room — lumens matter, and a dim pocket projector will disappoint in anything but a blacked-out space.
Whichever projector you have, prepare the image first. Drop your photo into the free tool, set the crop and check the composition, and reduce the reference to the outline you actually need to trace — projecting a strong, cropped image beats projecting a raw snapshot at scale.
Whichever machine you use, the setup and the tracing are much the same, and so is the flaw that trips up every beginner. That is the next chapter.
How to set up a projector and trace with it
The technique itself is simple, and most of the skill is in the preparation. Sloppy setup is the reason so many projected drawings come out subtly wrong. Work through these steps in order and the trace will be clean.
- Mount the surface flat and square.
Fix your paper, canvas, or the wall flat and truly vertical. A surface that leans even slightly guarantees a distorted trace no matter how carefully the projector is set. Tape paper flat; check a wall is plumb.
- Place the projector level and perpendicular.
Set it on a tripod or a stable table so the lens is centred on the surface and faces it dead-on, not tilted up or down. This one step prevents most keystone distortion — the persistent flaw covered in the next chapter.
- Dim the room and load the image.
Reduce ambient light until the projected image reads clearly. For a digital projector, open the file on your device; for an opaque projector, slide the print in. Flip or invert on a digital projector if you need a mirror image.
- Scale and focus.
Move the projector nearer or further to size the image to fit the surface, then adjust the focus ring until the edges are sharp. Now verify the projected rectangle is genuinely square, not a trapezoid — a quick grid check catches this in seconds.
- Trace the outline, not the values.
Trace the main contours and a few placement landmarks lightly in pencil, chalk, or charcoal. Do not try to trace every shadow. Then turn the projector off and render the values, edges, and colour by observation. The projection is a scaffold, not the drawing.
The step most people rush is the fourth: verifying the projected image is square before committing a single line. The fastest way to check is to project a grid over your reference and confirm the squares land evenly on the surface. If the top row of squares is wider than the bottom, the projector is tilted and needs re-levelling.6
A grid is the fastest keystone detector you have. Open your photo in the free tool, switch on the square grid, and note where the lines fall — then check those same lines land evenly on the wall once projected. Uneven squares mean the projector needs squaring, not your drawing.
Notes from the studio
An illustrative scenario: a sign painter has a four-foot board to letter from a small logo file. She tapes the board flat to the wall, sets a digital projector on a tripod at working height, and levels it with a bubble app until the lens faces the board square-on. She projects a grid first, nudges one tripod leg until the squares read even top to bottom, then swaps in the logo, scales it to the board, and traces only the letter outlines in chalk.
Another illustrative scenario: a hobbyist tries the same job holding a cheap episcope by hand in a half-lit room, tilting it up at the board. The letters come out fatter at the top, the edges are soft, and the trace has to be redrawn. The difference between the two is not the machine — it is the ten minutes spent squaring and darkening before the first line.
Keystone: getting the image square and undistorted
Every honest account of projector tracing comes back to one problem: keystone distortion. It is the single most common reason a projected drawing looks subtly wrong when the projector is switched off, and it is worth understanding properly because the fixes are mechanical, not mysterious.
What keystone is
Keystone distortion is the trapezoidal stretch that appears when a projector's lens is not perpendicular to the surface. Tilt the projector up at a wall and the top of the image lands further away than the bottom, so it spreads wider — the projected rectangle becomes a trapezoid, named for the keystone shape at the top of an arch.6 Trace that, and every proportion inherits the stretch: a face grows long, a circle turns into an egg, lettering leans. The error is invisible while the projector is on and obvious the moment it is off.
Squaring the hardware
The reliable fix is mechanical. Put the projector on a tripod or a stable, adjustable surface. Set its height so the centre of the lens lines up with the centre of the projected area, and make the lens face the surface square-on rather than angled. Level it — a bubble level or a phone's level app is enough — and shim one end with a book if the table is not flat. Then project a grid or a simple rectangle and confirm the shape is true before you trace anything.6 Getting a projector dead-square to a wall is fiddly the first few times and quick once you have a routine.
Why software correction is a last resort
Most digital projectors offer keystone correction in software — the projector digitally squeezes the image to counter the trapezoid. It is genuinely useful for a slideshow, but for tracing it is a compromise: heavy correction throws away pixels and softens the picture, and the correction is a geometric approximation that can leave subtle proportion errors of its own.5 Use it only to clean up a small residual skew after you have squared the hardware as well as you can, never as the primary method.
The other standing complaints
Keystone is the headline flaw, but three more come with it. Cheap lenses go soft toward the edges, so the corners of a large projection blur. Room glare washes the image out unless you darken the space, which is why projection wants a dim or blacked-out room. And the image is only as steady as the projector — bump the tripod and your whole reference shifts. None of these is fatal, but together they explain why projection rewards patience and a controlled space, and why the daylight AR method in the later chapters appeals to artists who have neither.
Pros and cons of the projector method
A projector is a powerful tool for a specific set of jobs and an awkward one for the rest. The honest ledger below is what should drive the decision — not the assumption that faster is always better.
What projection does well
It enlarges and traces in one step, at any scale, which nothing else on this list does as fast. On a mural wall or a large canvas, projecting a composition and tracing the outline can take minutes where gridding by hand would take an hour. It handles any level of enlargement — a postage-stamp reference can become a building-sized image simply by moving the projector back. And with a digital projector you can manipulate the image on the way: flip it, reduce it to a line drawing, boost contrast, or project only the parts you need.
What projection does poorly
It trains your eye very little. Tracing a projected outline is a mechanical act; the observational skill that the grid method and sight-size build is left untouched, so an artist who only ever projects does not get better at seeing.7 It carries the keystone problem and its companions — edge softness, glare, the need for a dark room. It is a real cash outlay for a machine that does one job. And it is immobile in practice: a tripod, a power source, and a controlled space are not something you carry to a client's wall casually.
Whatever you project, check the composition before you commit. A precisely traced but poorly cropped image is a precisely bad drawing. Set the crop with an overlay first, then project the arrangement you actually want.
Projector vs grid vs light table vs AR
Projection is one of four common ways to get a reference onto a surface, and the right choice depends on size, surface, light, budget, and whether you care about training your eye. The table maps them against each other; the notes below say when each wins.
| Method | Best for | Enlarges? | Works in daylight? | Trains your eye? | Cost |
|---|---|---|---|---|---|
| Projector | Large surfaces, fast scale-up | Yes, any ratio | No — needs a dim room | Little | Medium–high |
| Grid method | Accurate enlargement at a desk | Yes, any ratio | Yes | Yes — actively | Free |
| Light table | Most accurate same-size copy | No | Yes | Little | Low–medium |
| AR tracing | Murals, odd surfaces, portability | Yes | Yes | Little | Free tier / low |
Projector vs the grid method
The grid method is the projector's closest rival for enlargement. It is free, works in any light, and is the only method here that actively builds your measurement skill — but it is slower and tedious on very large surfaces. The projector is faster and effortless at scale, but costs money, needs darkness, and teaches you nothing. A fair rule: grid at the desk, project on the wall. The dedicated grid method vs projector vs tracing guide compares the two in detail.
Projector vs the light table
A light table gives the most accurate copy of all because the photo and paper share the same plane and scale — but only at the same size, and only on paper thin enough for light to pass through. The projector is the answer whenever you need to enlarge or to work on canvas, board, or a wall the light table cannot touch. They rarely compete for the same job.
Projector vs AR tracing
AR tracing is the projector's modern rival, and it wins on almost everything except raw brightness: it works in daylight, needs no dark room, no tripod, and no bulky machine, and it sidesteps keystone because you place and scale the reference directly onto the surface through the screen. Where a projector still wins is very large, very bright output — a full mural in an unlit hall, where a phone screen cannot compete with a bright lamp. The next chapter takes the AR alternative on its own terms.
The art projector alternative: AR tracing
Everything a projector does — throw a reference onto a surface so you can trace it — a phone can now do without the dark room, the tripod, or the machine. Augmented-reality tracing points your phone or tablet at your paper, canvas, or wall, overlays your chosen reference photo on the live camera view, locks it in place, and lets you draw the lines you see through the screen onto the real surface beneath. It is the direct descendant of the camera obscura and the camera lucida, delivered by the device already in your pocket.
How it works
The app composites your reference over the live camera feed and holds it steady relative to the surface, so as the phone moves slightly the reference stays pinned where you placed it. Modern mobile AR frameworks — Apple's ARKit and Google's ARCore, both released in 2017 — do the heavy lifting: they track the device's position and the flat plane in front of it, which is what keeps the overlay locked to the surface rather than sliding around the screen.8 You set the reference's size and position once — pinch to scale, drag to position — then draw underneath, glancing at the screen to see where each contour falls.
Why it beats a projector on most jobs
The advantages line up directly against the projector's weaknesses. No dark room: because you look at a bright screen rather than a faint projected image, AR works in ordinary daylight. No keystone: you place and scale the reference onto the surface directly, so there is no angled projection to skew into a trapezoid. No bulky hardware: no projector, no tripod, no power cable — just the phone. Any surface: a curved sign, a guitar body, a tote bag, a wall in a bright room — places a projector setup is impractical or impossible. For a muralist starting a wall, it removes the single most awkward part of the job. The muralists hub goes into that workflow.
The honest limits
AR tracing is not magic, and it is fair to say so plainly. It depends on holding the phone reasonably steady and keeping your viewing angle consistent — the same eye-position discipline the camera lucida always demanded. Tracking can drift on blank, featureless surfaces the AR framework has little to lock onto. The reference is only as sharp as your screen and your light. And, like a projector, it gives you placement, not artistry: the values, edges, and colour decisions are still yours to make afterward. It is one tool among several, best for the portable, daylight, awkward-surface cases, not a universal replacement.
Where Grid Maker Pro fits
The free Grid Maker Pro web tool — 82 composition and drawing overlays, in your browser, free forever, no account — is the open front door to all of this. It does everything a browser can: overlay grids on a photo, check composition, set a crop, prepare a reference for the grid method. What a browser cannot do is lock a reference over your real paper or wall through the camera. That is a separate job, and it is what the Grid Maker Pro AR app is for. The app is an addition, never a paywall on the free tool.
The AR app, plainly
- A separate app — not a paywall on the free tool. The browser tool stays free forever.
- Built by Sujith Puthran, a working artist of more than 15 years, to solve the AR-tracing job at his own easel.
- On Android via Google Play (com.gridmakerpro.app); an iOS version is planned.
- Runs on-device. Your reference photos stay on your phone.
- Free tier: 3 AR traces of your own photo every month, plus all 82 composition grids. Paid: $29.99 / year, $6.99 / month, or $79 once for lifetime.
If you are weighing tracing options against each other, the comparison with Da Vinci Eye lays out the differences honestly. Before dismissing the projector entirely, though, there is a fair question left: when does it still win?
When a projector still wins
It would be dishonest to send everyone to a phone. For a few real jobs the projector remains the better tool, and knowing which they are keeps you from forcing the modern method where the old one is genuinely stronger.
Very large murals in controlled spaces
On a building-sized wall in a hall you can darken, a bright digital projector throws a huge, clear image a phone screen cannot match at that scale. When the whole team needs to see the projected composition at once, or the wall is far larger than one artist can reach in a session, projection's brightness and reach still lead.
Bright, high-lumen output
A projector's lamp is simply brighter than a phone display. In situations where you need the reference readable across a large area from several feet back — a scenic backdrop, a stage flat — the raw light output of a projector is an advantage AR cannot replicate.
Working from physical originals with no device
An opaque projector or episcope throws a physical print with no computer, phone, or file in the loop. If your reference exists only on paper and you would rather not scan it, the opaque projector remains the direct route.
A shared, fixed studio setup
A studio with a permanently mounted, squared projector and a controlled light environment turns projection into a fast, repeatable step. Once the fiddly setup is done once and left in place, the per-job cost drops and the projector earns its keep. The honest summary is a division of labour: projector for the big, bright, controlled jobs; AR and the grid for everything portable, daylit, and small-to-medium.
Even in a projector studio, the composition work happens before the machine. Set the crop and check the arrangement in the free tool, then project the version you actually want on the wall.
Open the free grid tool → · or the AR app for portable walls →
Cost comparison and getting started
Cost is often the deciding factor, and it is where the projector method looks least attractive for an occasional user. The figures below are broad ranges — projector prices vary widely by brightness and quality, so treat them as orientation, not quotes.
| Route | Typical starting cost | Ongoing | Notes |
|---|---|---|---|
| Cheap episcope / opaque projector | ~$30–$80 | Bulbs | Dim, small originals, dark room needed |
| Usable digital projector | ~$100–$400+ | Lamp / power | Bright enough to trace by in a partly-lit room |
| Grid method | $0 | None | Ruler, pencil, and the free web tool |
| AR app (free tier) | $0 | None | 3 own-photo traces a month, plus 82 grids |
| AR app (paid) | $79 lifetime, or $29.99 / yr, or $6.99 / mo | Subscription or none | Unlimited AR tracing, advanced AR modes, recording, PDF printing and 600 DPI export |
The pattern is clear. A projector is a dedicated purchase that does one job and needs a controlled space; for an artist who transfers occasionally, that is a lot of money and gear sitting idle between jobs. The grid method with the free tool costs nothing and covers most desk work. The AR app's free tier lets you feel the method on your own reference before spending anything, and a one-time $79 costs less than most usable digital projectors while fitting in your pocket and working in daylight.
Getting started, whichever route you pick
Start with the free browser tool regardless: drop a reference in, set the crop, check the composition, and reduce it to the outline you need to transfer. If you are gridding at a desk, rule the matching grid and copy from the screen. If you have a projector, square it carefully and verify with a projected grid before tracing. If the surface is a wall, a large canvas, or something awkward and you would rather skip the dark room and the tripod, try the AR app's free own-photo traces and see whether the modern alternative suits your hand. The point is not which machine you own; it is getting a strong image onto the surface with the least fuss for the job in front of you.
The first step is the same for every route: prepare the reference. Open the free tool, crop for a strong composition, and switch on a grid so you know exactly what you are transferring.
Where projection has been used
Projection and its optical ancestors are woven through the history of picture-making. These are documented or strongly argued cases where throwing and tracing an image belonged to serious practice.
The camera obscura, from antiquity onward
The projecting-image principle behind every art projector was understood in antiquity and analysed rigorously by Ibn al-Haytham in the eleventh century; portable camera-obscura boxes later let artists project and trace a scene directly.1 The device sits at the root of the whole projection lineage.
Johannes Vermeer (1632–1675)
The case for Vermeer's use of a camera obscura — a projecting optical device — is one of the most thoroughly examined in art history, supported by the optical character of his highlights and perspective.2 It is the textbook example of an undisputed master whose reputation survives the strong likelihood that he traced from a projected image.
The magic-lantern tradition (17th c. onward)
The magic lantern established projection as a mainstream technology for throwing enlarged images onto walls, first for spectacle and instruction and eventually for the slide and digital projectors artists use today.3 Every art projector is its descendant.
Muralists and scenic painters (20th c.)
Large-scale muralists and theatrical scenic painters have long scaled cartoons onto walls and backdrops by projection and grid transfer, because no faster method gets a complex composition onto a building-sized surface accurately.6 The projected outline, squared and traced, is a standing part of that trade.
Common mistakes with the projector method
Ignoring keystone distortion
A projector not dead-square to the surface throws a trapezoid, and every proportion you trace inherits the stretch. The error is invisible with the projector on and obvious the moment it is off.
Relying on software keystone correction
Heavy digital correction squeezes the image, throws away pixels, and softens the picture — and it can leave subtle proportion errors of its own. It is a slideshow feature, not a tracing solution.
Projecting a bad composition accurately
Accuracy is not a good picture. A precisely traced but poorly cropped or unbalanced photo is a precisely bad drawing. Projection locks in whatever you feed it, flaws included.
Tracing every value instead of the outline
Trying to trace all the shading off a projection produces a flat, lifeless copy and skips the part where the drawing actually comes alive.
Never drawing without the projector
Projecting every single piece means your observational eye never develops, and the machine becomes a ceiling rather than a tool.
The camera obscura and the lens are as much a part of the history of picture-making as the brush and the pencil. To pretend otherwise is to misread how images were actually made.— paraphrasing the argument of David Hockney, Secret Knowledge, 20012
Frequently asked questions
What is the projector drawing technique?
It is a transfer method in which an art projector throws an enlarged image of a photo or drawing onto a surface — paper, canvas, or a wall — so the artist can trace its outline directly at any size. An opaque projector reflects light off a physical print; a digital projector takes the file from a laptop or phone. It is the traditional way to scale a small reference up onto a large surface fast, and muralists and sign painters have relied on it for generations.
How do you stop an art projector from distorting the image?
The distortion is called keystone, and it happens when the lens is not perpendicular to the surface, so the projected rectangle skews into a trapezoid. The fix is mechanical: set the projector level on a tripod, centre it on the surface, and make the lens face the surface square-on rather than tilting it. Verify with a projected grid — if the squares are even, the image is square. Software keystone correction helps a little but softens the picture, so squaring the hardware is always better.
What is the difference between an opaque projector and a digital projector for art?
An opaque projector — sometimes called an episcope or art projector — shines a bright light onto a physical photo or printout and reflects its enlarged image onto the wall. A digital projector takes the image directly from a laptop, phone, or memory card. Opaque projectors need no computer and work from any print but are dim and limited to small originals; digital projectors are brighter and take any file but require the image on a device.
Is an art projector better than the grid method?
Neither is better outright; they suit different jobs. A projector is faster for enlarging onto large surfaces and does the scaling for you, but it costs money, needs a dark room, introduces keystone distortion, and trains your eye little. The grid method is free, works in any light, and actively builds your measurement skill, but it is slower on very large surfaces. Many artists grid at the desk and reserve a projector or an AR app for walls.
What is an episcope?
An episcope is the classic opaque projector for flat, non-transparent originals — the tabletop box you drop a photo or a page into to throw it, enlarged, onto a wall. The related epidiascope could project both opaque and transparent material. For most artists "episcope" and "opaque projector" mean the same thing.
Do I need a dark room to use an art projector?
For most projectors, yes — ambient light washes out the projected image, especially with dimmer opaque projectors. A bright digital projector can cope with a partly-lit room. If you want to trace in ordinary daylight without darkening anything, the AR method is designed for exactly that, since you look at a bright screen rather than a faint projection.
What can I use instead of an art projector?
The two strongest alternatives are the grid method, which needs only a ruler, pencil, and the free web tool, and AR tracing, which locks a reference over your real surface through a phone camera with no dark room, tripod, or bulky machine. A light table is a further option for same-size copies onto thin paper. The AR method is the closest modern replacement for the projector's enlarge-and-trace-on-any-surface job.
How does AR tracing avoid keystone distortion?
It mostly sidesteps it. Because you place and scale the reference directly onto the surface through the screen rather than projecting at an angle, there is no fixed trapezoid to correct. You do still need to hold the phone at a consistent viewing angle, the same discipline the camera lucida demanded.
When is a projector still the better choice?
Very large murals in a room you can darken, situations that need bright, high-lumen output readable from several feet back, working from a physical print with no device, and a permanently squared studio setup. In those cases a projector's brightness and reach still lead. For portable, daylight, or awkward-surface work, AR and the grid usually win.
How much does an art projector cost?
Cheap episcopes run roughly $30–$80 but are dim and take only small originals. A digital projector bright enough to trace by in a partly-lit room typically runs $100–$400 or more depending on brightness and quality. By comparison, the grid method costs nothing and the AR app is free to try, $79 once for lifetime, or $29.99 a year. Re-check current projector prices before buying — they vary widely.
Is the Grid Maker Pro AR app free?
It has a free tier of three AR traces of your own photo every month, plus all 82 composition grids. Paid plans are $29.99 a year, $6.99 a month, or $79 once for lifetime. The separate Grid Maker Pro web tool — the 82 overlays in your browser — is free forever, with no account. The app is a different product for the job a browser cannot do, not a paywall on the free tool.
Does tracing from a projector count as cheating?
No. Projection and its optical ancestors have been part of serious art for centuries — the camera obscura case for Vermeer is a textbook example. Tracing fixes placement; the values, edges, and colour that carry a picture are still yours to do by hand. The guide to tracing a photo covers this question in full.
Does the reference image leave my device when I use the tools?
No. The free web tool renders overlays on your device with no upload, and the AR app processes your photo on-device. Your reference image stays with you in both cases.
References
- "Camera obscura." Wikipedia. On the projecting-image principle known since antiquity and analysed by Ibn al-Haytham (Alhazen) in the eleventh-century Book of Optics, and on portable camera-obscura boxes used by artists for tracing. en.wikipedia.org/wiki/Camera_obscura.
- Hockney, David. Secret Knowledge: Rediscovering the Lost Techniques of the Old Masters. Thames & Hudson (2001; expanded ed. 2006). ISBN 978-0-500-23785-5. The optical thesis on lenses, mirrors, the camera obscura, and the camera lucida in old-master practice, developed with optical physicist Charles Falco, including the discussion of Vermeer.
- "Magic lantern." Wikipedia. On the seventeenth-century projection device — lamp, lens, and painted glass slide — that established projection for enlarged images and is the optical ancestor of the slide and digital projector. en.wikipedia.org/wiki/Magic_lantern.
- "Opaque projector." Wikipedia. On the opaque projector and episcope — devices that project enlarged images of opaque originals by reflected light — and their use in art and instruction. en.wikipedia.org/wiki/Opaque_projector.
- On digital projectors and keystone correction: manufacturer and technical documentation for video projectors describe optical vs. digital keystone correction and the image-quality cost of heavy digital correction; a general treatment is "Keystone effect," Wikipedia. en.wikipedia.org/wiki/Keystone_effect.
- "Keystone effect." Wikipedia. On the trapezoidal distortion produced when a projector's lens is not perpendicular to the surface, and the geometric principle behind squaring the projection. Standard mural- and scenic-studio practice squares the projected cartoon before tracing to avoid this distortion.
- Loomis, Andrew. Drawing the Head and Hands. Viking Press (1956); Titan Books reprint (2011). ISBN 978-1-84856-680-6. On construction, proportion, and measurement as the observational literacy that mechanical tracing does not build on its own.
- Apple ARKit (2017) and Google ARCore (2017): the mobile augmented-reality frameworks providing device motion tracking and flat-plane detection that keep a virtual overlay pinned to a real surface. Apple, "ARKit," developer documentation, developer.apple.com/augmented-reality/arkit; Google, "ARCore," developer documentation, developers.google.com/ar.
Update log
- — Published. Full guide to the projector drawing technique: the three kinds of art projector, setup and tracing, keystone distortion, pros and cons, the four-method comparison, the modern AR alternative, and when a projector still wins.
On this page
1. What it is & its history 2. Three kinds of projector 3. Setup & tracing 4. Keystone distortion 5. Pros and cons 6. Projector vs grid vs light vs AR 7. The AR alternative 8. When a projector still wins 9. Cost & getting started Where it's been used Common mistakes FAQ Related guides References AuthorFrom the screen to the page
Everything here is free in your browser and stays that way. When a reference has to leave the screen and land on real paper, canvas, or a wall, a browser has no camera to register it to the surface. The Grid Maker Pro AR app adds exactly that — hold your phone over the paper and trace your own photo directly, with the same 82 composition overlays alongside.
Meet the AR tracing app → Free web tool, free forever · AR tracing is the separate paid appEnlarge and trace, without the dark room
Prepare your reference in the free browser tool — crop, check composition, and grid it for the grid method. When the surface is a wall or a large canvas and you would rather skip the projector and the tripod, the AR app locks a reference over any real surface in daylight. Your image stays on your device, either way.
Open the free grid tool →One brief every other Tuesday.
One overlay, one historical reference, one workflow note. Studio notes from working artists, photographers, and designers. No spam, unsubscribe in two clicks.