
Lightbox vs projector vs AR
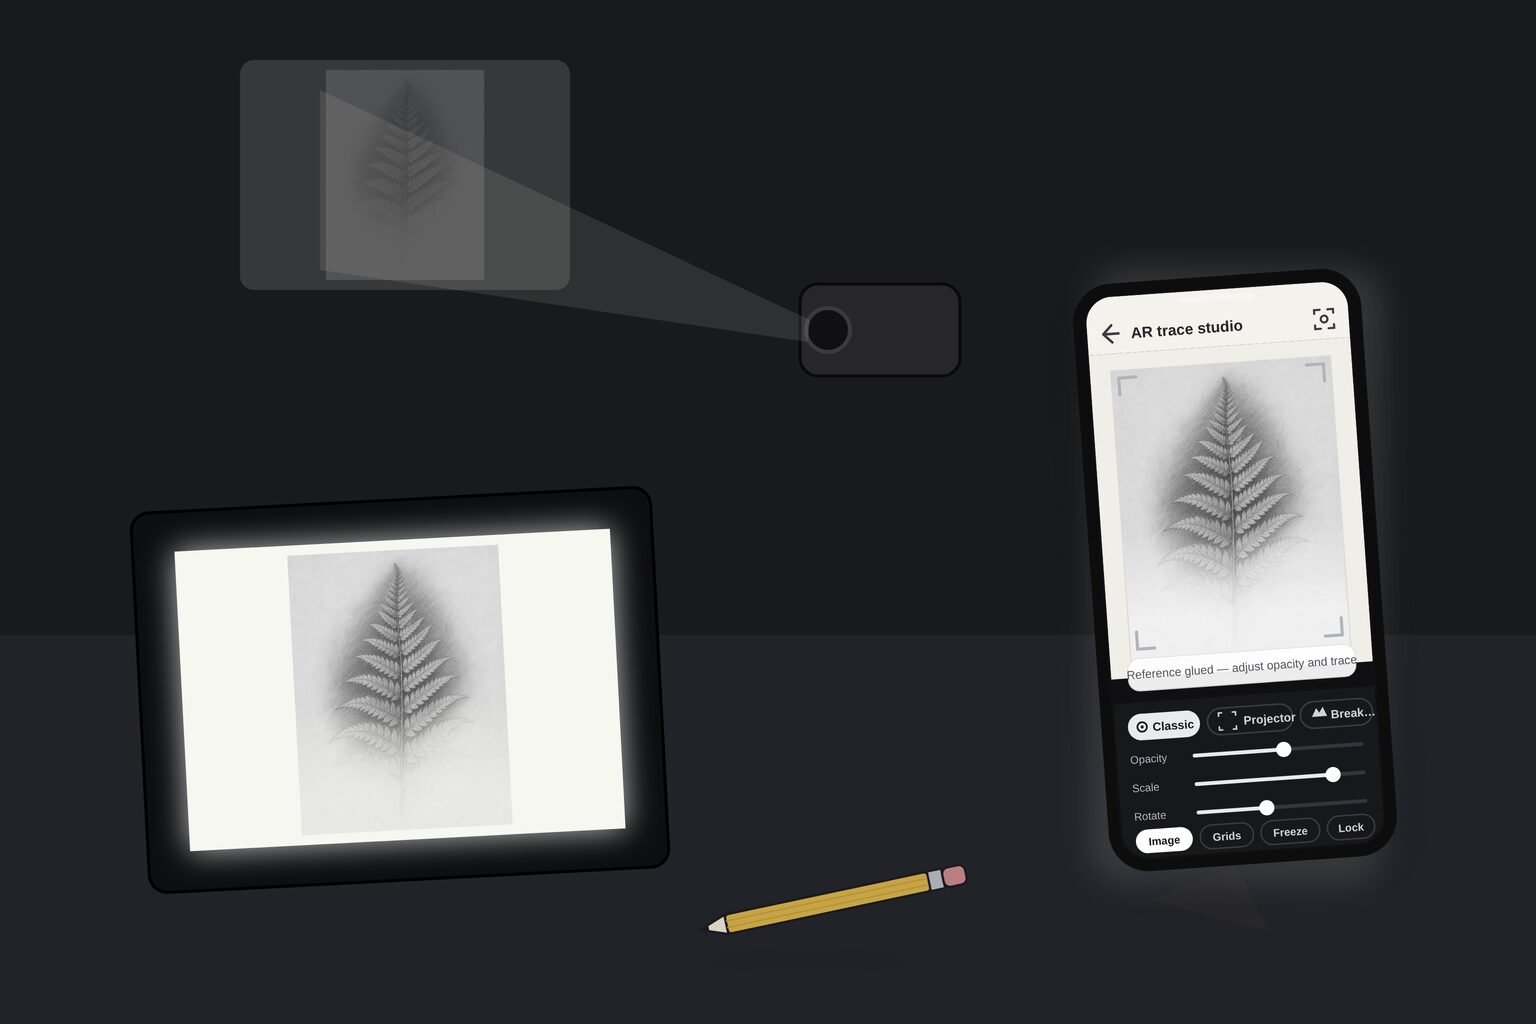
Three tools put a reference image where you can trace it, and each one works by moving light differently. A lightbox glows from behind so lines show through thin paper — the most accurate copy there is, at one size. An art projector throws the image onto any surface at any scale, but wants a dark room and a square wall. Phone-camera AR tracing pins the reference over your real paper, canvas, or wall through the screen, in daylight, on any surface. This guide compares all three honestly — surface, size, lighting, cost, portability — and shows you how to trace when you own none of them.
One of the guides behind the 82 composition overlays every visual artist should know and use.
- Tools compared
- Lightbox, projector, AR
- Most accurate
- Lightbox (thin paper, one-to-one)
- Best for big walls
- Projector or AR
- Works in daylight
- Lightbox and AR
- Most portable
- AR (a phone)
- Cheapest to start
- Free (window + grid)
In short
- All three tools do the same job — put a reference where you can trace it — but by moving light in different ways, which is why each wins in a different situation.
- A lightbox (light table) is the most accurate tool for small work on thin paper: the photo and paper share the same plane and scale, so there is nothing to misjudge. It cannot enlarge and cannot see through canvas.
- A projector is the tool for very large or opaque surfaces — it enlarges to any size and works on walls — but it needs a dimmed room, careful squaring to avoid keystone distortion, and real equipment cost.
- AR tracing pins a reference over your real surface through a phone camera. It works in daylight, on any surface, at any size, and it is the most portable — the best fit when a lightbox is too small and a projector is too much setup.
- You can trace without any of them: a sunlit window replaces a lightbox for free, and the grid method with the free Grid Maker Pro tool enlarges onto any surface with nothing but a ruler.
Why there are three tools, not one
Every tracing tool answers one question: how do I get this reference visible on this surface so I can copy it by hand? The reason there is no single winner is that surfaces and sizes vary enormously — a postcard-sized ink drawing on thin bristol and a twelve-foot mural on a brick wall are the same problem in name only. Each of the three tools in this guide solves that problem by controlling light in a distinct way, and each control has a matching limit.
The idea of overlaying a reference onto a working surface is not new. Leon Battista Alberti described a gridded veil for transferring proportion in his On Painting of 1435, framing the working surface as "an open window through which I see what I want to paint."1 That framing — the reference and the surface sharing one visual field — is exactly what a lightbox does with backlight, what a projector does with thrown light, and what AR does with a screen. The tools are new; the instinct is six centuries old.
Here is the short version of how each moves light, before we take them one at a time:
- The lightbox puts light behind the paper. The reference and your sheet sit on the same glowing plane, so the lines show straight through.
- The projector throws light forward onto the surface, casting an enlarged image you trace from the front.
- AR composites the reference onto a live camera view, so the light is on a screen between your eye and the surface rather than on the surface itself.
Before we compare them, one honest note about scope. This is the light-based, overlay-tracing family. If you are choosing between the hand methods — the grid method, freehand construction, and tracing in general — the companion pillar on the grid method vs a projector vs tracing is the better starting point, and the broad survey of every transfer method lives in how to trace a photo onto paper. This guide keeps the lightbox at the centre and compares its two closest rivals.
The lightbox, or light table
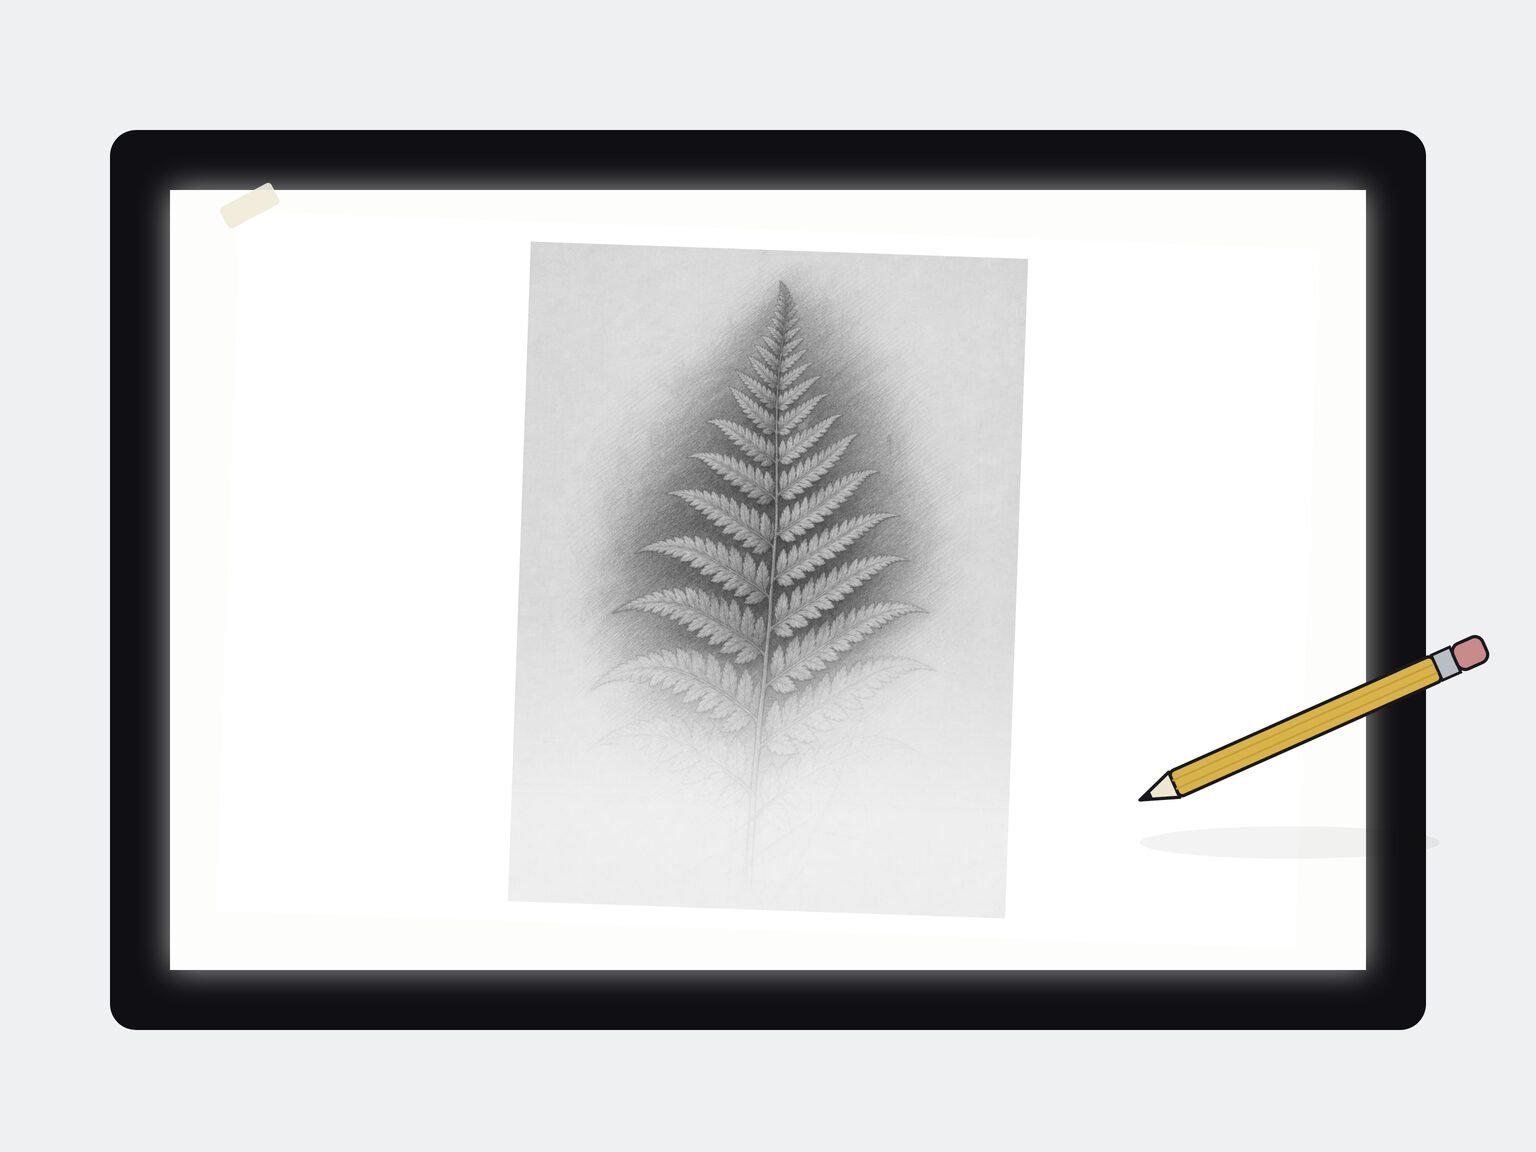
A lightbox — the larger flat version is called a light table — is a panel that emits an even, diffuse glow across its whole surface. You tape a printed photo or a previous drawing to the glass, tape your working paper over it, and the backlight makes the lines underneath visible straight through the top sheet so you can trace them directly.2 Modern panels are slim LED units; older studio tables used fluorescent tubes under frosted glass.
Why it is the most accurate tool
The lightbox's accuracy comes from geometry, not skill. The reference and your paper share the same flat plane and the same scale, so there is no angle to misjudge, no lens to soften the edges, and no enlargement ratio to compute. What you trace is exactly what sits beneath — a true one-to-one copy. This is why animation, comics, and illustration studios relied on light tables for decades: an animator could lay a fresh sheet over the previous frame and trace the parts that stay still, frame after frame, with perfect registration.3
The two hard limits
The lightbox has exactly two walls, and they are absolute. First, it cannot enlarge — the trace is always the same size as the print underneath, so to scale up you must first print larger, which a home printer cannot do past A4 without tiling pages together. Second, it cannot see through opaque surfaces: a stretched canvas, a wood panel, heavy watercolour paper, or a wall will not pass light, so the lightbox is useless for them. It is a specialist. Within its niche — small work on thin paper — nothing beats it. Outside it, you need one of the next two tools.
Even when you plan to trace on a lightbox, set the crop and check the composition on screen first. A perfectly traced but badly cropped image is still a badly cropped image — fix the arrangement before you commit ink.
The lightbox, then, is accuracy in a small box. Its opposite number — a tool that gives up some accuracy to work at any size on any surface — is the projector.
The art projector
Where the lightbox lights the paper from behind, a projector throws light forward onto the surface, casting an enlarged image you trace from the front. It is the only pre-digital tool that enlarges and traces in one step, which is why muralists, scenic painters, and sign writers have relied on it for generations.4
Two kinds
An opaque projector — the "art projector" or episcope — shines a bright lamp onto a physical photo or printout and reflects its enlarged image onto the wall.5 A digital projector takes the file straight from a laptop or phone and throws it at the surface. Either way you dim the room, position the projector, scale the image to fit, and trace the projected outline in pencil or chalk. Because it enlarges, one small reference becomes a whole wall.
The standing problems
The projector's headline flaw is keystone distortion: unless the lens is dead-perpendicular to the surface and centred, the projected rectangle skews into a trapezoid, and everything you trace is subtly stretched. Getting a projector square to a wall takes a tripod, patience, and often a book wedged under one end. Digital units offer software keystone correction, but heavy correction softens the image. The other standing complaints are practical: you generally need a dimmed room because ambient light washes out the projection; edges go soft; and a bright enough digital projector is a real purchase — commonly a hundred to several hundred dollars for one you can trace by in a partly-lit room.4
Where it still wins
None of that changes the fact that for a genuinely large flat wall, a projector is hard to beat. It throws a bright, hands-free image you can step back from and trace at a distance, it does not depend on holding anything steady, and once it is squared it stays put for hours. If you have a dedicated studio wall and a dark space, the projector remains a serious tool. The trouble is that most artists have neither — which is the gap AR was built to close.
If you do project, square the image first. Open the photo in the free tool, switch on a grid, and note where the lines fall — then check those same lines land evenly on the wall. A grid is the fastest keystone detector you have.
AR tracing — the reference on the glass
Augmented-reality tracing is the newest member of the family and, in a sense, the oldest idea returned in modern form. You point a phone or tablet at your paper, canvas, or wall; the app shows the live camera view with your chosen reference photo overlaid on top, locked in place; and you draw the lines you see through the screen onto the surface beneath. No projector, no dark room, no backlight, no equipment beyond the phone already in your pocket.
The concept is centuries old. The camera lucida, patented by William Hyde Wollaston in 1806, used a small prism to make the subject appear superimposed on the drawing paper so the artist could trace a virtual image by hand.6 AR does exactly this with software: a phone screen stands in for the prism and a locked digital photo stands in for the subject. What made it practical on ordinary phones was the arrival of mobile AR frameworks — Apple's ARKit and Google's ARCore, both released in 2017 — which let an app anchor a virtual image to the real world through the camera.7
How it works
The app composites your reference over the live camera feed and holds it steady relative to the surface, so small movements of the phone do not shift the reference off the spot you placed it. You set its size and position once — pinch to scale, drag to position — then draw underneath, glancing at the screen to see where each contour falls. Because you place and scale the image directly onto the surface, there is no enlargement ratio to calculate and no trapezoid to correct.
What it fixes about the other two
AR neatly answers the limits of both rivals. Against the lightbox, it enlarges freely and works on opaque surfaces — canvas, board, a wall, a guitar body — because it never needs light to pass through the material. Against the projector, it needs no dark room (it works in daylight), it is portable (a phone), and it mostly sidesteps keystone because you place the image on the surface directly rather than throwing it at an angle.
The honest limits
AR is not magic, and it is fair to say so plainly. It depends on holding the phone reasonably steady and keeping a consistent viewing angle — the same eye-position discipline the camera lucida demanded. Tracking can drift on blank, featureless surfaces where the software has few features to lock onto. The reference is only as sharp as your screen and your light. And like every tool here, it gives you placement, not artistry — the values, edges, and colour decisions remain yours. It is best for the large-and-awkward cases, not a replacement for a lightbox on thin paper at your desk.
Where Grid Maker Pro fits
The free Grid Maker Pro web tool — 82 composition and drawing overlays, in your browser, free forever, no account — is the open front door to all of this. It does everything a browser can: overlay grids on a photo, check composition, set a crop, work the grid method. What a browser physically cannot do is lock a reference over your real paper or wall through the camera. That is a separate job, and it is what the Grid Maker Pro AR app is for — an addition, never a paywall on the free tool.
The AR app, plainly
- A separate app — not a paywall on the free tool. The browser tool with all 82 overlays stays free forever.
- Built by Sujith Puthran, a working artist of more than 15 years, to solve the AR-tracing job at his own easel.
- On Android via Google Play (com.gridmakerpro.app); an iOS version is planned.
- Runs on-device. Your reference photos stay on your phone.
- Free tier: 3 AR traces of your own photo every month. Paid: $29.99 / year, $6.99 / month, or $79 once for lifetime.
The master comparison
The three tools line up cleanly once you put their trade-offs side by side. The table below compares them on the factors that actually decide a purchase: what surfaces they handle, how big they go, whether they need a dark room, cost, portability, and whether they can use your own photo without restriction.
| Factor | Lightbox / light table | Art projector | AR tracing |
|---|---|---|---|
| Surfaces it works on | Thin paper only (light must pass through) | Any surface, including opaque walls and canvas | Any surface, including opaque and curved |
| Maximum size | Limited to the panel and print size | Very large — whole walls and murals | Any size — you scale to the surface |
| Enlarges the reference? | No — always one-to-one | Yes — any ratio | Yes — pinch to scale |
| Room lighting needed | Works in normal daylight | Needs a dimmed or dark room | Works in normal daylight |
| Keystone / distortion | None — same plane, same scale | Yes, unless squared carefully | Minimal — placed directly on the surface |
| Accuracy of copy | Highest (true one-to-one) | Good once squared; edge softness | Good; depends on steady angle |
| Portability | Portable but a dedicated object | Bulky; tripod and cabling | Highest — a phone in your pocket |
| Cost to start | Low to medium (or free via a window) | Medium to high | Free tier; low paid tiers |
| Use your own photo? | Yes — you print it | Yes — your file or printout | Yes (free tier: 3 own-photo traces / month) |
| Best single use | Small line art, comics, animation registration | Large flat walls in a dark studio | Murals, odd surfaces, no dark room, on the go |
Whichever tool you pick, the composition decision comes first. Overlay a thirds or golden grid on your reference and set the crop before you trace a single line — the tool is free and nothing is uploaded.
Choosing by situation
The comparison table shows the trade-offs; this chapter turns them into a decision. Ask three questions in order — surface, size, and setting — and the right tool usually names itself.
When a lightbox wins
Reach for a lightbox when the work is small, on thin paper, and needs a faithful one-to-one copy. Inking a pencil drawing onto clean bristol, registering successive animation frames, transferring a comic layout, copying a line drawing without smudging the original — these are the lightbox's home. It is the most accurate tool there is when its two conditions are met, and for desk-scale line work nothing else is as clean or as fast. If you mostly draw at A4 or smaller on paper you can see through, buy the lightbox first.
When a projector wins
Reach for a projector when the surface is very large and flat, the room can be darkened, and you want a bright hands-free image. A studio muralist with a dedicated wall and blackout blinds will get a big, stable projection to trace at a distance without holding anything. If you routinely scale small studies up onto four-foot canvases in a controlled space, and you have somewhere to store the equipment, the projector earns its footprint. It is genuinely the best tool for that specific combination — large, flat, dark, stationary.
When AR wins
Reach for AR when you hit any surface, any size, no dark room, or no room for equipment. Murals on a bright exterior wall, a curved sign, a canvas larger than any lightbox, a quick reference roughed onto a sketchbook page in a café — these are exactly the cases the other two handle badly. It is also the answer when you simply do not want to own and store a projector to trace occasionally. For most artists who work in varied places and sizes, AR covers the widest range of jobs with the least kit — a phone you already carry.
One caveat that applies to all three: none of these tools builds your observational eye. If your goal is to draw better, not just to finish this piece faster, keep a freehand and square grid habit running alongside whatever tracing tool you use. The wider guide on tracing covers how to trace so you still improve.
How to trace without a lightbox
You do not need to own a light table to trace. This is the search that brings many artists here, and the honest answer is that three of the most useful methods cost nothing or almost nothing. Work down this list in order — the first that fits your surface and size is the one to use.
- Try a sunlit window first.
For thin paper at one-to-one size, a window in daylight is a free lightbox. Tape the printed photo to the glass, tape your drawing paper over it, and trace the lines the backlight reveals. It shares the lightbox's limits exactly — it cannot enlarge and will not work on canvas or any opaque surface — but for small line work it is genuinely all you need. Bright afternoon light works best; a north-facing window on a dull day may be too dim.2
- Use phone-camera AR for opaque or large surfaces.
When the surface is canvas, board, or a wall — anything a window cannot help with — an AR tracing app locks the reference over the real surface through the camera, and you draw the lines you see. This is the no-lightbox method that also enlarges, works in daylight, and needs no equipment beyond your phone. Place and scale the reference once, then draw underneath.
- Use graphite transfer paper for a same-size opaque copy.
For an exact same-size outline on an opaque surface, graphite transfer paper is the direct route. Print the photo at final size, lay the transfer paper coated-side down on the surface, place the print on top, and trace the contours firmly with a stylus so the graphite offsets onto the surface below. The line erases and does not bleed through paint, which is why it is the studio standard for scaffolding a painting.8 You can make your own by scribbling soft graphite over the back of the printout.
- Use the grid method when you need to enlarge accurately.
When accuracy and enlargement both matter, the grid method beats every backlit method because it scales to any ratio with nothing but a ruler. Overlay a square grid on the photo with the free Grid Maker Pro tool, rule a matching but larger grid on your surface, and copy the image one cell at a time. Nothing needs to be backlit, and the method actively trains your measurement while you work.1
For the grid-method route, the free tool gives you the overlay in seconds — drop a photo in, switch on the square grid, and tighten the cell count until each cell holds one clear feature. Nothing is uploaded; the rendering happens on your device.
Between them, these four cover every surface and size a lightbox cannot, and the first two cost nothing at all. If you were about to buy a light table only to discover it cannot handle your canvas, one of these is almost certainly the tool you actually needed.
What each one costs
Cost is often the deciding factor for occasional tracers, so it is worth being concrete and balanced about it. Prices drift, so treat these as ballpark bands rather than quotes — but the relative order is stable.
| Tool | Entry cost | What you are paying for |
|---|---|---|
| A window | Free | Nothing — daylight and tape. The zero-cost lightbox for thin paper. |
| Grid method + free web tool | Free | Nothing — a ruler, a pencil, and the browser overlay. Enlarges to any surface. |
| LED lightbox / light table | Low to medium | A slim panel; larger tables cost more. A dedicated object for one job. |
| Opaque projector | Low to medium | Cheaper than digital but dim, limited to small originals, and bulky. |
| Digital projector | Medium to high | Brightness and resolution; a bright unit for a lit room is the expensive part. |
| AR app | Free tier, then low | Software, not hardware. Free: 3 own-photo traces / month. Paid: $29.99/yr, $6.99/mo, or $79 lifetime. |
The honest read: if you only trace occasionally and mostly at small sizes on thin paper, a window or a modest lightbox is the sensible spend, and you may never need anything more. If you need scale but not a permanent dark-room setup, AR's software cost undercuts a bright projector by a wide margin while doing more surfaces. A projector still makes sense as a considered purchase for a working muralist with a dedicated space — this is not a case where one tool beats the others on price everywhere.
Common mistakes with each tool
Buying a lightbox for canvas work
The most common mismatch: an artist buys a light table, then tries to use it on stretched canvas or a wood panel and finds nothing shows through. Light does not pass through opaque surfaces, and no lightbox will change that.
Ignoring keystone with a projector
A projector that is not dead-square to the wall throws a trapezoid, and every proportion you trace inherits the stretch. The error is invisible until you remove the projector and the drawing looks subtly wrong.
Tracing AR on a blank surface
AR tracking needs visual features to lock onto. A perfectly clean, featureless white wall or panel can make the reference drift as you move the phone, because the software has nothing to anchor to.
Tracing a bad composition accurately
Every tool here copies faithfully, flaws included. A precisely traced but poorly cropped or unbalanced photo is a precisely bad drawing. Accuracy is not the same as a good picture.
Never drawing without the aid
Whichever tool you settle on, tracing every piece means your observational eye never develops and you stay dependent. The tool stops being a convenience and becomes a ceiling.
I inscribe a quadrangle of right angles, as large as I wish, which is considered to be an open window through which I see what I want to paint.— Leon Battista Alberti, On Painting, 14351
Frequently asked questions
What is the difference between a lightbox and a projector for tracing?
A lightbox glows evenly from behind, so you tape a printed photo and thin paper on top and trace the lines the backlight shows through. It only works at one-to-one size and only on paper thin enough for light to pass through. A projector throws an enlarged image of the reference onto any surface, including opaque canvas and walls, and scales to any size — but it needs a dimmed room and careful squaring to avoid keystone distortion. The lightbox is the most accurate tool for small thin-paper copies; the projector is the tool for large opaque surfaces.
How do I trace an image without a lightbox?
The simplest free substitute is a sunlit window — tape the photo and thin paper to the glass and trace what the light reveals. For opaque surfaces like canvas or board, use graphite transfer paper for a same-size copy, or a phone-camera AR app that locks the reference over the surface so you draw the lines you see. To enlarge accurately, use the grid method: overlay a square grid on the photo with the free tool, rule a larger matching grid on your surface, and copy cell by cell. None of these need a light table.
Is AR tracing better than a projector?
It depends on the job. AR works in daylight, needs no dark room, is portable, and mostly avoids keystone distortion because you place the reference directly on the surface through the screen — stronger for murals, awkward surfaces, and anyone without room for a projector. A projector still wins for very large flat walls where you want a bright, hands-free image thrown up while you work at a distance, and it does not depend on holding a phone steady. They solve overlapping problems from different directions.
Do I need a dark room to trace with a projector?
Usually yes, at least a dimmed one. A projector competes with ambient light, so unless it is very bright the projected image washes out in a lit room and the lines become hard to trace. This is one of the main practical reasons artists move to AR tracing or a lightbox, both of which work in normal daylight.
Can a lightbox enlarge an image?
No. A lightbox is always one-to-one with the print underneath — the reference and your paper share the same plane and scale. To enlarge you must first print larger, which a home printer cannot do past A4 without tiling. If you need to scale up, use the grid method, a projector, or AR instead.
Can I trace on canvas with a lightbox?
Not really — stretched canvas is opaque and heavy, so backlight does not pass through it. For canvas, use graphite transfer paper for a same-size outline, a projector to scale up in a dark room, or an AR app that overlays the reference through the camera on any opaque surface.
Is a light table the same as a lightbox?
Effectively yes — they work identically, glowing evenly from behind. "Light table" usually means the larger, flatter version you work on horizontally, common in animation and drafting; "lightbox" often means a smaller, portable panel. Both are limited to thin paper at one-to-one size.
What is keystone distortion and does AR have it?
Keystone distortion is the trapezoid you get when a projector's lens is not perfectly square to the surface — one edge stretches wider than the other, and every proportion you trace inherits the skew. AR mostly avoids it because you place and scale the reference directly onto the surface through the screen rather than throwing it at an angle, though you still need to hold the phone at a steady viewing angle.
Which tool is cheapest for a beginner?
Free options come first: a sunlit window replaces a lightbox for thin paper, and the grid method with the free Grid Maker Pro tool enlarges onto any surface with just a ruler. If you want dedicated kit, a small LED lightbox is inexpensive, and an AR app has a free tier of three own-photo traces a month before any paid plan. A bright projector is the most expensive way in.
Can I use my own photo with the AR app for free?
Yes — the free tier includes three AR traces of your own photo every month, so you can feel the method on your own reference before deciding on a paid plan. Paid plans are $29.99 a year, $6.99 a month, or $79 once for lifetime. The separate Grid Maker Pro web tool, with all 82 overlays, is free forever with no account — the app is a different product for the job a browser cannot do, not a paywall on the free tool.
Does my reference image leave my device with these tools?
Not with Grid Maker Pro. The free web tool renders overlays on your device with no upload, and the AR app processes your photo on-device. A window and a lightbox obviously involve no software at all. A digital projector fed from your own laptop or phone is similarly local.
Should I get a lightbox or learn the grid method?
They suit different needs. A lightbox is faster for same-size copies on thin paper but cannot enlarge or build your eye. The grid method costs nothing, enlarges to any surface and ratio, and actively trains your measurement — but it is slower. Many artists use both: the grid to scale up and to practise, the lightbox to ink clean copies. The grid method comparison goes deeper.
References
- Alberti, Leon Battista. On Painting (Della Pittura, 1435). Translated by Cecil Grayson, introduction by Martin Kemp. Penguin Classics (1991 ed.). ISBN 978-0-14-043331-3. Book Two describes the gridded veil (velum) and the "open window" framing quadrangle — the earliest written account of overlaying a reference for transfer.
- "Light box." Wikipedia. A general reference on the backlit panel used to view or trace images through translucent media, and its use in art, drafting, and animation. https://en.wikipedia.org/wiki/Light_box
- On light tables in animation and cel work: the practice of registering and tracing successive drawings over a backlit panel is foundational to traditional 2D animation studios through the twentieth century; see the standard accounts of the animation "light table" and peg-registration workflow.
- On grid transfer and projection in mural and scenic painting, including keystone correction: standard mural-studio workflow, in which cartoons are scaled to walls by grid or projected image and squared to avoid trapezoidal distortion.
- "Opaque projector." Wikipedia. A general reference on the episcope / opaque projector that reflects light off a physical original to project an enlarged image, and its use by artists to scale up references. https://en.wikipedia.org/wiki/Opaque_projector
- Wollaston, William Hyde. Patent for the camera lucida, British Patent No. 2993 (1806). The prism device that overlays a virtual image of the subject onto the drawing surface — the direct optical ancestor of AR tracing.
- Apple Inc., "ARKit," and Google, "ARCore," both introduced in 2017. The mobile augmented-reality frameworks that anchor a virtual image to the real world through a phone camera, making on-device AR tracing practical on consumer hardware. https://developer.apple.com/augmented-reality/ · https://developers.google.com/ar
- On graphite transfer paper as the studio standard for erasable, non-bleeding outlines on opaque surfaces: standard practice documented in artists'-materials references; the distinction from waxy carbon paper is technical and well established.
- Hockney, David. Secret Knowledge: Rediscovering the Lost Techniques of the Old Masters. Thames & Hudson (2001; expanded ed. 2006). ISBN 978-0-500-23785-5. The optical thesis on lenses, mirrors, the camera obscura, and the camera lucida in old-master practice, developed with optical physicist Charles Falco — the historical backdrop to overlay-and-trace tools.
- Kemp, Martin. The Science of Art: Optical Themes in Western Art from Brunelleschi to Seurat. Yale University Press (1990). ISBN 978-0-300-05241-6. The standard scholarly survey of optical and perspectival devices in Western art, and the measured counterpoint to Hockney's thesis.
Update log
- — Published. Balanced comparison of the lightbox, the art projector, and AR tracing, plus a how-to on tracing without a lightbox and a cost breakdown.
From the screen to the page
Everything here is free in your browser and stays that way. When a reference has to leave the screen and land on real paper, canvas, or a wall, a browser has no camera to register it to the surface. The Grid Maker Pro AR app adds exactly that — hold your phone over the paper and trace your own photo directly, with the same 82 composition overlays alongside.
Meet the AR tracing app → Free web tool, free forever · AR tracing is the separate paid appPick the tool the surface needs
Start in the free browser tool for the grid method, composition checks, and clean transfers. Reach for the AR app when the surface is a wall, a canvas, or anything a lightbox cannot see through. Your image stays on your device, either way.
Open the free grid tool →One brief every other Tuesday.
One overlay, one historical reference, one workflow note. Studio notes from working artists, photographers, and designers. No spam, unsubscribe in two clicks.