
How to trace a photo onto paper
There are seven real ways to get a photograph onto paper or canvas, and no honest artist pretends only one of them counts. The grid method breaks the image into cells you copy by hand. Freehand sight-size trains your eye. Transfer paper and lightboxes give you a clean one-to-one copy. Projectors and the modern phone-camera AR method throw the reference straight onto a wall or canvas at any size. The camera lucida is the optical trick the old masters quietly used. This guide walks all of them with their genuine strengths and limits — and how to trace in a way that still makes you a better artist, not a worse one.
One of the guides behind the 82 composition overlays every visual artist should know and use.
- Methods covered
- Seven, from grid to AR
- Oldest technique
- Gridding, documented by Alberti, 1435
- Most accurate enlargement
- The grid method
- Fastest on large surfaces
- Projector or AR tracing
- Cost to start
- Free (grid / sight-size)
- Best for murals
- AR or projector
In short
- There is no single "right" way to trace a photo. The grid method, freehand sight-size, transfer paper, the lightbox, projectors, the camera lucida, and phone-camera AR each solve a different problem — accuracy, scale, speed, or learning.
- The grid method is the most reliable way to enlarge an image by hand and the only one that actively trains measurement. It needs nothing but a print, a ruler, and a pencil — or the free Grid Maker Pro tool to overlay the grid on screen.
- Lightboxes give a perfect same-size copy; projectors and AR throw the reference onto any surface at any scale but add keystone distortion you correct by eye.
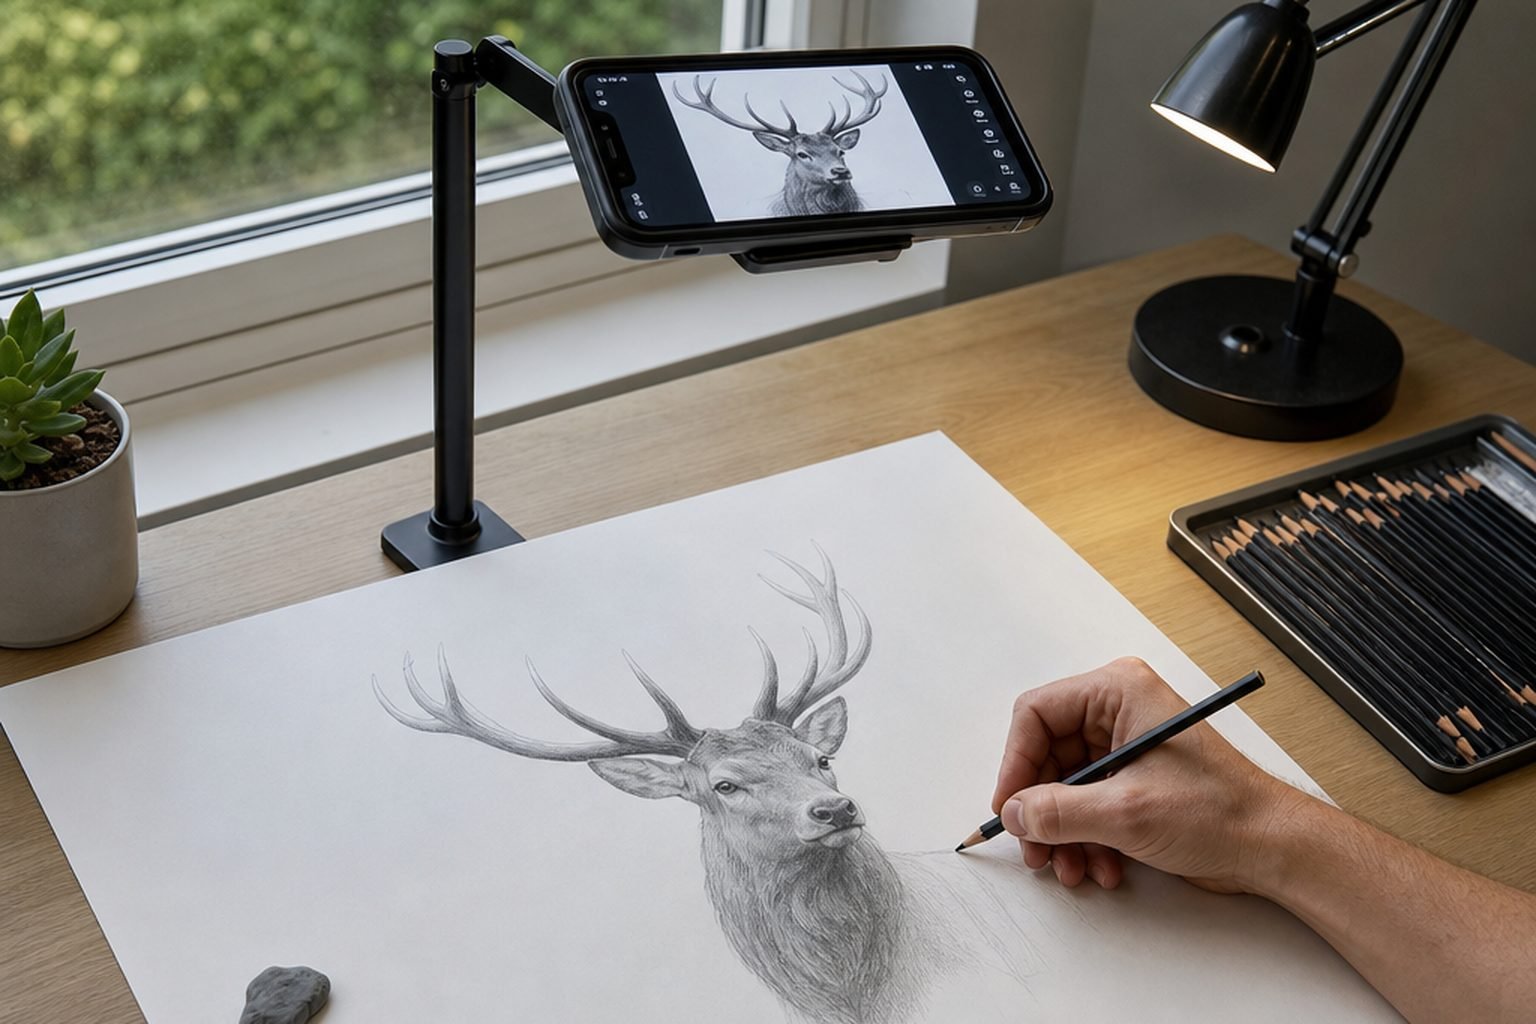
- AR tracing — locking a reference photo over your real paper, canvas, or wall through a phone camera — is the modern method. It shines on murals, large pieces, and odd surfaces where a projector is impractical.
- Tracing is not cheating. Optical aids have been part of serious art since the fifteenth century. What matters is whether you do the real work — value, edge, colour, decision — by hand and eye after the placement is set.
Why artists transfer images, and how old the problem is
The desire to get an accurate image onto a surface is older than photography by centuries. Long before a camera existed, painters needed to scale a small study up to a fresco wall, copy a master's drawing faithfully, or fix a difficult foreshortening they could not hold in their heads. The methods in this guide are modern conveniences sitting on top of a very old practice.
The earliest written description of gridding for transfer comes from Leon Battista Alberti's On Painting (Della Pittura), completed in 1435. Alberti described a velum — a veil of fine threads stretched on a frame and divided into squares — held between the artist and the subject. By noting where each contour crossed a thread, the painter could record proportion exactly onto a paper ruled with the same squares.1 This is the grid method, described nearly six hundred years ago, and it has barely changed.
A century later, Albrecht Dürer engraved his famous woodcuts of draughtsmen using gridded frames and sighting devices to draw a lute, a seated woman, and a reclining nude in correct perspective. Those 1525 images, from his Underweysung der Messung, are the clearest visual record of how Renaissance artists mechanised observation.2 The frame and the veil are the direct ancestors of every overlay in the grid library you can call up in a browser today.
The most provocative modern account of this history is the painter David Hockney's Secret Knowledge: Rediscovering the Lost Techniques of the Old Masters, published in 2001. Hockney argued, with the optical physicist Charles Falco, that artists from roughly 1420 onward used lenses, mirrors, and projection — the camera obscura and later the camera lucida — to achieve the sudden leap in optical accuracy visible in early Netherlandish and later painting.3 The thesis remains debated, but two things are not: optical aids existed and were available, and artists who could use a tool to work better generally did. Tracing, in other words, is not a modern shortcut grafted onto a pure tradition. It is part of the tradition.
What changed everything was photography. Once a photograph could freeze a pose, a face, or a fall of light, the artist's transfer problem narrowed: how do I get this image, at this size, accurately onto that surface? Every technique below is an answer to that one question, and each answers it with a different trade between accuracy, scale, speed, and how much your own eye is exercised in the process.4
With the history in place, the rest of this guide is practical. We will start with the technique that has the longest pedigree and the most teaching value, then work outward to the faster and more mechanical methods, ending with the modern AR approach and the honest question of whether any of this is cheating.
The grid method
The grid method is the technique most working artists reach for when they need to enlarge a photograph accurately onto paper or canvas without any equipment beyond a ruler. It is also the only transfer method on this list that actively makes you a stronger draughtsman, because it forces you to measure rather than guess.
How it works
You draw a grid of evenly spaced squares over a print of your reference photo, then draw a second grid with the same number of cells — but larger — on your paper or canvas. Because both grids have the same number of cells, each square on the reference maps to exactly one square on the surface. You copy the image one cell at a time, drawing only the small piece of contour that falls inside the square you are working on. A face that feels impossible to draw freehand becomes thirty or forty small, manageable shapes.
The mathematics is simple proportion. If your reference grid uses one-inch squares and your canvas grid uses three-inch squares, every line you copy is enlarged exactly three times, with no distortion, because the ratio is constant across the whole image.5 This constancy is the grid's great advantage over freehand enlargement, where small errors at the top of the image compound into large ones by the bottom.
Doing it without drawing on your photo
You do not have to ruin a good print with pencil lines. The free Grid Maker Pro tool exists for exactly this: drop your photo into the browser, choose a square grid, and the overlay sits on top of the image on screen. Nothing is uploaded — the rendering happens on your device. You then rule the matching grid on your paper and copy from the screen. If you want the underlying square-grid overlay on its own, the square drawing grid page covers the spacing options and when an even square grid beats a rectangular one.
Drop a portrait into the tool, switch on the square grid, and tighten the cell count until each cell holds one clear feature — an eye, the corner of the mouth, the turn of the jaw. That is the right grid density for copying a face.
Choosing cell size
Finer grids give more accuracy but slow you down; coarse grids are fast but leave you guessing inside large cells. A practical rule from atelier teaching is to use enough cells that no single important feature spans more than one or two squares, and no more.6 For a head, a four-by-five grid is usually plenty. For a complex full-figure or landscape, you may want eight or ten divisions on the long edge. The golden-ratio variant — placing grid lines on proportional rather than even divisions — is covered in the golden ratio overlay page, and it doubles as a composition check while you transfer.
The grid method's only real weakness is speed: ruling two grids and copying forty cells takes time, and very large surfaces become tedious. That is exactly the gap the projector and AR methods fill, which is where we turn after two faster but lower-tech options.
Freehand and sight-size measurement
This chapter is the honest counterweight to the rest of the guide. Not every transfer should be traced. The two oldest non-mechanical approaches — comparative measurement and sight-size — produce the strongest observational artists, and they are worth understanding even if you mostly trace, because they tell you what tracing is doing for you and what it is doing instead of you.
Comparative (block-in) measurement
In comparative measurement you choose one unit on the subject — say the length of the head — and judge every other dimension against it by eye, holding a pencil at arm's length to check angles and proportions. Betty Edwards's Drawing on the Right Side of the Brain popularised the mindset behind this for a general audience: the difficulty in drawing is rarely the hand, it is seeing relationships accurately rather than drawing the symbol your brain has stored for "eye" or "nose."7 A grid is, in a sense, comparative measurement with the comparisons pre-printed for you.
Sight-size
Sight-size is the atelier method in which the drawing is placed beside the subject at the same apparent size, so the artist can step back, compare the two directly, and correct by eye. It is the foundation of the Bargue–Gérôme academic training and remains the core of contemporary classical ateliers.8 It is slow and demanding, and it builds an eye that no tracing method can substitute for.
The practical point for this guide is sequencing. Loomis, in Drawing the Head and Hands, treats construction and measurement as the literacy beneath everything else — the thing that lets an artist draw from imagination, not just copy.9 If you only ever trace, you never build that literacy. The strongest working artists tend to do both: freehand and sight-size practice to keep the eye sharp, and tracing or gridding when a job demands speed or scale. The methods are not rivals; they are a rotation.
Use the tool's grid as training wheels you remove over time. Trace placement with the grid for the first few of a series, then try the next one freehand and only switch the grid on to check yourself. The grid becomes a measuring instrument, not a crutch.
With the case for the unaided eye made, we can look at the cleanest tracing methods of all — the ones that give a true one-to-one copy.
Transfer paper and graphite tracing
When you need an exact same-size copy of a photo's outline onto an opaque surface — a stretched canvas, a board, a sheet of watercolour paper too thick to see through — graphite transfer is the most direct method, and it predates carbon-copy office paper by a long way.
Graphite transfer paper
Commercial graphite transfer paper is a thin sheet coated on one side with a releasable graphite layer. You print your photo at the size you want, lay the transfer paper graphite-side down on your surface, place the print on top, and trace the contours firmly with a stylus or hard pencil. The pressure offsets graphite onto the surface, leaving a clean, erasable outline you then paint or render over. Unlike carbon paper, graphite transfer lines erase and do not bleed through paint, which is why it is the studio standard.10
The home-made version
You can make your own: scribble soft graphite (a 4B or 6B pencil) heavily over the back of your printout, then trace the front. The graphite on the back transfers under the stylus. It is messier than commercial sheets but free, and for a single drawing it works perfectly well.
Transfer paper only gives you outlines. Before you commit, check the composition on screen with an overlay so you are transferring a strong arrangement, not just an accurate one. Drop the photo in, switch on a thirds or golden grid, and crop before you print.
The honest limits
Transfer paper is locked to the print size — to enlarge, you first have to print large, which a home printer cannot do past A4 without tiling. It also gives you only flat outlines, no value or edge information, so it is a starting scaffold and nothing more. For same-size work it is fast and clean; for anything large it gives way to a lightbox, projector, or AR. The next method is the cleanest of all, when the paper is thin enough to see through.
The lightbox and light table
A lightbox is the most accurate tracing tool there is, with one condition: the paper must be thin enough for light to pass through. It is a flat panel that glows evenly from behind. You tape your printed photo to the glass, tape your drawing paper over it, and the backlight makes the photo's lines visible straight through the paper so you can trace them directly.
Why it is so accurate
Because the photo and the paper share the same plane and the same scale, there is nothing to misjudge — no keystone angle, no lens softness, no enlargement ratio. What you trace is exactly what is underneath. This is why animation, comics, and illustration studios relied on light tables for decades: an animator could place a new drawing over the previous frame and trace the parts that stay put.11
Where it stops
The lightbox has two hard limits. It cannot enlarge — the trace is always one-to-one with the print. And it does not work on canvas, board, heavy watercolour paper, or any surface light will not pass through. A window in daylight is the zero-cost version of the same idea, with the same limits. When you need scale or an opaque surface, you reach for projection — the next chapter.
Even when you plan to trace on a lightbox, set your crop and check the composition in the tool first. A traced-but-badly-cropped image is still a badly-cropped image.
Projectors — opaque and digital
When the surface is large — a four-foot canvas, a mural wall, a sign — and you need the image scaled up fast, projection is the traditional answer. It is the only pre-digital method that enlarges and traces in one step, which is why muralists and scenic painters have relied on it for generations.
Two kinds of projector
An opaque (or "art") projector shines light onto a physical photo or printout and reflects its image onto the wall, enlarged. A digital projector takes the file directly from a laptop or phone and throws it at the surface. Either way, you dim the room, position the projector, scale the image to fit, and trace the projected outline directly onto the surface in pencil or chalk.
The classic problem
Projection has one persistent flaw: keystone distortion. Unless the projector's lens is perfectly perpendicular to the surface and centred, the projected rectangle skews into a trapezoid — wider at top than bottom, or tilted. Trace that, and your drawing is subtly stretched. Getting a projector dead-square to a wall takes patience, a tripod, and often a stack of books under one end. Digital projectors offer "keystone correction" in software, but heavy correction softens the image. Lens softness at the edges, room glare, and the need to work in the dark are the other standing complaints.12
What it costs
A usable digital projector is a real purchase — typically a hundred to several hundred dollars for one bright enough to trace by in a partly-lit room. Opaque projectors are cheaper but dimmer and limited to small originals. For an artist who transfers occasionally, that is a lot of dedicated equipment that does one job and needs a dark room to do it. This is precisely the gap the AR method was built to close, and it is where we go next.
If you do project, square the image first. Open the photo in the tool, switch on a grid, and note where the lines fall — then check those same lines land evenly on the wall. A grid is the fastest keystone detector you have.
The camera lucida
The camera lucida deserves its own chapter because it is the direct optical ancestor of AR tracing — a device that overlays a virtual image of the subject onto the paper so the artist can trace it by hand. The phone-camera method in the next chapter does, with software, almost exactly what this brass-and-glass instrument did two centuries ago.
How it works
Patented by William Hyde Wollaston in 1806, the camera lucida is a small prism on an adjustable arm clamped to the edge of a drawing board.13 The artist looks down through the prism and sees the subject in front of them apparently superimposed on the paper below. Move the pencil to where a feature appears to sit and you are tracing a virtual image — there is no projection, no light thrown, just an optical illusion delivered to one eye. It works in full daylight and on any surface, which made it popular for portrait sketching and scientific illustration through the nineteenth century.
It is also notoriously hard to use. The image floats only if your eye stays in one exact position; the slightest shift and the subject drifts off the paper. This is the device Hockney and Falco point to in Secret Knowledge as one of the optical aids available to earlier painters, alongside the camera obscura, and the difficulty of mastering it is part of why its use was rarely advertised.3 The painter who learned to hold their eye still gained an accuracy that looked, to everyone else, like pure genius.
The camera lucida is mostly a historical curiosity now — you can still buy modern reproductions, and they are charming to use — but its logic is everywhere in the next method. "Overlay a virtual image of the reference onto the real surface, then trace it by hand" is precisely what an AR app does, with a phone screen standing in for the prism and a locked digital photo standing in for the subject. If you want the broader vocabulary of optical and measuring aids, the glossary collects the related terms.
You do not need a prism to feel how an overlay aids tracing. The grid tool overlays a virtual reference on screen the way the lucida overlaid the subject on paper — same idea, different medium.
AR tracing — locking a reference over the real surface
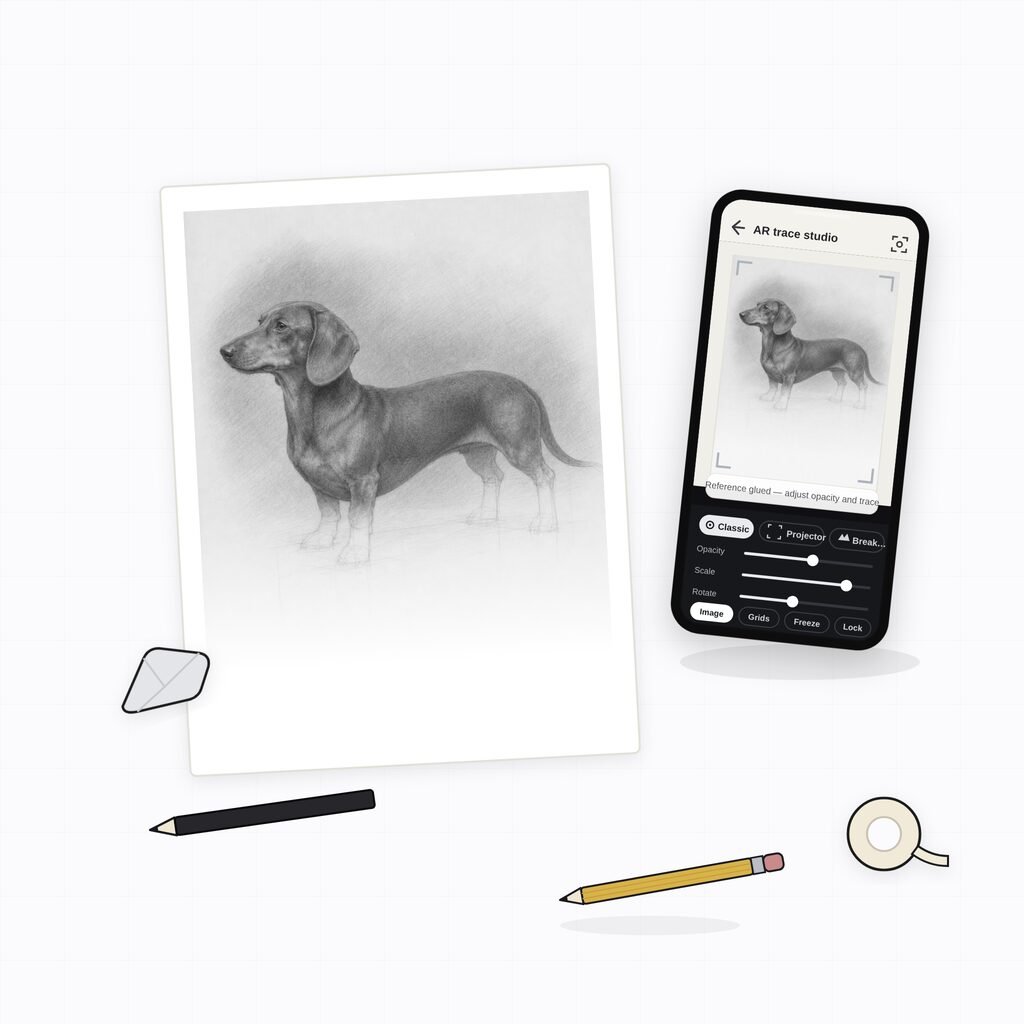
Augmented-reality tracing is what the camera lucida always wanted to be. You point your phone or tablet at your paper, canvas, or wall; the app shows you the live camera view with your chosen reference photo overlaid on top, locked in place; and you draw the lines you see through the screen onto the real surface beneath. No projector, no dark room, no keystone fuss, no equipment beyond the phone already in your pocket.
How it works
The app composites your reference image over the live camera feed and holds it steady relative to the surface, so as you move the phone slightly the reference stays pinned where you placed it. You set its size and position once — pinch to scale, drag to position — then draw underneath, glancing at the screen to see where each contour falls. Because you place and scale the image to fit the surface directly, there is no enlargement ratio to calculate and no trapezoid to correct. It is the fastest way there is to get a reference onto an awkward size or surface.
Where AR shines
AR earns its place on jobs the older methods handle badly: murals and large walls, where wrangling a square projector against a tall surface is a chore; large or odd surfaces — a curved sign, a guitar body, a tote bag — where transfer paper and lightboxes simply do not reach; and fast placement, where you want a reference roughed in within seconds rather than after ten minutes of ruling grids. For a muralist (see the audience hub for painters), it removes the single most awkward part of starting a wall.
The honest limits
AR tracing is not magic, and it is fair to say so plainly. It depends on holding the phone reasonably steady and keeping your viewing angle consistent, the same eye-position discipline the camera lucida demanded. Tracking can drift on blank, featureless surfaces. The reference is only as sharp as your screen and your light. And — like every method in this guide — it gives you placement, not artistry: the values, edges, and colour decisions are still yours to make. It is one tool among many, best for the large-and-awkward cases, not a replacement for the grid on a sheet of paper at your desk.
Where Grid Maker Pro fits
The free Grid Maker Pro web tool — 82 composition and drawing overlays, in your browser, free forever, no account — is the open front door to all of this. It does everything a browser can: overlay grids on a photo, check composition, set a crop, copy by the grid method. What a browser cannot do is lock a reference over your real paper or wall through the camera and let you trace it by hand. That is a separate job, and it is what the Grid Maker Pro AR app is for.
The AR app, plainly
- A separate app — not a paywall on the free tool. The browser tool stays free forever.
- Built by Sujith Puthran, a working artist of more than 15 years, to solve the AR-tracing job at his own easel.
- On Android via Google Play (com.gridmakerpro.app); an iOS version is planned.
- Runs on-device. Your reference photos stay on your phone.
- Free tier: 3 AR traces of your own photo every month. Paid: $29.99 / year, $6.99 / month, or $79 once for lifetime.
If you are weighing AR apps against each other, the comparison with Da Vinci Eye lays out the differences honestly. With every method now on the table, two questions remain: is any of this cheating, and how do you trace so you still improve?
How do you trace a drawing from your phone?
Tracing a drawing from your phone takes five steps with an AR tracing app:
- Choose an AR tracing app that imports your own photos.
- Load the reference and set its opacity to around 50%.
- Anchor the phone above your paper — a stand keeps the image steady.
- Trace the major contours through the screen, checking alignment against two or three anchor marks.
- Finish values and details by eye once the outline is placed.
Is tracing cheating?
This is the question every artist who traces eventually has to answer, usually first to themselves and then to someone who saw them do it. The honest answer is no — with a caveat that matters.
The historical case
Optical and mechanical aids have been part of serious art since at least the fifteenth century. Alberti described the gridded veil in 1435 as a legitimate professional tool, not a confession.1 Dürer engraved his sighting frames proudly into instructional woodcuts.2 Hockney and Falco's research, controversial as it is, documents the plausible use of lenses and mirrors by painters whose names anchor the canon.3 Vermeer's likely camera obscura, Canaletto's, Ingres's camera lucida portraits — the list of celebrated artists who used optical aids is long, and their reputations are intact. The idea that real artists work only with an unaided eye is a modern myth, not a historical fact.
The real distinction
Tracing is a tool, and a tool is morally neutral — what matters is what you do with the time it saves. An outline is the least artistically interesting part of most images. The value structure, the quality of edges, the colour temperature, the thousand small decisions about what to emphasise and what to suppress — that is where the art lives, and no tracing method does any of it for you.14 If you trace the placement and then do that real work by hand and eye, you have used a tool the way professionals always have. If you trace to avoid thinking, you have produced a copy and learned nothing — but the fault is in the avoidance, not the tracing.
There is also a fairness point. Tracing is most useful exactly where the unaided eye is least relevant: getting a complex reference onto a large mural fast, hitting a tight commercial deadline, or matching a client's photo precisely. In those jobs, refusing to trace is not virtue; it is wasted time. The next chapter is the constructive version of this answer: how to trace so the practice still builds you.
How to trace so you still improve as an artist
The fear behind "is tracing cheating" is really a fear of not growing. That fear is legitimate — tracing carelessly can let you produce passable work without learning anything. But traced deliberately, transfer methods accelerate exactly the skills beginners most neglect. Here is how to make tracing a teacher.
Trace placement, render by hand
Use the trace only to fix where things go, then turn the reference off and do the values, edges, and colour from observation. The placement is the boring part; the rendering is where you learn. Loomis's whole pedagogy rests on the idea that construction and proportion are the literacy that frees you to make the interesting decisions — once placement is handled, your attention is available for everything that actually carries a picture.9
Use the grid as removable training wheels
In a series of drawings, grid the first one fully, the next with half the cells, the third freehand with the grid switched on only to check. This is comparative measurement learned through tracing — the grid teaches your eye what accurate proportion feels like, then withdraws.7 Within a few studies you will find you no longer need it for the easy proportions.
Trace, then redraw freehand
Trace an image once to understand its structure, then put the trace away and draw it again from scratch. The traced pass is reconnaissance; the freehand pass is the real practice. Bargue-method copying works on the same principle — the careful copy builds the eye that then works unaided.8
Mix tracing with pure observation
Keep a sight-size or life-drawing habit running alongside whatever tracing your jobs require. The two are not in conflict; the observational practice keeps your eye sharp, and the tracing keeps your deadlines met. Müller-Brockmann made the same argument about grids in graphic design — the grid is a tool for clarity and economy, not a substitute for the designer's judgement, and the best designers use it precisely because it frees them to think about what matters.15
Build the removable-training-wheels habit with the free tool: grid a study, draw it, then redraw the same subject with the grid off and compare. The gap you see is exactly the skill you are building.
Choosing a method by situation
No method wins everywhere. The right choice depends on three things: the size you need, the surface you are working on, and whether you care about training your eye in the process. The table below maps the seven methods against the situations they suit, and the questions that follow narrow it quickly.
| Method | Best for | Enlarges? | Works on canvas / wall? | Trains your eye? | Cost |
|---|---|---|---|---|---|
| Grid method | Accurate enlargement at a desk | Yes, any ratio | Yes | Yes — actively | Free |
| Freehand / sight-size | Building observational skill | By eye | Yes | Most of all | Free |
| Transfer paper | Clean same-size outline on opaque surface | No | Yes | Little | Low |
| Lightbox | Most accurate same-size copy | No | No (thin paper only) | Little | Low–medium |
| Projector | Large surfaces, fast scale-up | Yes | Yes | Little | Medium–high |
| Camera lucida | Daylight tracing, historical interest | By placement | Yes | Some | Medium |
| AR tracing | Murals, odd surfaces, fast placement | Yes | Yes | Little | Free tier / low |
The quick decision
Ask in order. Is the surface thin paper at the same size as your print? Use a lightbox — nothing beats it for accuracy. Is it an opaque surface at the same size? Transfer paper. Do you need to enlarge onto paper or a modest canvas at your desk? The grid method, with the free tool for the overlay. Is it a mural, a wall, or a large or odd surface? AR tracing if you have a phone, a projector if you have a dark room and a tripod. Do you want to get better at drawing rather than just finish this piece? Sight-size and freehand, with the grid as an occasional check.
For most desk work the answer is the grid, and the free tool gives you the overlay in seconds. Pick the surface case you are in and the method usually picks itself.
Artists who used transfer and optical aids
The case that tracing belongs to serious practice is strongest when made by name. These are documented or strongly argued uses of transfer and optical aids by artists whose work anchors the canon.
Albrecht Dürer (1471–1528)
Dürer did not hide his use of gridded frames and sighting devices — he engraved them into instructional woodcuts in his Underweysung der Messung of 1525, presenting mechanical aids to perspective as proper professional knowledge to be taught.2
Jan van Eyck and the early Netherlandish painters (15th c.)
Hockney and Falco's optical thesis centres on the sudden leap in accuracy visible from around 1420, arguing that lenses and mirrors enabled the new optical realism of painters like van Eyck.3 The thesis is contested, but the rise in optical precision it tries to explain is not.
Johannes Vermeer (1632–1675)
The case for Vermeer's use of a camera obscura is one of the most thoroughly examined in art history, supported by the optical character of his highlights and perspective. It is the textbook example of an undisputed master whose reputation survives the strong likelihood that he used a projecting device.3
Jean-Auguste-Dominique Ingres (1780–1867)
Ingres's precise portrait drawings are frequently linked to the camera lucida, the Wollaston prism that overlays a virtual image on the paper — the direct optical ancestor of AR tracing.13 His celebrated linear accuracy is exactly what the device delivers.
Diego Rivera and the muralist tradition (20th c.)
Large-scale muralists have long scaled cartoons up onto walls by grid transfer and projection, because no other method gets a complex composition onto a building-sized surface accurately. The grid-and-projection workflow is standard practice across the mural tradition that runs through Rivera and the public-art movements of the twentieth century.12
Common mistakes when tracing a photo
Tracing a bad composition accurately
Accuracy is not the same as a good picture. A precisely traced but poorly cropped or unbalanced photo is a precisely bad drawing. Tracing locks in whatever you give it, including its flaws.
Ignoring keystone distortion with a projector
A projector that is not dead-square to the surface throws a trapezoid, and every proportion you trace inherits the stretch. The error is invisible until you remove the projector and the drawing looks subtly wrong.
Tracing only outlines and stopping there
Every method here gives you placement, not a finished drawing. A traced outline with no value structure reads as flat and lifeless — the work that makes an image convincing has not been done yet.
Never drawing without the aid
Tracing every single piece means your observational eye never develops, and you stay dependent. The aid stops being a tool and becomes a ceiling.
Using a grid that is too coarse or too fine
Too few cells and you are guessing inside large squares; too many and you spend longer ruling lines than drawing. Both defeat the purpose.
I shall describe what I do. First about where I draw, I inscribe a quadrangle of right angles, as large as I wish, which is considered to be an open window through which I see what I want to paint.— Leon Battista Alberti, On Painting, 14351
Frequently asked questions
What is the most accurate way to trace a photo onto paper?
For a one-to-one copy, a lightbox is the most accurate, because the photo and paper share the same plane and scale and there is nothing to misjudge. To enlarge while staying accurate, the grid method is the most reliable hand technique — it breaks the image into cells you copy individually and keeps you measuring rather than guessing. Projectors and AR are fastest on large surfaces but add keystone distortion and lens softness you correct by eye.
Is tracing a photo cheating?
No. Tracing is a tool, not a verdict on your worth as an artist. Optical aids have been part of serious practice since at least the fifteenth century, and historians have documented their use by old masters. What matters is what you do with the traced outline — if you do the values, edges, colour, and decisions by hand and eye afterward, you are using your time the way professionals always have.
How do you transfer a photo onto canvas without a projector?
The grid method needs only a ruler and pencil: grid a print, draw a matching but larger grid on the canvas, and copy cell by cell. Graphite transfer paper handles same-size transfers — print the photo, lay coated paper underneath, trace the lines. On a phone, an AR app locks the reference over the canvas through the camera so you draw the lines you see, no projector required.
Does tracing help you get better at drawing?
It can, traced deliberately. Tracing fixes placement so your attention is free for the parts beginners neglect — edge quality, value, colour temperature. Used as a removable measuring crutch it teaches your eye what accurate proportion feels like. It does not build raw observational skill on its own, but it is a legitimate stage in a learning sequence.
Do I need to buy a projector to enlarge a drawing?
No. The grid method enlarges to any ratio with nothing but a ruler and pencil, and for large or odd surfaces an AR app does the same scale-up through a phone camera. Projectors are useful but expensive and demand a dark room and careful squaring; many artists never need one.
What grid size should I use for a portrait?
Use enough cells that no single feature — an eye, the mouth, the jaw — spans more than one or two squares. For a head, a four-by-five grid is usually plenty. Adjust the density live in the free tool until each cell holds one clear feature; that is the right setting.
Can I use a window instead of a lightbox?
Yes. Taping the photo and your paper to a sunlit window does the same job as a lightbox for thin paper, for free. It shares the same limits: it cannot enlarge, and it does not work on canvas or any opaque surface.
What is the difference between transfer paper and carbon paper?
Graphite transfer paper leaves an erasable line that does not bleed through paint, which is why it is the studio standard. Carbon paper leaves a waxy, permanent line that resists erasing and can show through thin paint — fine for office copies, poor for drawing.
How does AR tracing handle keystone distortion?
It mostly sidesteps it. Because you place and scale the reference directly onto the surface through the screen rather than projecting at an angle, there is no fixed trapezoid to correct. You do still need to hold the phone at a consistent viewing angle, the same discipline the camera lucida demanded.
Is the Grid Maker Pro AR app free?
It has a free tier of three AR traces of your own photo every month. Paid plans are $29.99 a year, $6.99 a month, or $79 once for lifetime. The separate Grid Maker Pro web tool — the 82 composition overlays in your browser — is free forever, with no account. The app is a different product for the job a browser cannot do, not a paywall on the free tool.
Which AR tracing app should I use?
There are several on the stores. Grid Maker Pro's app is built by a working artist and runs on-device, keeping your reference photos on your phone. If you are comparing options, the Grid Maker Pro vs Da Vinci Eye comparison lays out the differences without overselling.
Will tracing work for painting, not just drawing?
Yes — every method here transfers the outline that a painting starts from. The grid, transfer paper, projector, and AR all give you a placement scaffold on canvas; the painting itself — colour, value, edges — is then done conventionally. Check the composition before you transfer so you are painting over a strong arrangement.
Does the reference image leave my device when I use the tools?
No. The free web tool renders overlays on your device with no upload, and the AR app processes your photo on-device. Your reference image stays with you in both cases.
References
- Alberti, Leon Battista. On Painting (Della Pittura, 1435). Translated by Cecil Grayson, introduction by Martin Kemp. Penguin Classics (1991 ed.). ISBN 978-0-14-043331-3. Book Two describes the gridded veil (velum) and the "open window" framing quadrangle.
- Dürer, Albrecht. Underweysung der Messung mit dem Zirckel und Richtscheyt (Instruction in Measurement with Compass and Ruler). Nuremberg (1525). The perspective-machine woodcuts; widely reproduced, e.g. in the Metropolitan Museum of Art collection.
- Hockney, David. Secret Knowledge: Rediscovering the Lost Techniques of the Old Masters. Thames & Hudson (2001; expanded ed. 2006). ISBN 978-0-500-23785-5. The optical thesis on lenses, mirrors, the camera obscura, and the camera lucida in old-master practice, developed with optical physicist Charles Falco.
- Kemp, Martin. The Science of Art: Optical Themes in Western Art from Brunelleschi to Seurat. Yale University Press (1990). ISBN 978-0-300-05241-6. The standard scholarly survey of optical and perspectival devices in Western art, providing the measured counterpoint to Hockney's thesis.
- On proportional enlargement by constant ratio: Alberti (1435), op. cit., Book One on commensuration; the principle that a constant cell ratio preserves proportion across the whole image.
- On grid density in atelier teaching: the practical convention that cells be sized so no key feature spans more than one or two squares is standard studio practice; see the construction discussion in Loomis (1956), ref. 9.
- Edwards, Betty. Drawing on the Right Side of the Brain. Definitive 4th edition. Tarcher/Penguin (2012). ISBN 978-1-58542-920-2. On comparative perception, the "symbol system" obstacle, and learning to see relationships rather than draw stored symbols.
- Ackerman, Gerald M. Charles Bargue: Drawing Course. ACR Édition (2003). ISBN 978-2-86770-145-1. The Bargue–Gérôme academic copying course underlying sight-size atelier training.
- Loomis, Andrew. Drawing the Head and Hands. Viking Press (1956); Titan Books reprint (2011). ISBN 978-1-84856-680-6. On construction and proportion as the literacy that frees imaginative drawing.
- On graphite transfer paper as the studio standard for erasable, non-bleeding outlines: standard practice documented in materials references such as the conservation and artists'-materials literature; the distinction from waxy carbon paper is technical and well established.
- On light tables in animation and cel work: the practice of registering and tracing successive drawings over a backlit panel is foundational to traditional 2D animation studios through the twentieth century.
- On grid transfer and projection in mural and scenic painting, including keystone correction: standard mural-studio workflow, in which cartoons are scaled to walls by grid or projected image and squared to avoid trapezoidal distortion.
- Wollaston, William Hyde. Patent for the camera lucida, British Patent No. 2993 (1806). The prism device that overlays a virtual image of the subject onto the drawing surface; discussed at length in Hockney (2001), ref. 3.
- On the primacy of value, edge, and colour decisions over outline: the working principle that an outline is the least artistically determinant part of an image is a commonplace of representational teaching; see Loomis (1956), ref. 9, and Edwards (2012), ref. 7.
- Müller-Brockmann, Josef. Grid Systems in Graphic Design (Raster Systeme für die visuelle Gestaltung). Niggli (1981). ISBN 978-3-7212-0145-1. On the grid as a tool for clarity and economy that frees rather than constrains the designer's judgement.
- Steadman, Philip. Vermeer's Camera: Uncovering the Truth Behind the Masterpieces. Oxford University Press (2001). ISBN 978-0-19-280302-3. The detailed reconstruction arguing for Vermeer's use of a camera obscura, the most thoroughly examined optical-aid case in art history.
Update log
- — Published. Full guide to the seven transfer methods, the history of optical aids, the tracing-as-cheating question, and how to trace while still improving.
On this page
1. Why artists transfer images 2. The grid method 3. Freehand & sight-size 4. Transfer paper 5. The lightbox 6. Projectors 7. The camera lucida 8. AR tracing 9. Is tracing cheating? 10. Trace and still grow 11. Choosing a method Practitioners Common mistakes FAQ Related guides References AuthorFrom the screen to the page
Everything here is free in your browser and stays that way. When a reference has to leave the screen and land on real paper, canvas, or a wall, a browser has no camera to register it to the surface. The Grid Maker Pro AR app adds exactly that — hold your phone over the paper and trace your own photo directly, with the same 82 composition overlays alongside.
Meet the AR tracing app → Free web tool, free forever · AR tracing is the separate paid appTrace your photo, your way
Drop a reference into the free browser tool for the grid method, composition checks, and clean transfers. Reach for the AR app when the surface is a wall, a canvas, or anything a browser cannot reach. Your image stays on your device, either way.
Open the free grid tool →One brief every other Tuesday.
One overlay, one historical reference, one workflow note. Studio notes from working artists, photographers, and designers. No spam, unsubscribe in two clicks.