
How to enlarge a drawing
Enlarging a drawing is a proportion problem, not a talent problem. The reason a scaled-up sketch so often ends up lopsided is that the eye compounds small errors as the image grows. Every method that works fixes a constant ratio and copies within it: the grid method — squaring up — divides the drawing into cells and rebuilds it larger cell by cell; the diagonal method scales a whole rectangle by geometry alone; projectors and phone-camera AR throw the image up at any size in one step; and a photocopier or home printer tiles a big drawing across several sheets. This guide walks all of them, gives you the enlargement math, and shows how to scale up to any size, on any surface, without distortion.
One of the guides behind the 82 composition overlays every visual artist should know and use.
- Methods covered
- Five, from grid to AR
- Most reliable by hand
- The grid method (squaring up)
- Oldest technique
- Squaring up, documented by Alberti, 1435
- Fastest at scale
- Projector or AR tracing
- Cost to start
- Free (grid / diagonal)
- The core rule
- One constant ratio, both directions
In short
- Enlarging by eye fails because small errors compound as the scale grows. Every good method fixes a constant ratio and copies within it, so proportion holds from top to bottom.
- The grid method — also called squaring up — is the most reliable way to enlarge by hand: draw a grid on the original, a proportionally larger grid with the same number of cells on the new surface, and copy cell by cell. Use nothing but a ruler and pencil, or the free Grid Maker Pro tool to overlay the grid on screen without marking the artwork.
- The scaling math is one number. Divide the new width by the old width to get the scale factor, then apply the same factor to the height so the aspect ratio never changes. Different factors for width and height stretch the drawing.
- The diagonal method scales a whole rectangle by geometry alone — any corner on the extended diagonal shares the original's exact proportions — and is the fastest way to find a correctly-shaped larger frame.
- Projectors and phone-camera AR enlarge in one step and shine on murals and large or odd surfaces; a photocopier or home printer tiles a big drawing across several sheets. Pick the method by size, surface, and how much equipment you have.
Why enlarging a drawing by eye goes wrong
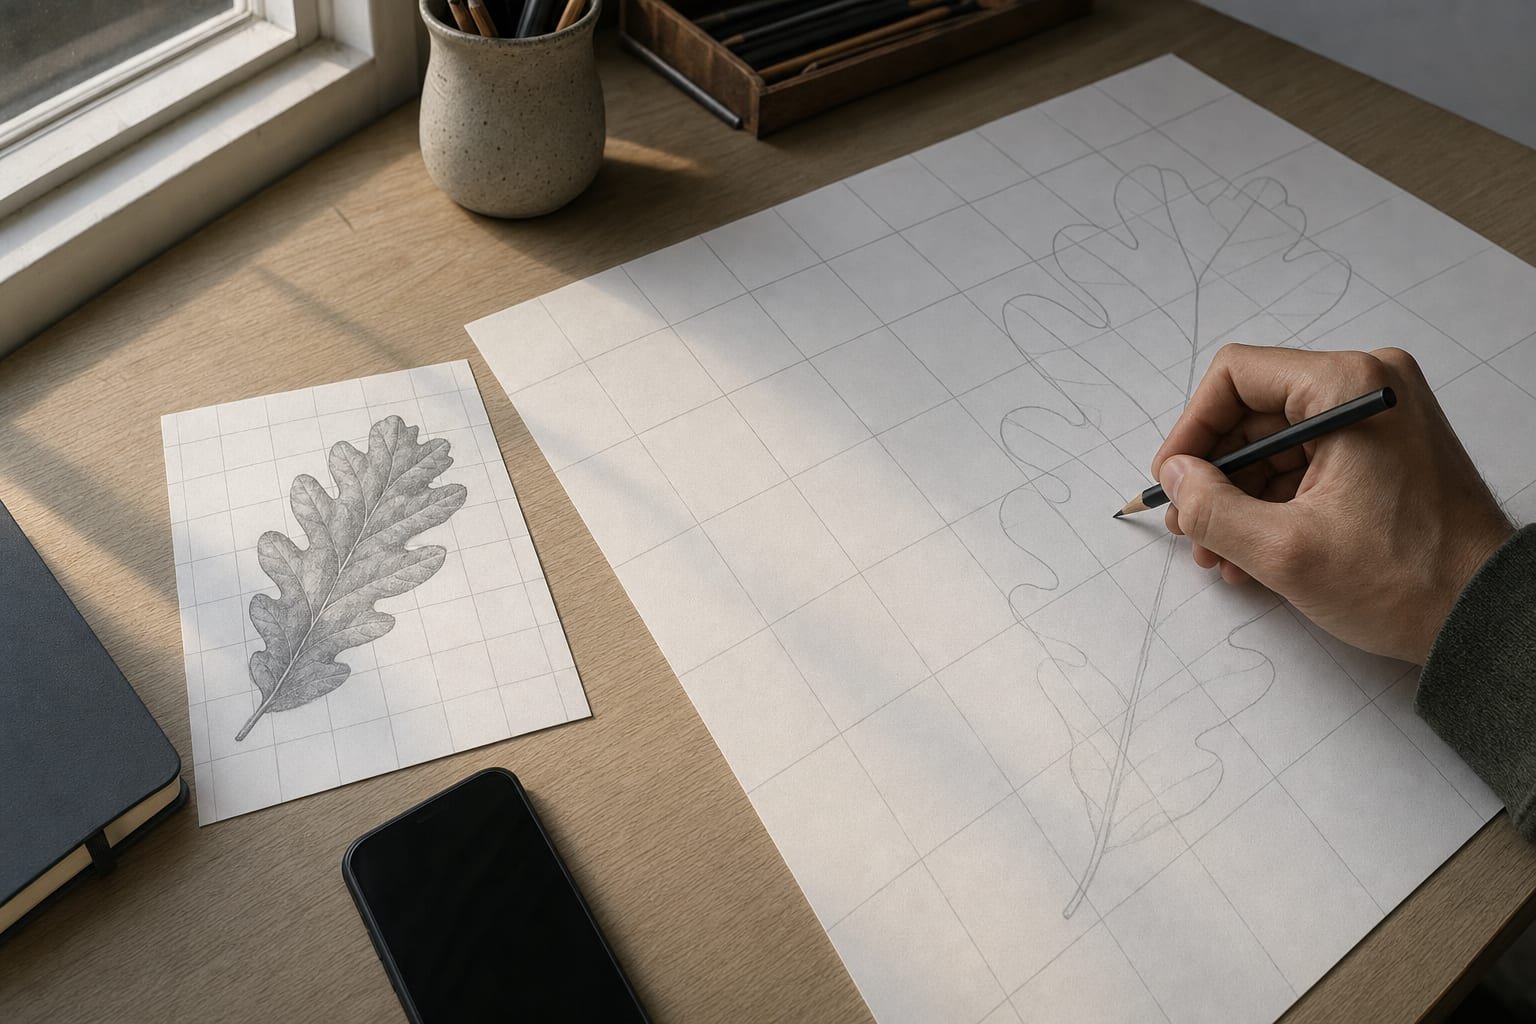
Almost every artist has tried to scale a small sketch up freehand and watched it drift. The head starts fine, the shoulders sit a little too wide, and by the time you reach the feet the whole figure is out of proportion. Nothing was wrong with your hand. The problem is arithmetic: enlargement multiplies every distance, and it multiplies your mistakes along with them.
When you draw freehand at the same size as a reference, a two-millimetre misjudgement is a two-millimetre error. When you enlarge four times, that same misjudgement becomes eight millimetres — and it does not sit in isolation. Each feature is placed relative to the ones before it, so an early error shifts everything downstream. This is why a freehand enlargement drifts further and further from the original the lower you go: the errors compound.1
The entire craft of enlargement is a set of techniques for defeating that compounding. Each one does it the same way in principle — it fixes a constant ratio between the small drawing and the large one, then copies within that ratio so you are always measuring rather than guessing. Betty Edwards's central argument about drawing applies with double force here: the difficulty is almost never the hand, it is seeing relationships accurately rather than drawing the symbol your brain has stored.2 Enlargement is that difficulty magnified, and the methods below are how artists have solved it for six centuries.
The oldest of these techniques is also the most durable, and it is where every discussion of enlargement should start.
The grid method, or squaring up — with the math
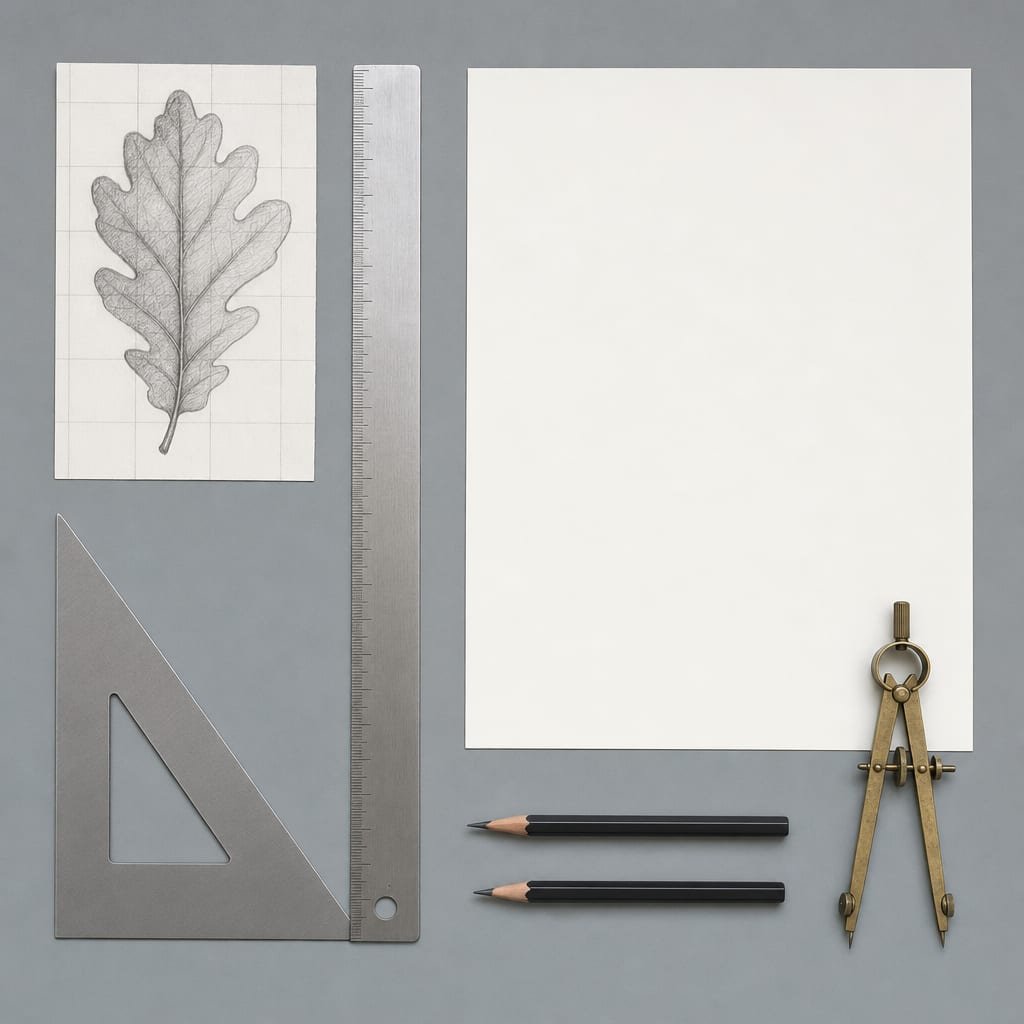
The grid method — known in academic drawing as squaring up — is the technique working artists reach for when they need to enlarge a drawing accurately without any equipment beyond a ruler. It is the modern descendant of the gridded veil Leon Battista Alberti described in On Painting in 1435, and the term "squaring up" is the one the Getty and other institutions use for the same procedure applied to scaling a cartoon up to a wall or panel.3
The one rule of enlargement
Here is the whole idea in a sentence: you keep the same number of cells in both grids, and make the cells in the second grid bigger. Because both grids share the same number of divisions, each square on the original maps to exactly one square on the enlargement. You copy the drawing one square at a time, drawing only the small piece of contour inside the cell you are working on. A figure that feels impossible to scale up freehand becomes thirty or forty small, manageable shapes.4
The enlargement math
The arithmetic is one number: the scale factor. Divide the width you want by the width you have. Then use that same factor everywhere.
example: a 6" drawing to a 24" canvas → 24 ÷ 6 = ×4
new height = original height × scale factor → 8" × 4 = 32"
new cell size = original cell size × scale factor → 1" cells → 4" cells
That last line is the practical shortcut. You do not have to measure the enlargement at all — you only have to multiply your original cell size by the scale factor and draw cells that big. If your original used one-inch squares and your factor is four, you rule four-inch squares on the new surface, keep the same number of them, and the whole drawing enlarges by exactly four with no distortion, because the ratio is constant across the entire image. The grid calculator works the same arithmetic out for any scale factor if you would rather not do it by hand.4
Step by step
- Divide the original into an even grid — say five columns by seven rows. Draw it in light pencil, or overlay it on a scan so you never mark the artwork itself.
- Work out the scale factor: new width ÷ original width. Keep it a round number if you can; it makes the cell math easier.
- On the larger surface, rule the same number of columns and rows, each cell multiplied by the scale factor.
- Copy the drawing one cell at a time, redrawing only what falls inside the matching square. Work across in reading order so you do not lose your place.
- Erase the grid and refine the enlarged drawing — curves, values, edges — by eye.
Doing it without drawing on your artwork
You do not have to rule pencil lines across a finished drawing you care about. The free Grid Maker Pro tool exists for exactly this: scan or photograph the drawing, drop it into the browser, and choose a square grid that sits on top of the image on screen. Nothing is uploaded — the overlay renders on your device. You then rule the matching enlarged grid on your new surface and copy from the screen. If you want the underlying square overlay on its own, the square drawing grid page covers the spacing options and when an even square grid beats a rectangular one, and the grid method glossary entry gives the short definition.
Drop your drawing into the tool, switch on the square grid, and set the cell count so no important feature — a hand, an eye, the turn of a jaw — spans more than one or two cells. That is the right density for copying accurately at scale.
The grid method's only real weakness is speed: ruling two grids and copying forty cells takes time, and very large surfaces become tedious. That is the gap the diagonal shortcut, the projector, and AR each fill — starting with a piece of pure geometry that needs no cells at all.
The diagonal, or proportional-scaling, method
Before you can enlarge a drawing you need a larger frame with the exact same shape as the original — the same aspect ratio. Guessing that rectangle is where a lot of enlargements go wrong before a single line is copied. The diagonal method solves it with geometry alone, no arithmetic and no cells.
How it works
Draw the diagonal of your original rectangle — corner to corner — and extend it in a straight line. Any new rectangle whose far corner touches that extended diagonal has exactly the same proportions as the original. This is a direct consequence of similar triangles: every rectangle sharing that diagonal is a scaled copy of the first.5 Slide your corner further out along the line and you get a bigger frame; every one of them is correctly shaped.
What it is good for
The diagonal is the fastest way to size a canvas, panel, or sheet so it matches the drawing before you commit. Framers, sign painters, and photographers use it constantly to crop and resize without distorting the shape.5 It pairs naturally with the grid: use the diagonal to find the correctly-shaped larger frame, then square that frame up with a grid to copy the interior. Some artists take the proportional idea further with a proportional divider — a two-arm instrument that reads a length off the original and steps off the enlarged length directly — but the diagonal gives you the same guarantee for free, with only a straightedge.
You can preview the correct proportion on screen: drop the drawing into the tool, note its aspect from the frame, and set your new surface to match before you rule anything. A wrong-shaped frame is the one enlargement error a grid cannot rescue.
The grid and the diagonal both keep you at the desk. When the target is a wall or a four-foot canvas, the fastest route is to throw the image up at full size — which is where projection comes in.
Enlarging with a projector
When the enlargement is large — a mural wall, a four-foot canvas, a stage backdrop — and you need the scale-up fast, a projector enlarges and transfers in one step. It is the only pre-digital method that does both at once, which is why muralists and scenic painters have relied on it for generations.
How it works
An opaque (or "art") projector shines light onto a physical drawing and reflects an enlarged image onto the wall. A digital projector takes the scanned file from a laptop or phone and throws it directly. Either way you dim the room, position the projector, scale the projected image until it fits your surface, and trace the enlarged outline in pencil or chalk. Because the projector sets the size for you, there is no scale-factor math — you enlarge simply by moving the projector further from the wall.
The keystone problem
Projection has one persistent flaw: keystone distortion. Unless the projector's lens is perfectly perpendicular to the surface and centred, the projected rectangle skews into a trapezoid — wider at the top than the bottom, or tilted. Trace that and your enlargement is subtly stretched in one direction, which defeats the whole point of keeping proportion. Getting a projector dead-square takes a tripod, a level, and patience; digital keystone correction helps but softens the image when pushed hard.6 A projector also demands a dark room and is a real purchase — often a hundred dollars or more for one bright enough to trace by in a partly-lit space.
If you do project, square the image first. Overlay a grid on the drawing in the tool, note where the lines fall, then check those same lines land evenly on the wall. A grid is the fastest keystone detector you have.
For a full comparison of squaring up against projection — including the eye-training trade-off — the dedicated grid method vs projector vs tracing guide goes deeper than there is room for here. Before projection, though, there is a lower-tech scale-up almost everyone has access to: the office photocopier.
Photocopier and print tiling
The most accessible enlargement method needs no artistic skill at all: let a machine scale the image, then reassemble it. A photocopier or home printer can enlarge a drawing precisely by percentage, and for sizes larger than a single sheet you tile the output across several pages.
Copier percentages
A photocopier's enlargement setting is your scale factor expressed as a percentage. To double a drawing, set 200%; to quadruple it, 400%. If your target does not fit in one enlargement step, chain them — enlarging a copy of a copy — but note that each pass softens the linework slightly, so scan-and-print from the digital file is cleaner when you can. The math is the same scale factor from Chapter 2, written as a percent: new size ÷ old size × 100.
Tiling to poster size
A home printer stops at A4 or Letter, but almost every print dialog and PDF viewer offers a "poster" or "tile" option that splits an enlarged image across a grid of sheets you tape together. You choose the finished size, the software works out how many pages it needs, and you trim the margins and align the pieces. It is slow and a little fiddly, but it enlarges a drawing to poster or small-mural size for the cost of a few sheets of paper — and because the machine holds the ratio, there is no distortion to correct.
All of the methods so far involve either drawing a grid or handling a print. The newest one skips both: it locks the drawing straight over your surface through a phone camera.
Enlarging with AR — scale the overlay to any size
Augmented-reality tracing turns enlargement into a single gesture. You point your phone or tablet at your paper, canvas, or wall; the app shows the live camera view with your drawing overlaid on top, locked in place; and you pinch to scale that overlay to whatever size you want, then draw the enlarged lines you see straight onto the surface beneath. There is no scale-factor math, no grid to rule, and no dark room.
Why it enlarges cleanly
The app composites your reference image over the camera feed and holds it steady relative to the surface, so as you move the phone slightly the overlay stays pinned where you placed it. Enlargement is just the pinch: you scale the overlay until it fills the surface, and because you are setting the size directly on the surface there is no enlargement ratio to compute and — unlike a projector at an angle — no fixed trapezoid to correct. Scaling the overlay preserves its aspect ratio automatically, so the proportion carries through the enlargement by default.
Where AR enlargement shines
AR earns its place on the enlargements the older methods handle badly: murals and large walls, where a square projector against a tall surface is a chore; large or odd surfaces — a curved sign, a guitar body, a tote bag — where a grid or print will not reach; and fast scale-up, where you want the enlargement roughed in within seconds rather than after ten minutes of ruling grids. For a muralist (see the audience hub for muralists), it removes the single most awkward part of scaling a design up onto a wall.
The honest limits
AR enlargement is not magic, and it is fair to say so plainly. It depends on holding the phone reasonably steady and keeping your viewing angle consistent. Tracking can drift on blank, featureless surfaces. The overlay is only as sharp as your screen and your light. And, like every method here, it gives you placement, not artistry — the values, edges, and finishing are still yours. It is one tool among several, best for the large-and-awkward enlargements, not a replacement for a grid on a sheet of paper at your desk.
Where Grid Maker Pro fits
The free Grid Maker Pro web tool — 82 composition and drawing overlays, in your browser, free forever, no account — is the open front door to all of this. It does everything a browser can: overlay a grid on your drawing for the squaring-up method, check the aspect ratio, and set up a clean enlargement on screen. What a browser cannot do is lock your drawing over a real wall or canvas through the camera and let you scale and copy it by hand. That is a separate job, and it is what the Grid Maker Pro AR app is for.
The AR app, plainly
- A separate app — not a paywall on the free tool. The browser tool stays free forever.
- Built by Sujith Puthran, a working artist of more than 15 years, to solve the AR scale-up job at his own easel.
- On Android via Google Play (com.gridmakerpro.app); an iOS version is planned.
- Runs on-device. Your reference drawings stay on your phone.
- Free tier: 3 AR traces of your own photo every month. Paid: $29.99 / year, $6.99 / month, or $79 once for lifetime.
With all five methods on the table, two practical questions remain: how to keep an enlargement undistorted whatever method you use, and which method to reach for on which job.
Enlarging without distortion — keeping the aspect ratio
Distortion in an enlargement almost always comes from one mistake: scaling the width and the height by different amounts. Keep them equal and the drawing enlarges cleanly; let them diverge and it stretches tall or squashes wide, no matter how carefully you copy the interior.
The rule, restated
The aspect ratio is the relationship between width and height. To preserve it, apply the same scale factor to both. If a 6-by-8-inch drawing is scaled to 24 inches wide (×4), it must be 32 inches tall (8 × 4). Set it to 24 by 30 instead and you have squashed the drawing without touching a single interior line. This is the most common enlargement failure, and it happens most often when someone picks a new surface first — "I have a 24-by-36 canvas" — and forces a differently-shaped drawing onto it.5
Where each method protects the ratio for you
Some methods keep the ratio automatically and some leave it in your hands. The grid keeps it as long as your cells are square in both grids. The diagonal keeps it by construction. A copier or printer keeps it as long as you enlarge by a single percentage rather than resizing width and height separately. AR keeps it because pinch-scaling is uniform. The projector is the one method that can quietly break it — through keystone — which is why squaring the projector matters so much.
Confirm the aspect before you scale. Drop the drawing in, read its proportion from the frame, and match your surface to it — the one enlargement error no cell-copying can undo is a wrong-shaped frame.
With distortion handled, the last practical question is which method fits which enlargement — and that depends almost entirely on scale.
Murals, canvases, and small work — choosing by scale
The right enlargement method depends less on taste than on scale and surface. A method that is perfect for a mural is overkill for a sketchbook page, and vice versa. Match the job to the tool and the choice usually makes itself.
Small work — sketchbook to A3 or a modest canvas
At the desk, the grid method is almost always the answer: it is free, accurate, and it doubles as measuring practice. For finding the correctly-shaped larger sheet, add the diagonal. A copier handles a modest enlargement in seconds if a machine is nearby. You rarely need a projector or AR at this scale — the setup outweighs the benefit.
Mid-size — large canvas or panel
A three- or four-foot canvas is the crossover zone. The grid still works but the cell-copying gets tedious; print tiling covers it if you can print and tape; AR is fastest if you have a phone; a projector is worth setting up if you already own one and can dim the room. The deciding factor is usually what equipment is already at hand.
Murals and walls — the largest jobs
At mural scale, hand grids and prints stop being practical and the choice narrows to three: a large chalk-line grid squared up on the wall, a projector, or AR. The projector is fast but demands darkness and squaring; AR needs only a phone and works in daylight, which is why it has become the muralist's shortcut. A very large chalk grid remains the no-equipment fallback that has always worked. The grid-method mural lesson walks the chalk-grid approach step by step.
| Method | Best scale | Works on canvas / wall? | Keeps ratio? | Trains your eye? | Cost |
|---|---|---|---|---|---|
| Grid method (squaring up) | Small to mural | Yes | Yes, with square cells | Yes — actively | Free |
| Diagonal method | Sizing the frame | Yes | Yes, by construction | Some | Free |
| Projector | Large to mural | Yes | Only if squared | Little | Medium–high |
| Copier / print tiling | Small to poster | On paper; transfer after | Yes, by percentage | Little | Low |
| AR tracing | Mid-size to mural | Yes | Yes, pinch is uniform | Little | Free tier / low |
The quick decision
Ask in order. Is it small enough to sit on your desk? Grid method, with the free tool for the overlay and the diagonal to size the sheet. Is a copier or printer handy and the target under poster size? Let the machine enlarge and tile. Is it a large canvas? AR if you have a phone, a projector if you have a dark room. Is it a wall or mural? AR or a projector, with a large chalk grid as the no-equipment fallback. If getting better at drawing matters as much as finishing the piece, favour the grid — it is the only method that measures your eye while it scales the drawing.
For most enlargements the answer is the grid, and the free tool gives you the overlay in seconds. Pick the scale you are working at and the method usually picks itself.
Where scaling up comes from
Enlargement is one of the oldest technical problems in art, and the methods in this guide sit on centuries of practice. A few landmarks show how durable the ideas are.
Leon Battista Alberti (1435)
The earliest written account of gridding for transfer and scaling is in Alberti's On Painting, which describes a gridded veil held between artist and subject, mirrored by a paper ruled with the same squares.3 That is squaring up, described nearly six hundred years ago, and its principle has not changed.
Renaissance fresco workshops
Painters routinely scaled small studies up to wall-sized frescoes by squaring the cartoon and transferring it grid by grid — the only way to get a complex composition onto a building-sized surface accurately before projection existed. The Getty and other institutions document squaring up as the standard enlargement procedure of the period.7
Muralists of the twentieth century
The public-mural movements carried the grid-and-projection workflow into the modern era. Scaling a design up onto a building wall by grid transfer, and later by projected image, is standard muralist practice, and the keystone-squaring discipline of projection dates from this tradition.6
Graphic designers and the grid system
Josef Müller-Brockmann's argument about grids in design applies directly to enlargement: the grid is a tool for clarity and economy that frees rather than constrains the maker's judgement, letting the real decisions happen once the structure is fixed.8 Scaling by grid is that same logic applied to size.
Common mistakes when enlarging a drawing
Scaling width and height by different amounts
The single most common enlargement failure. Force a differently-shaped drawing onto a surface you already own and it stretches or squashes, no matter how carefully you copy the interior.
Using a different number of cells in the two grids
The grid method only holds proportion when both grids have the same number of columns and rows. Add or drop a division on the enlargement and the cell mapping breaks.
Ignoring keystone with a projector
A projector that is not square to the wall throws a trapezoid, and the enlargement inherits the stretch. The error is invisible until the projector is off and the drawing looks subtly wrong.
Choosing a grid that is too coarse for the scale
The bigger the enlargement, the more a coarse grid leaves you guessing inside huge cells, and the more any misjudgement is magnified. Too few cells defeats the point at large scale.
Stopping at the enlarged outline
Every method here gives you a scaled placement, not a finished drawing. A blown-up outline with no value structure reads as flat, and enlargement exaggerates that emptiness.
Scaling a small study up to a four-foot canvas
Picture a common studio situation: a 6-by-8-inch charcoal study needs to become a four-foot painting for a show. Enlarging it freehand would be a gamble, so the method is a two-step one. First the diagonal — extend the study's diagonal, size the canvas so its corner lands on that line, and the frame is guaranteed to share the study's proportions. Then squaring up — a five-by-seven grid on a scan of the study (overlaid on screen, so the original is never marked), the same five-by-seven grid ruled large in vine charcoal on the canvas, and the drawing copied cell by cell. The scale factor here is eight (48 inches ÷ 6 inches), so one-inch study cells become eight-inch canvas cells. Twenty minutes of ruling and copying replaces an afternoon of freehand correction, and the enlargement holds because the ratio never varied. This is a made-up example to show the workflow, not a specific project.
I inscribe a quadrangle of right angles, as large as I wish, which is considered to be an open window through which I see what I want to paint.— Leon Battista Alberti, On Painting, 14353
Frequently asked questions
What is the easiest way to enlarge a drawing without distorting it?
The grid method, also called squaring up, is the most reliable way to enlarge a drawing by hand without distortion. You divide the original into a grid, draw a proportionally larger grid with the same number of cells on the new surface, and copy the drawing one cell at a time. Because the ratio between the two grids is constant across the whole image, every line enlarges by exactly the same factor, so proportion holds. It needs nothing but a ruler and pencil, or the free Grid Maker Pro tool to overlay the grid on screen without marking the artwork.
How do I keep the aspect ratio when enlarging a drawing?
Enlarge width and height by the same factor. If the original is 6 by 8 inches and you scale the width by four to 24 inches, the height must also be scaled by four, to 32 inches, so the shape of the rectangle stays the same. The diagonal method makes this automatic: any rectangle whose corner sits on the extended diagonal of the original shares its exact proportions. If you enlarge width and height by different amounts the drawing stretches or squashes.
How do you enlarge a drawing for a mural?
For a wall-sized enlargement the grid method scales to any size — draw a large chalk grid on the wall and copy the gridded drawing cell by cell. A projector throws the image up at full size in one step but needs a dark room and careful squaring to avoid keystone distortion. AR tracing pins the reference over the wall through a phone camera at whatever size you set, with no projector and no dark room, which is often the least awkward option on a tall or bright wall.
Why does enlarging a drawing by eye usually go wrong?
Freehand enlargement compounds error. A small misjudgement near the top of the drawing grows with the scale factor and pushes everything below it out of place, so the finished enlargement drifts further and further from the original the lower you go. Any method that keeps a fixed ratio — the grid, the diagonal, a projector, or AR — removes that compounding by measuring instead of guessing.
What is the scale factor and how do I calculate it?
The scale factor is how many times bigger the enlargement is: new width divided by original width. A 6-inch drawing going to 24 inches has a scale factor of four. Apply the same factor to the height and to your grid cell size — one-inch cells become four-inch cells — and the whole drawing enlarges by four with no distortion.
How is squaring up different from the grid method?
They are the same technique under two names. "Squaring up" is the academic and fresco-workshop term for dividing a drawing into squares and copying it into a proportionally larger grid; "the grid method" is the everyday name for it. Both describe copying cell by cell between two grids with the same number of divisions.
Can I enlarge a drawing without drawing lines on the original?
Yes. Scan or photograph the drawing and overlay a grid on the digital copy with the free Grid Maker Pro tool — the grid sits on the screen image, so the artwork itself is never marked. You then rule the enlarged grid on your new surface and copy from the screen. The diagonal and copier methods also leave the original untouched.
What is the diagonal method for scaling up?
Draw the diagonal of the original rectangle and extend it. Any larger rectangle whose far corner sits on that extended line shares the original's exact proportions, because rectangles on a shared diagonal are scaled copies of each other. It is the fastest way to size a canvas or sheet to match a drawing before you enlarge the interior.
How do I enlarge a drawing bigger than my printer paper?
Use the "poster" or "tile" option in your print dialog or PDF viewer. It enlarges the image and splits it across a grid of sheets you trim and tape together. Because the software holds the ratio, the tiled enlargement is undistorted; the only work is trimming margins and aligning the pieces.
Do I need a projector to enlarge a drawing?
No. The grid method enlarges to any ratio with only a ruler and pencil, and for large or odd surfaces an AR app scales the overlay up through a phone camera. Projectors are useful for murals but expensive and demand a dark room and careful squaring; many artists never need one.
Is enlarging a drawing the same as transferring it to canvas?
They overlap but are not the same job. Enlarging is about changing the size while keeping proportion; transferring is about getting the image onto a particular surface. Often you do both at once — squaring up enlarges and transfers in one pass. For the surface side of the problem, see the guide on how to transfer a drawing to canvas.
Is the Grid Maker Pro AR app free?
It has a free tier of three AR traces of your own photo every month. Paid plans are $29.99 a year, $6.99 a month, or $79 once for lifetime. The separate Grid Maker Pro web tool — the 82 composition overlays in your browser — is free forever, with no account. The app is a different product for the enlargement job a browser cannot do, not a paywall on the free tool.
Does my drawing leave my device when I use the tools?
No. The free web tool renders overlays on your device with no upload, and the AR app processes your image on-device. Your drawing stays with you in both cases.
References
- On the compounding of proportional error in freehand enlargement: the principle that scaling multiplies both distances and misjudgements is a direct consequence of similar-figure geometry; the constant-ratio grid removes it by re-anchoring each cell. See the commensuration discussion in Alberti (1435), ref. 3.
- Edwards, Betty. Drawing on the Right Side of the Brain. Definitive 4th edition. Tarcher/Penguin (2012). ISBN 978-1-58542-920-2. On perception, the "symbol system" obstacle, and learning to see relationships rather than draw stored symbols — the difficulty enlargement magnifies.
- Alberti, Leon Battista. On Painting (Della Pittura, 1435). Translated by Cecil Grayson, introduction by Martin Kemp. Penguin Classics (1991 ed.). ISBN 978-0-14-043331-3. Book One on commensuration and Book Two on the gridded veil (velum) and the "open window" framing quadrangle — the origin of squaring up.
- On the grid / squaring-up procedure and constant-ratio enlargement: standard atelier and craft-teaching practice, described consistently across art-instruction references such as Mont Marte's and Artists Network's transfer-and-enlargement guides. The rule — same cell count, cells multiplied by the scale factor — preserves proportion across the whole image.
- On the diagonal method for proportional scaling: rectangles sharing an extended diagonal are geometrically similar (similar triangles), so a corner placed on the diagonal yields a rectangle of identical aspect ratio. This is the standard framer's and photographer's construction for resizing without distortion.
- On projection, grid transfer, and keystone correction in mural and scenic painting: standard mural-studio workflow, in which cartoons are scaled to walls by grid or projected image and squared to avoid trapezoidal distortion.
- On "squaring up" as the documented enlargement procedure of Renaissance fresco and cartoon transfer: the term and technique are described in institutional conservation and technique literature, including the J. Paul Getty Museum's and Google Arts & Culture's accounts of transferring and scaling cartoons.
- Müller-Brockmann, Josef. Grid Systems in Graphic Design (Raster Systeme für die visuelle Gestaltung). Niggli (1981). ISBN 978-3-7212-0145-1. On the grid as a tool for clarity and economy that frees rather than constrains the maker's judgement.
- Loomis, Andrew. Drawing the Head and Hands. Viking Press (1956); Titan Books reprint (2011). ISBN 978-1-84856-680-6. On construction and proportion as the literacy that frees imaginative and refined drawing once placement is set.
- Kemp, Martin. The Science of Art: Optical Themes in Western Art from Brunelleschi to Seurat. Yale University Press (1990). ISBN 978-0-300-05241-6. The standard scholarly survey of proportional, optical, and perspectival devices in Western art, including scaling and transfer instruments.
Update log
- — Published. Full guide to enlarging a drawing: the grid method with the scaling math, the diagonal method, projectors, print tiling, AR, keeping the aspect ratio, and choosing by scale.
From the screen to the page
Everything here is free in your browser and stays that way. When a reference has to leave the screen and land on real paper, canvas, or a wall, a browser has no camera to register it to the surface. The Grid Maker Pro AR app adds exactly that — hold your phone over the paper and trace your own photo directly, with the same 82 composition overlays alongside.
Meet the AR tracing app → Free web tool, free forever · AR tracing is the separate paid appScale your drawing up, cleanly
Drop a drawing into the free browser tool to square it up with a grid overlay and check its proportions before you enlarge. Reach for the AR app when the enlargement is a wall, a large canvas, or anything a browser cannot reach. Your image stays on your device, either way.
Open the free grid tool →One brief every other Tuesday.
One overlay, one historical reference, one workflow note. Studio notes from working artists, photographers, and designers. No spam, unsubscribe in two clicks.