
Tattoo stencil transfer methods
Every tattoo starts twice: once as a design decided on skin, and once as a line the needle follows. This guide covers both. The physical guide is almost always a thermal stencil, a spirit-transfer stencil, or a freehand marker drawing, applied with proper hygiene and stencil solution — that workflow is unchanged and this page walks it step by step. The part that trips people up is the other one: sizing and positioning the design on the body before any stencil is made. That is where a phone and augmented reality genuinely help — as a planning aid, not a replacement for the sterile stencil that goes on the skin.
One of the guides behind the 82 composition overlays every visual artist should know and use.
- What this covers
- Stencil transfer + design placement
- Standard studio method
- The thermal (thermofax) stencil
- Older hand method
- Spirit / transfer paper
- No-stencil method
- Freehand marker drawing
- Where AR fits
- Placement, sizing, flash layout — planning only
- What AR does not do
- The sterile line on the skin
In short
- A tattoo stencil is the design's outline transferred onto the skin so the artist has an accurate line to tattoo over. The physical stencil is made and applied the normal way — this page walks the whole workflow.
- Three physical methods dominate: the thermal (thermofax) stencil made from a finished line drawing, the older spirit / transfer-paper hand-traced stencil, and freehand drawing directly on the skin with a surgical marker.
- All of them use stencil transfer solution on properly prepped skin, and all of them must follow the studio's standard hygiene and single-use practice. Skin prep and hygiene are non-negotiable and are a matter for the artist's training, not this guide.
- The genuinely hard planning problem is placement and sizing — where the design sits on the body and how big it is. This is where augmented reality helps, by pinning the design on a mock-up or on the skin through a phone camera so artist and client can agree on scale and position before a stencil is made.
- AR is a planning aid, not a stencil. It does not put a tattooable line on the skin and does not replace the sterile thermal-stencil workflow. It also helps lay out flash sheets before printing. The free Grid Maker Pro web tool stays free forever in your browser; the AR capability lives in a separate app.
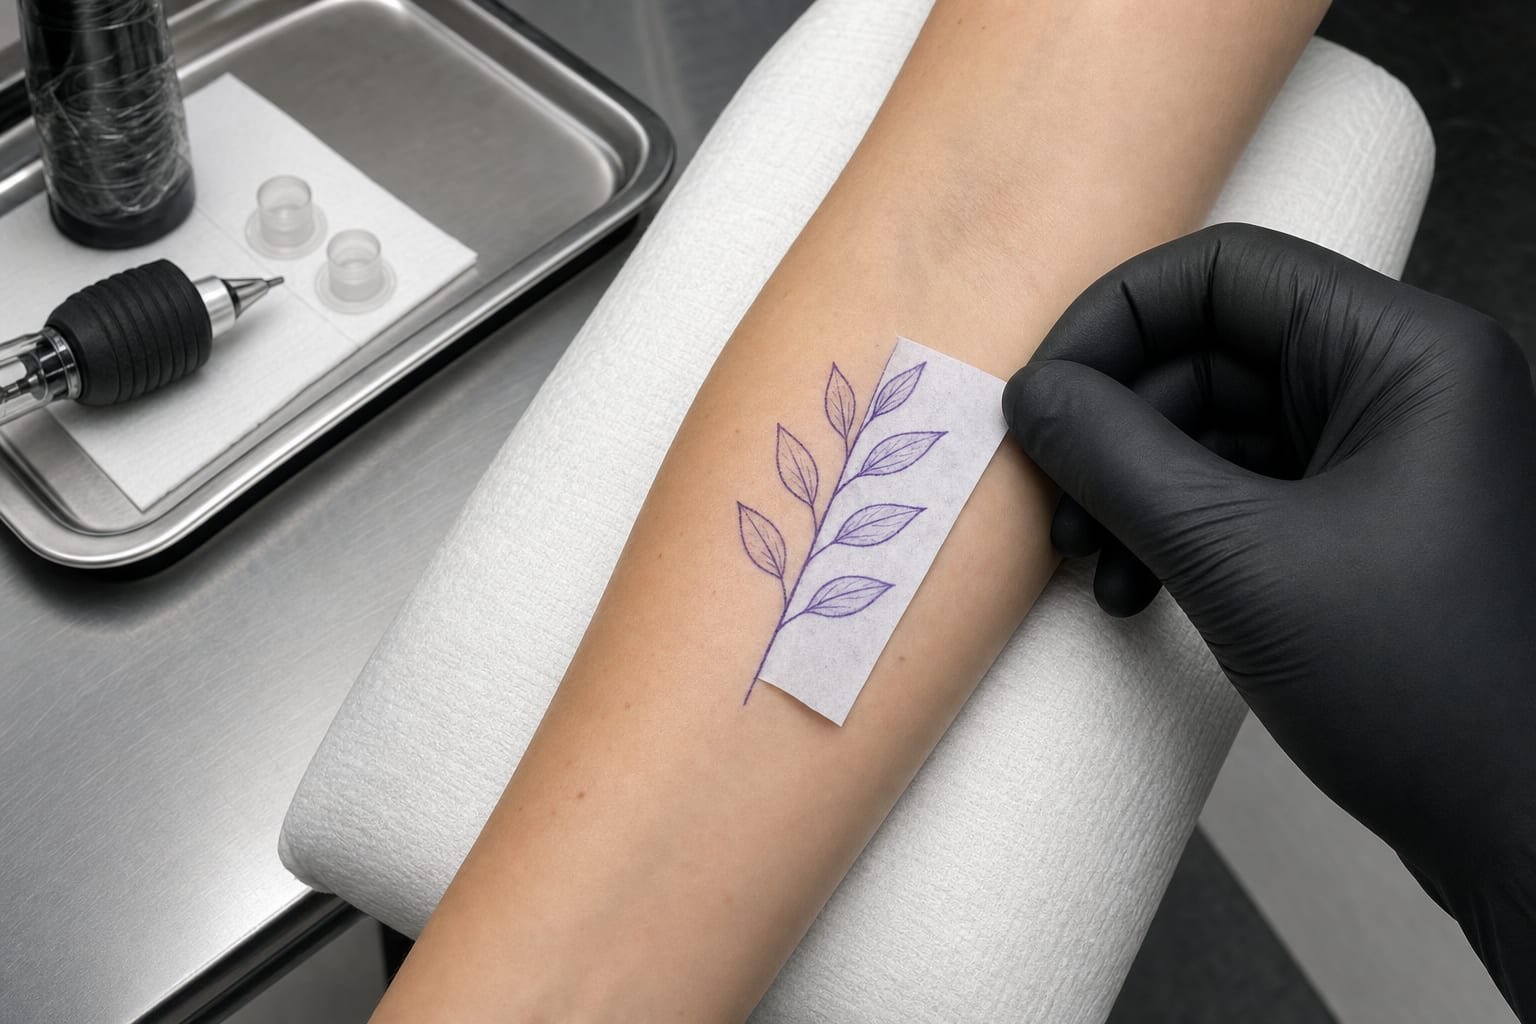
What a tattoo stencil actually is — and the two problems it hides
A tattoo stencil is nothing more mysterious than the design's outline, copied onto the skin so the artist can follow it accurately with the machine. Without a guide, only the most experienced freehand artists can hold a complex design true across a curved, moving surface. The stencil turns "draw this from memory on skin" into "trace the lines that are already here" — the same logic that makes the grid method and every other transfer technique useful across drawing.
Tattooing itself is ancient — preserved tattoos on the mummified body known as Ötzi date to over five thousand years ago, and the practice appears independently across many cultures.1 The word tattoo entered English from Polynesian languages in the eighteenth century.1 For most of that history there was no stencil in the modern sense: designs were drawn or pricked directly. The transferable paper stencil is a relatively recent, industrial convenience.
Here is the thing most guides skip. "Getting a tattoo onto skin" is really two problems wearing one coat, and they are solved by completely different tools:
- The transfer problem — putting an accurate, clean line onto the skin for the needle to follow. This is solved physically: a thermal stencil, a spirit-transfer stencil, or a freehand marker drawing, applied with stencil solution on prepped skin. It is a craft with hygiene rules, and no app changes it.
- The placement problem — deciding where the design goes, how big it is, which way it flows, and how it will sit on that specific body. This is a judgement and communication problem, argued out between artist and client, often with the stencil repositioned several times before anyone is happy.
The rest of this guide takes them in that order: first the physical transfer methods as they are actually done, then the placement problem and the honest, bounded role that augmented reality plays in it.
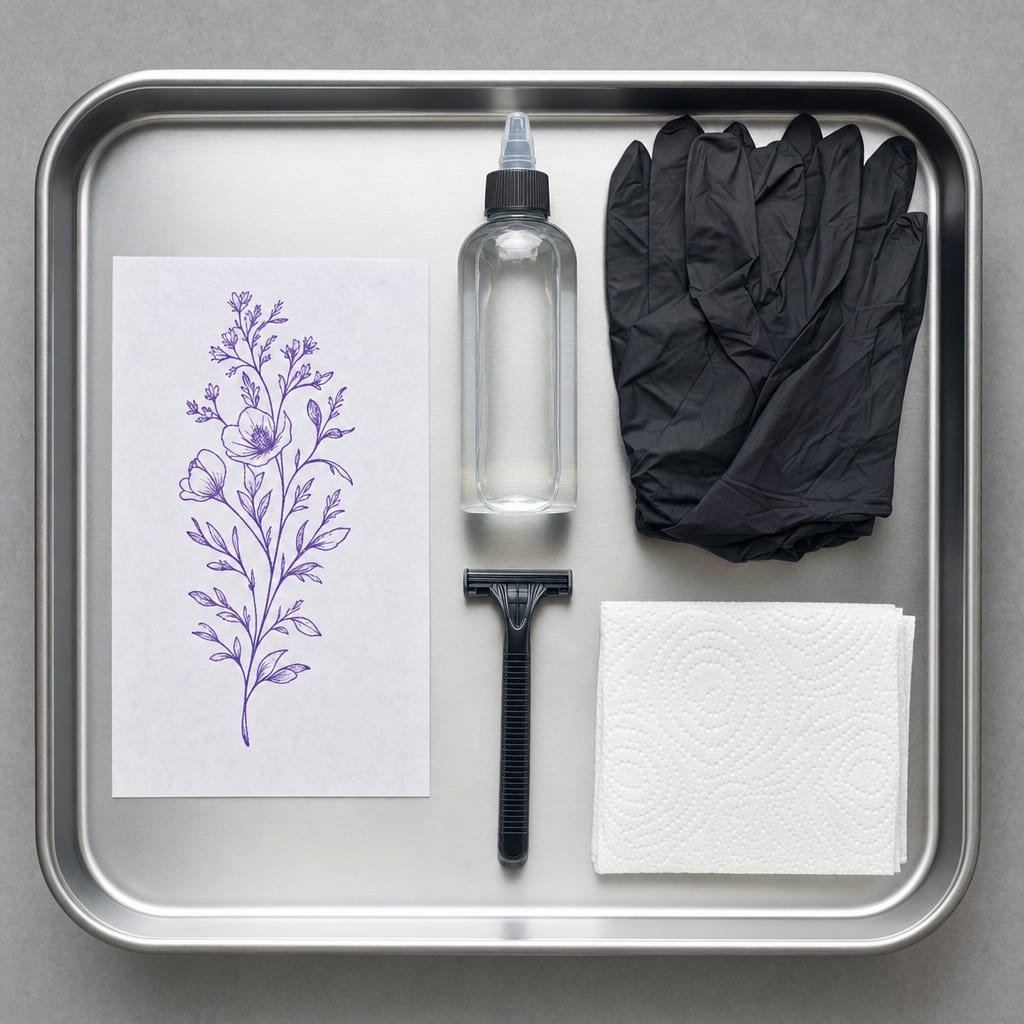
The thermal stencil workflow, step by step
The thermal stencil is the modern studio default. It borrows the technology of the thermal-fax copier — a machine that reproduces images with heat rather than ink — which was invented in the mid-twentieth century and later adapted so tattoo artists could copy a line drawing onto special multi-layer stencil paper in one pass.2 Before these units were common, every stencil had to be hand-traced; the thermal copier made a clean, repeatable stencil a matter of seconds.
What you are making
Thermal stencil paper is a small stack of layers: the top tissue you draw or copy on, a backing sheet, and a sheet of purple carbon in between. When heat (from a thermal-copier) or firm pressure (from hand-tracing) passes over a line, the carbon transfers to the underside of the top sheet, producing a purple mirror of your design. That purple line is what will end up on the skin.
The workflow
- Finalise the line drawing at true size. Only lines copy to a thermal stencil, so reduce the design to clean, closed outlines and decide the exact size it will be tattooed before this stage. Sizing changes here are cheap; sizing changes after the stencil is on the skin are not.
- Make the thermal stencil. Feed the line drawing and a sheet of thermal stencil paper through the thermal-copier unit. The heat copies the lines onto the stencil in purple carbon. (The older hand-traced version, covered in the next chapter, does the same job without a machine.)
- Prep and clean the skin. Clean the area, remove hair, and follow the studio's standard skin-preparation and hygiene procedure so the stencil sits on a clean, dry surface.
- Apply stencil solution. Spread a thin, even layer of stencil transfer solution on the prepped skin and let it become tacky. The solution is what makes the purple lines adhere and stay put during the tattoo.
- Position and press the stencil. Place the stencil carbon-side down in the planned position and orientation, press it flat and evenly with no dragging, then lift it straight off. This positioning step is the placement problem made physical — and where an AR preview earns its keep, by settling the position argument before you reach this point.
- Let it set and check it. Let the transferred lines dry fully before touching them, then check placement, symmetry, and flow with the client in a mirror. If it is wrong, it comes off and goes on again — better now than mid-tattoo.
Before a design ever reaches the stencil stage, its composition — how the elements sit inside their outline, where the focal point falls — is worth checking on screen. Drop the artwork into the free tool and lay a thirds or golden overlay over it to sanity-check the arrangement while it is still just a drawing.
The thermal stencil is fast, consistent, and reproducible — you can make ten identical stencils of a flash design in a minute. Its limits are that it copies only lines, not tone, and it needs the copier unit. When there is no machine, or the artist prefers to work by hand, the older method still holds up, and that is the next chapter.
Spirit stencils and transfer paper
Before thermal copiers, and still today when an artist wants full control, stencils were made by hand. The principle is the same as any transfer method: a coated sheet offsets a line under pressure. Only the medium and the destination change.
Hectograph / spirit transfer paper
The hand-traced tattoo stencil uses transfer paper with a coloured hectograph or spirit-based coating on the back. You place the paper under your original drawing, trace over the lines firmly, and the coating offsets a mirrored copy onto the sheet's underside — exactly the same offset principle as the graphite-transfer method used across drawing and painting.3 That copied line is then transferred to the skin with stencil solution in the same way as a thermal stencil. The purple line you see on skin in both methods is doing the identical job; only how it was made differs.
Why some artists still trace by hand
A hand-traced stencil lets the artist edit as they go — thickening a line, simplifying a cluttered area, adjusting proportions to suit the body part — in a way a straight machine copy does not. It costs nothing but paper and time, needs no equipment, and is the fallback whenever a copier is unavailable. Its trade is speed and repeatability: hand-tracing ten identical flash stencils is tedious where a thermal copier is instant.
Both stencil methods share one assumption: you already have a finished line drawing at the right size. The next method throws that assumption out entirely.
Freehand marker drawing on the skin
Not every tattoo begins as a paper design. Many experienced artists — especially in large-scale, body-flowing styles like Japanese irezumi, blackwork sleeves, and organic ornamental work — draw the design straight onto the skin with a surgical skin-marker, no stencil at all. This is the freehand approach, and it is the oldest way of all, dressed in a modern marker.
Why freehand, and when
The argument for freehand is flow. A stencil is flat; a body is not. A design drawn directly on the skin can be made to wrap a bicep, follow the line of a spine, or bend around a calf in a way a flat stencil applied to a curved surface fights against. For pieces where the composition is the way it sits on the body, freehand lets the artist compose in three dimensions from the start. It demands a confident, experienced hand — the safety net of a printed line is gone — which is why it is not a beginner's method.4
The middle path
Most working artists mix the two. A common approach is to freehand the major placement and flow lines directly on the skin — the gesture of the piece — then stencil or hand-draw the detailed sections that need precision. The freehand marks establish where everything sits on the body; the stencil handles the parts where an exact line matters. In that hybrid, the marker is doing the placement job and the stencil is doing the transfer job — the two problems from Chapter 1, handled by the two tools each is best at.
Freehand or stencil, the underlying design still benefits from a composition check before it touches skin. Overlay a proportional grid on the artwork to confirm the focal point and balance read well at the size you plan to tattoo.
Freehand solves the flow side of placement beautifully, but it front-loads all the risk onto the artist's hand and eye. That is exactly the gap a placement preview can de-risk — letting artist and client see the sizing and position before the marker or stencil commits. Which brings us to the placement problem proper.
The placement problem: where a design goes on the body
Ask an experienced artist what goes wrong with tattoos, and placement will be near the top of the list long before line quality. A technically perfect stencil in the wrong position, at the wrong size, or fighting the flow of the muscle produces a tattoo the client quietly regrets. Placement is permanent in a way a stencil is not, and it is judged against several things at once.
What placement has to satisfy
- Body flow. The design should move with the anatomy — following the length of a forearm, wrapping a shoulder, respecting the centre line of a spine — rather than sitting on it like a sticker.
- Scale relative to the person. The same design reads differently on a slim wrist and a broad back. Size is chosen against the specific body, not in the abstract.
- How it reads at that size. Fine internal detail that looks crisp on paper can close up and blur when tattooed small; the design has to hold together at its actual dimensions.
- Movement and ageing. Skin stretches and moves; a placement that looks right static can distort in motion, and lines spread over years.
Traditionally, all of this is settled by physically positioning the stencil and looking. The artist applies the stencil, the client checks it in a mirror, and — if anything is off — it comes off and goes on again, sometimes several times. It works, but it is slow, and every re-application is another round of skin prep and solution.4
This is the problem worth solving faster, and it is the one where a screen genuinely helps — not by replacing the stencil, but by letting everyone see the decision before the physical process begins. That is the honest, bounded role of augmented reality, and it is the next chapter.
How AR helps with placement and sizing — before the stencil
Augmented reality does one thing well for tattooing, and it is worth stating its scope precisely before anything else: it previews a design on the body, at scale, before you commit to a stencil. That is a planning and communication aid. It is not a stencil, it does not put a tattooable line on the skin, and it does not touch the sterile physical workflow described above. Held to that scope, it is genuinely useful; stretched beyond it, it is a false promise.
What AR placement actually does
An AR app composites the design over the live camera view and pins it to the surface it sees, so you can point the phone at the arm, the back, or a printed mock-up and see the artwork sitting there at a chosen size and position. Pinch to scale, drag to reposition, and both artist and client watch the same preview update in real time. The same overlay logic that lets an AR tracing app lock a reference over a canvas is what lets it lock a design over a limb.
Where it saves real time and grief
- Sizing conversations. "How big is that going to be?" is answered by looking rather than guessing, before any solution touches skin.
- Position agreement. The client sees the piece on their own arm at the proposed spot and angle, so the choice is made together and the artist is not re-applying a stencil three times.
- Composition at true scale. Detail that will not hold at a small size shows up in the preview, prompting a redraw before the stencil, not after.
- Client confidence. Seeing it in place calms the pre-commitment nerves that make people hesitate on permanent work.
The honest limits — stated plainly
AR placement is a preview, and previews lie a little. Tracking can drift on smooth, featureless skin. A phone screen is not a colour-accurate proof, and lighting changes how a design reads. Most importantly, the preview is a picture, not a stencil: after everyone agrees on placement, the artist still makes and applies a physical thermal, spirit, or freehand stencil with proper hygiene. AR shortens the argument; it does not do the craft. Anyone selling an app as a replacement for the sterile stencil workflow is overselling it, and this guide will not.
The digital design to thermal stencil pipeline
Most tattoo designs are now drawn or refined digitally — on a tablet, in a drawing app — and there is a clean, well-worn path from that digital file to a physical stencil on the skin. Understanding the whole pipeline shows exactly where a placement preview slots in and where it hands off to the craft.
- Draw or refine the design digitally. Line art is produced or cleaned up on a tablet, kept as crisp, closed outlines because that is what a stencil needs.
- Check composition on screen. Overlay a grid on the artwork to confirm the focal point, balance, and internal proportion read well — the free Grid Maker Pro tool does this in the browser with nothing uploaded.
- Preview placement and scale on the body (AR). Pin the design on the client's arm or a mock-up through the camera, agree on size and position, and lock the final dimensions. This is the planning aid doing its job — and its job ends here.
- Print the line art at the agreed size. Output the artwork at the exact dimensions the AR preview settled on, so what you stencil matches what everyone approved.
- Make the physical stencil. Run the printout through a thermal-copier onto stencil paper, or hand-trace it onto spirit paper. From here the craft takes over.
- Apply with solution on prepped skin. Follow the physical workflow from Chapter 2, with the hygiene practice that governs it.
The handoff is the whole point. Digital tools — composition check, AR placement, precise printing — do the planning up to the exact moment the stencil is made. The stencil and everything after it is physical craft. Keeping that line clear is what makes the digital half genuinely helpful instead of a distraction.
Step 2 of that pipeline runs entirely in your browser. Drop the line art in, overlay a grid, and confirm the design is balanced and its focal point sits where you want before you print anything.
AR for flash sheet layout
There is a second, quieter place AR and overlay tools help a tattoo practice, and it has nothing to do with skin: laying out flash sheets. Flash is the classic sheet of ready-to-tattoo designs — the walls of images artists offer as pick-and-point options — and it has been part of tattoo culture since the trade's early studio days.5 A good flash sheet is a composition problem: many small designs arranged on one page so the whole reads as balanced and each piece has room to breathe.
Laying out a sheet
Arranging a dozen designs on a sheet is exactly the kind of grid-and-balance task the free web tool was built for. Overlay a grid on your working sheet to keep spacing even, align designs to a consistent baseline, and check the overall composition so the sheet looks intentional rather than scattered. A well-gridded flash sheet also scales and prints predictably, which matters when the same designs will later be stencilled.
Treat a flash sheet like any layout: drop it into the tool, switch on a square grid, and space the designs to the grid so the page reads as a deliberate set rather than a pile.
Previewing flash on the body
AR extends the same idea to the client conversation: a design chosen off a flash sheet can be previewed on the client's arm at scale before it is stencilled, so a walk-in can see the piece in place in seconds. Again, the boundary holds — the preview helps choose and size; the stencil and the tattoo happen the normal way. For more on composing many elements in one frame, the tattoo composition guide goes deeper into arranging designs for the body and the sheet.
When AR fits a tattoo workflow — and when it does not
Being honest about a tool means being honest about where it does not belong. AR placement is a real help for some parts of tattooing and irrelevant to others. The table sorts it out, and the plain answer follows.
| Task | Best tool | Does AR help? | Why |
|---|---|---|---|
| Deciding size & position on the body | AR placement preview | Yes — its core use | See the design on the body at scale, decide together, avoid re-applying stencils |
| Checking composition of the design | Free grid overlay tool | Indirectly | Grid overlay on the artwork, done in the browser before printing |
| Laying out a flash sheet | Grid overlay tool | Somewhat | Even spacing and balance across many small designs |
| Making the physical stencil | Thermal copier / spirit paper | No | A physical, purple-carbon line — no app produces it |
| Applying the stencil to skin | Stencil solution + trained hands | No | A hygiene-governed craft on prepped skin |
| Freehand flow on the body | Surgical skin-marker | No (AR can inform it) | Drawn directly with an experienced hand; a preview can guide the plan |
| The tattoo itself | The artist | No | Line, shading, colour, and healing are entirely the artist's craft |
The plain answer
AR fits at the front of a tattoo workflow — planning, sizing, placement, flash presentation — and stops the moment the process becomes physical. If a tool markets itself as replacing your stencil or your hygiene, treat that as a red flag. If it presents itself as a planning aid that helps you and the client agree on placement before you make a stencil, that is exactly what it is for, and it earns its place. Grid Maker Pro's own framing follows that line deliberately: a free browser tool for composition and grids, and a separate app for AR placement — never a paywall on the free tool.
Getting started, without overcomplicating it
If you are an artist adding a placement preview to how you already work, the sensible order is: keep your physical stencil workflow exactly as it is, and bolt planning tools onto the front of it. Nothing about the thermal stencil or the hygiene practice changes.
A practical starting sequence
- Start in the browser, free. Use the free Grid Maker Pro tool to check a design's composition and to lay out flash sheets. No account, nothing uploaded, works on any device.
- Add AR placement when you want it. Reach for the AR app when a client needs to see size and position on their own body before you make the stencil. It is a separate product for the one job a browser cannot do.
- Keep the craft unchanged. Thermal or spirit stencil, stencil solution, prepped skin, hygiene practice — all exactly as your training taught you. The digital tools stop at the print.
Where Grid Maker Pro fits
The free Grid Maker Pro web tool — 82 composition and drawing overlays, in your browser, free forever, no account — is the open front door: overlay grids on a design, check composition, lay out a flash sheet. What a browser cannot do is pin a design on a real arm at scale through the camera. That is a separate job, and it is what the Grid Maker Pro AR app is for — as a placement planning aid, on the honest terms this whole guide has kept.
The AR app, plainly
- A separate app for AR placement previews — not a paywall on the free tool. The browser tool stays free forever.
- A planning aid, not a stencil: it never contacts skin and does not replace the sterile thermal-stencil workflow.
- Built by Sujith Puthran, a working artist of more than 15 years.
- On Android via Google Play (com.gridmakerpro.app); an iOS version is planned.
- Runs on-device. Your design and reference photos stay on your phone.
- Free tier: 3 AR previews of your own photo every month, plus all 82 composition grids. Paid: $29.99 / year, $6.99 / month, or $79 once for lifetime.
See what the AR app does → · Grid Maker Pro for tattoo artists →
Common mistakes with stencils and placement
Deciding size after the stencil is on
Applying a stencil, then realising it is too big or too small, means removing it, re-prepping, and re-applying — sometimes more than once. It wastes solution, time, and the client's patience.
Stencilling a design that will not hold at size
Fine internal detail that looks crisp on paper can close up and blur when tattooed small. A technically clean stencil of an over-detailed design still ages badly.
Fighting the flow of the body with a flat stencil
A flat stencil pressed onto a strongly curved area can distort or refuse to lie flat, and a design that ignores the muscle's flow reads as stuck-on.
Treating an app as a replacement for the stencil
Believing a phone preview removes the need for a physical stencil or for hygiene practice is a serious misunderstanding of what AR does.
Skipping the composition check
Transferring an unbalanced design accurately just produces an accurate but poorly composed tattoo. The stencil locks in whatever it is given, flaws included.
The stencil only decides where the line goes. Everything that makes it a tattoo happens after — and none of it is on the paper.— A working principle of studio practice, on the difference between transfer and craft
Frequently asked questions
What is a tattoo stencil transfer?
It is the outline of a design copied onto the skin so the artist has an accurate guide to tattoo over. Most studios make the stencil on thermal stencil paper from a finished line drawing, apply a thin layer of stencil solution to prepped skin, press the stencil down carbon-side, and lift it away, leaving purple lines behind. The tattoo is then worked over that guide.
Can an app replace a physical tattoo stencil?
No. An AR or placement app is a planning aid for deciding size, position, and orientation before you commit. The physical guide the artist tattoos over is still a thermal stencil, spirit-transfer stencil, or freehand marker drawing applied with proper hygiene. AR helps artist and client agree on placement and scale; it does not put a sterile, tattooable line on the skin.
How do artists decide where a tattoo should sit on the body?
Placement is judged against the flow of the body part, the client's proportions, how the design reads at that size, and how it will move with the muscle. Traditionally the stencil is positioned by hand and checked with the client in a mirror, sometimes moved several times. An AR preview can shorten that back-and-forth by pinning the design on the body at scale before any stencil is made.
What is the difference between a thermal stencil and a spirit stencil?
A thermal stencil is made by running a line drawing and stencil paper through a thermal-copier, which copies the lines in one pass — fast and repeatable. A spirit stencil is hand-traced onto coated transfer paper, which is slower but needs no machine and lets the artist edit as they trace. Both end up as a solution-applied line on the skin; only how the line is made differs.
What is stencil transfer solution and why is it used?
Stencil solution is a thin liquid applied to prepped skin so the stencil's lines adhere and stay put during the tattoo. Without it, the transferred lines smudge or wipe away as the artist works. It is spread in a thin, even layer and allowed to become tacky before the stencil is pressed on.
Is freehand tattooing better than using a stencil?
Neither is simply better — they suit different work. Freehand marker drawing lets a design flow with the body in three dimensions and is favoured for large, body-following pieces, but it demands an experienced hand. Stencils give precision and repeatability. Many artists mix the two: freehand the flow, stencil the detail.
Does the AR app touch the skin or replace hygiene practice?
No. The AR app is a phone preview that never contacts skin. It helps decide where and how big a design should be. The sterile, tattooable line and all hygiene practice remain the trained artist's responsibility, exactly as before. Nothing on this page is medical or professional advice, and it does not replace an artist's training or local regulations.
Can I preview a tattoo on my own body before booking?
An AR placement app lets you pin a design on your arm or another body part through the camera at a chosen size, so you can see roughly how it would sit before committing. It is a rough preview, not a colour-accurate proof — lighting and screen limits mean the real tattoo will differ — but it is a good way to test size and position and to talk it through with an artist.
How does AR help with flash sheets?
Two ways. A grid overlay helps lay out many small designs on a sheet with even spacing and balance, done in the free browser tool. And a design chosen off a flash sheet can be previewed on the client's body at scale in AR before it is stencilled, so a walk-in sees the piece in place quickly.
Is the Grid Maker Pro AR app free?
It has a free tier of three AR previews of your own photo every month, plus all 82 composition grids. Paid plans are $29.99 a year, $6.99 a month, or $79 once for lifetime. The separate Grid Maker Pro web tool — the 82 overlays in your browser — is free forever, with no account. The app is a different product for the placement job a browser cannot do, not a paywall on the free tool.
Do my design or photos leave my device when I use the tools?
No. The free web tool renders overlays on your device with no upload, and the AR app processes your images on-device. Your design and reference photos stay with you in both cases.
I am new to tattooing — can I follow the stencil steps here to tattoo someone?
No. This guide is general information about how stencils are made and applied, not instruction to tattoo. Tattooing safely requires hands-on training, bloodborne-pathogen certification, and compliance with local regulations. Learn the craft through a proper apprenticeship and licensing pathway, not a web article.
References
- "Tattoo." Wikipedia, The Free Encyclopedia. On the antiquity of tattooing (including the Iceman "Ötzi", dated to over five thousand years ago) and the entry of the word tattoo into English from Polynesian languages in the eighteenth century. en.wikipedia.org/wiki/Tattoo (accessed 2026-07-01).
- "Thermal-transfer printing" and "Thermofax." Wikipedia, The Free Encyclopedia. On the thermal (heat-based) copying process invented in the mid-twentieth century whose stencil-copier descendants are used to make tattoo thermal stencils. en.wikipedia.org/wiki/Thermal-transfer_printing (accessed 2026-07-01).
- On the offset-transfer principle common to hectograph/spirit transfer paper and graphite transfer: the shared mechanism, in which pressure offsets a coating from the back of a sheet onto the surface beneath, is described in this site's general transfer-methods guide, How to trace a photo onto paper, and is a standard studio technique across drawing and stencil-making.
- On placement judgement, mirror-checking, and freehand versus stencil practice: general professional studio practice, in which the stencil is positioned by hand and reviewed with the client, and freehand marker drawing is used for body-flowing work by experienced artists. Described in general terms here; specific technique and hygiene are matters for professional training, not this article.
- "Flash (tattoo)." Wikipedia, The Free Encyclopedia. On flash as pre-drawn, ready-to-tattoo designs displayed in studios, part of tattoo culture since its early commercial studio era. en.wikipedia.org/wiki/Flash_(tattoo) (accessed 2026-07-01).
This article is general information about tattoo transfer and design tools. It is not medical, safety, or professional-training advice, and it does not instruct anyone to tattoo. Safe tattooing requires hands-on training, appropriate certification, and compliance with local regulations.

Update log
- — Published. The thermal and spirit stencil workflows, freehand marker drawing, the placement problem, AR's bounded role in placement and flash layout, the digital-to-stencil pipeline, and the honest limits of an app in a tattoo workflow.
On this page
1. Two problems in one 2. The thermal stencil 3. Spirit & transfer paper 4. Freehand marker drawing 5. The placement problem 6. How AR helps placement 7. Design → stencil pipeline 8. AR for flash layout 9. When AR fits (and not) 10. Getting started Common mistakes FAQ Related guides References AuthorNotes from the studio · Three views on stencils and placement
Illustrative composites of how these tools get used in practice — not quotes from named individuals.
Thermal stencil for anything detailed, every time — it is fast and it is the same line twice if I need it. The machine copies; my hands do the rest.
The placement argument used to take three stencil applications. A quick preview on the client's arm ends it in one — then the stencil goes on properly, once.
Big body-flow pieces I freehand with a marker — no flat stencil holds that. The preview helps me and the client see the size before I draw a single line.
From the screen to the page
Everything here is free in your browser and stays that way. When a reference has to leave the screen and land on real paper, canvas, or a wall, a browser has no camera to register it to the surface. The Grid Maker Pro AR app adds exactly that — hold your phone over the paper and trace your own photo directly, with the same 82 composition overlays alongside.
Meet the AR tracing app → Free web tool, free forever · AR tracing is the separate paid appPlan the design, keep the craft
Check composition and lay out flash in the free browser tool. Reach for the AR app to preview a design's size and placement on the body before you make the stencil. The sterile stencil workflow stays exactly as it is — the tools only help you plan it.
Open the free grid tool →One brief every other Tuesday.
One overlay, one historical reference, one workflow note. Studio notes from working artists, photographers, and designers. No spam, unsubscribe in two clicks.