If you’ve ever struggled with drawing proportional faces or figures, you’re not alone. Fortunately, Andrew Loomis developed a systematic approach to understanding human proportions that has helped generations of artists. When combined with GridMakerPro’s custom grid capabilities, the Loomis method becomes even more powerful and accessible.
What is the Loomis method?
Andrew Loomis was a renowned American illustrator whose instructional books, particularly “Drawing the Head and Hands” and “Figure Drawing for All It’s Worth,” have become essential resources for artists. The Loomis method breaks down the complex structure of the human head and body into simple geometric shapes and proportional relationships.
The core principle is elegant: by understanding the underlying construction and proportions, you can draw heads and figures from any angle with consistent accuracy.
Why combine Loomis with custom grids?
While the Loomis method provides the structural framework, custom grids add a layer of precision that helps you:
- Verify your proportional relationships are correct
- Maintain consistency across multiple drawings
- Bridge the gap between the idealized Loomis construction and your reference photos
- Speed up the learning process by seeing exactly where proportions align
Think of it this way: Loomis gives you the rules, and custom grids give you the measuring tape.
Understanding basic head proportions with Loomis
Before we dive into custom grids, let’s review the fundamental Loomis head proportions:
The classic head construction:
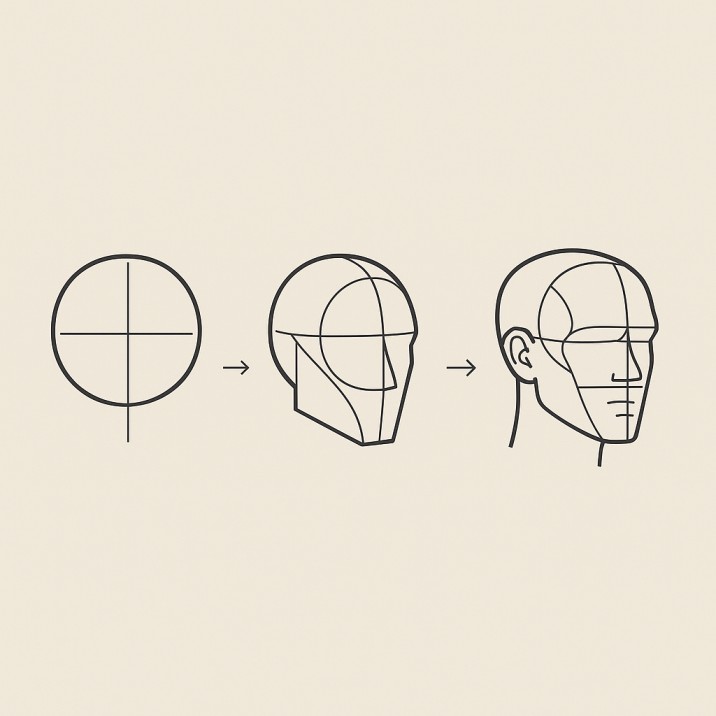
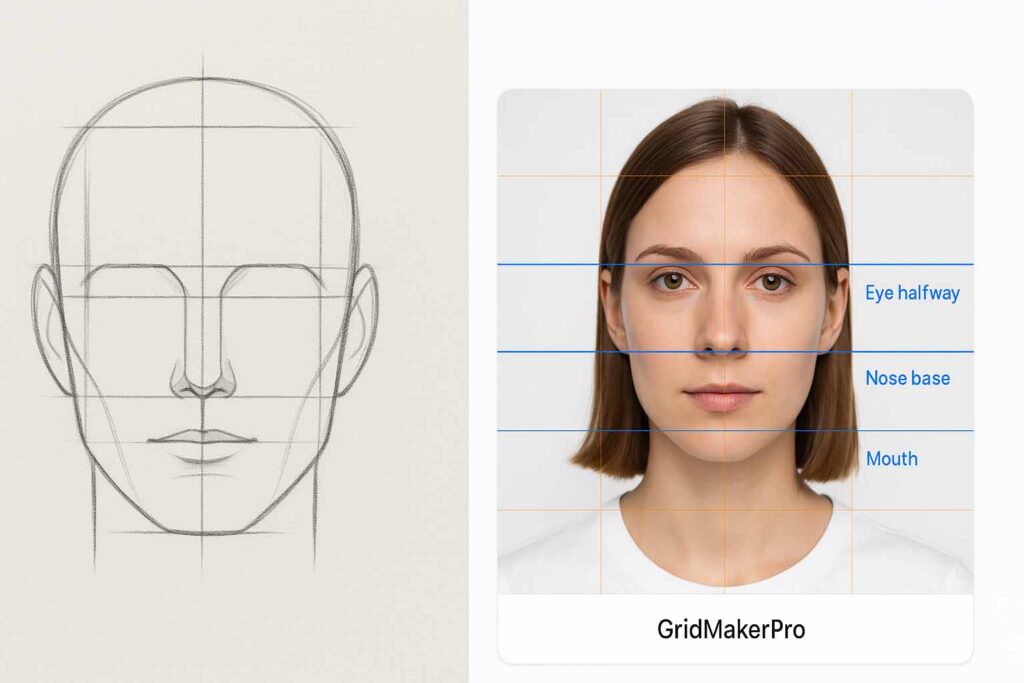
The head can be simplified into a sphere (the cranium) with a modified wedge attached (the jaw and facial plane). Key proportional landmarks include:
- The head is roughly 3.5 heads tall from chin to crown when including the neck
- The eyes sit approximately halfway down the head
- The bottom of the nose aligns with the bottom third division
- The mouth sits roughly one-third of the way between nose and chin
- The ears align vertically with the eyebrow to the nose base
- The width of the head is about two-thirds of its height
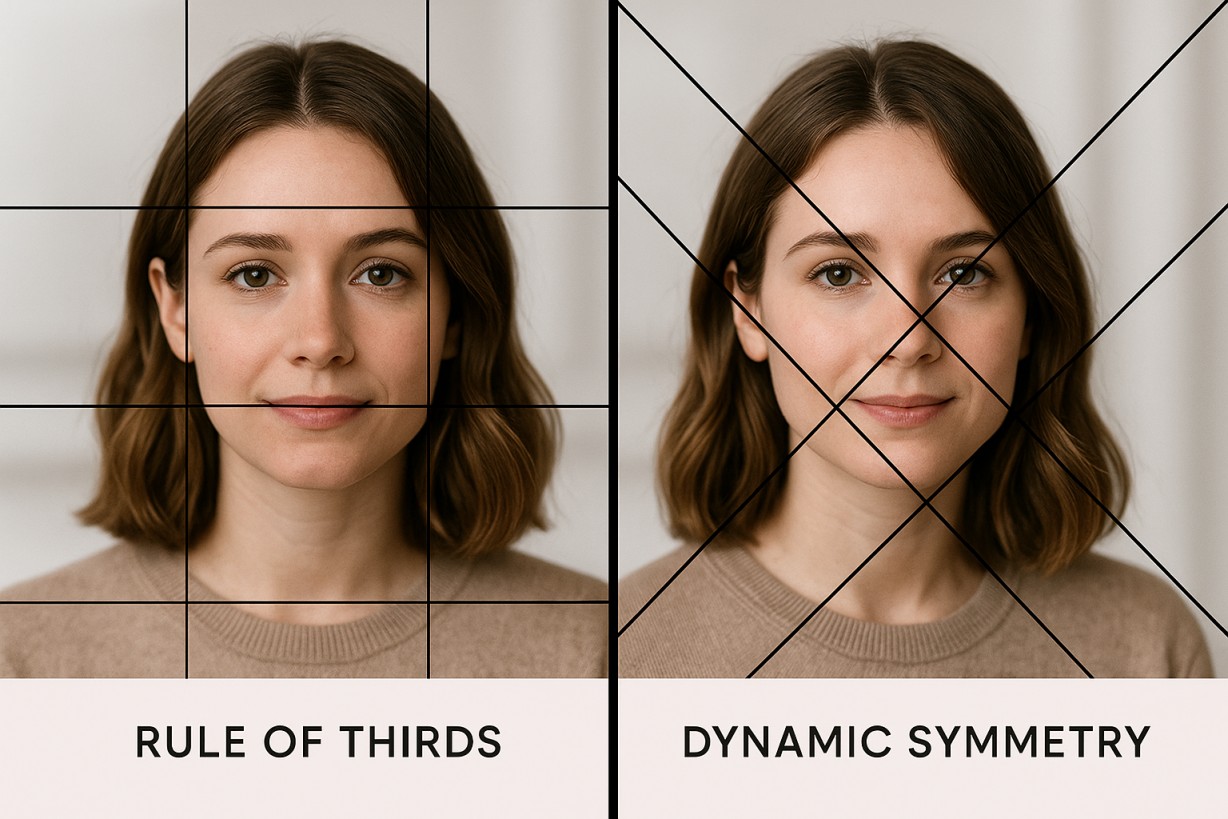
These are idealized proportions—real faces vary, which is where reference photos and custom grids become invaluable.
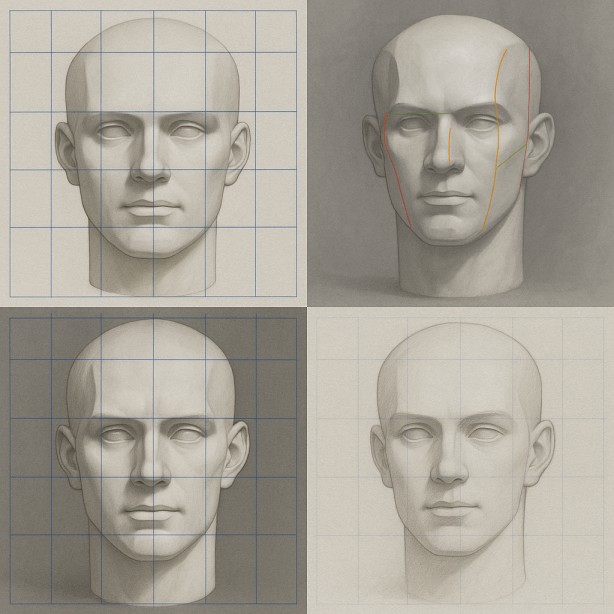
Setting up custom grids for the Loomis method
GridMakerPro allows you to create grids that align perfectly with Loomis proportional divisions. Here’s how to approach it:
For frontal views:
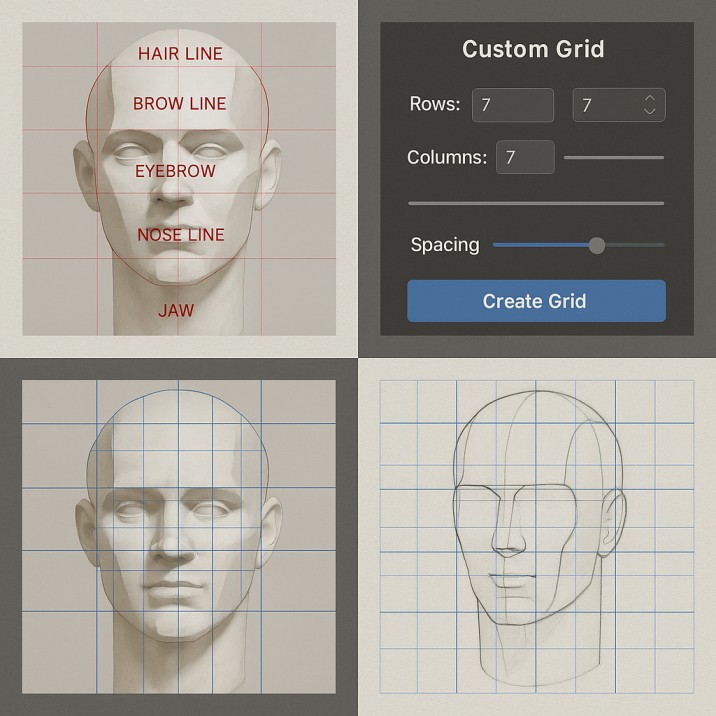
Create a custom grid that divides the head into the key Loomis sections:
Vertical divisions:
- Center line (crucial for symmetry)
- Eye width markers (one eye-width between eyes, one eye-width on each side)
- Outer head boundaries
Horizontal divisions:
- Hairline (typically 1/3 down from crown)
- Eyebrow line
- Eye line (halfway point)
- Nose base
- Mouth line
- Chin
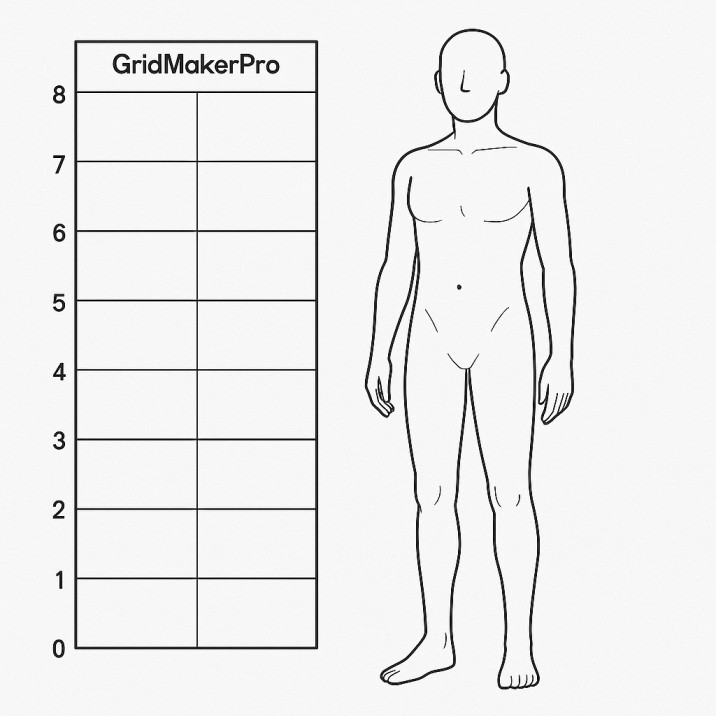
A 7×5 or 9×7 custom grid often works perfectly for capturing these critical proportions while keeping your grid manageable.
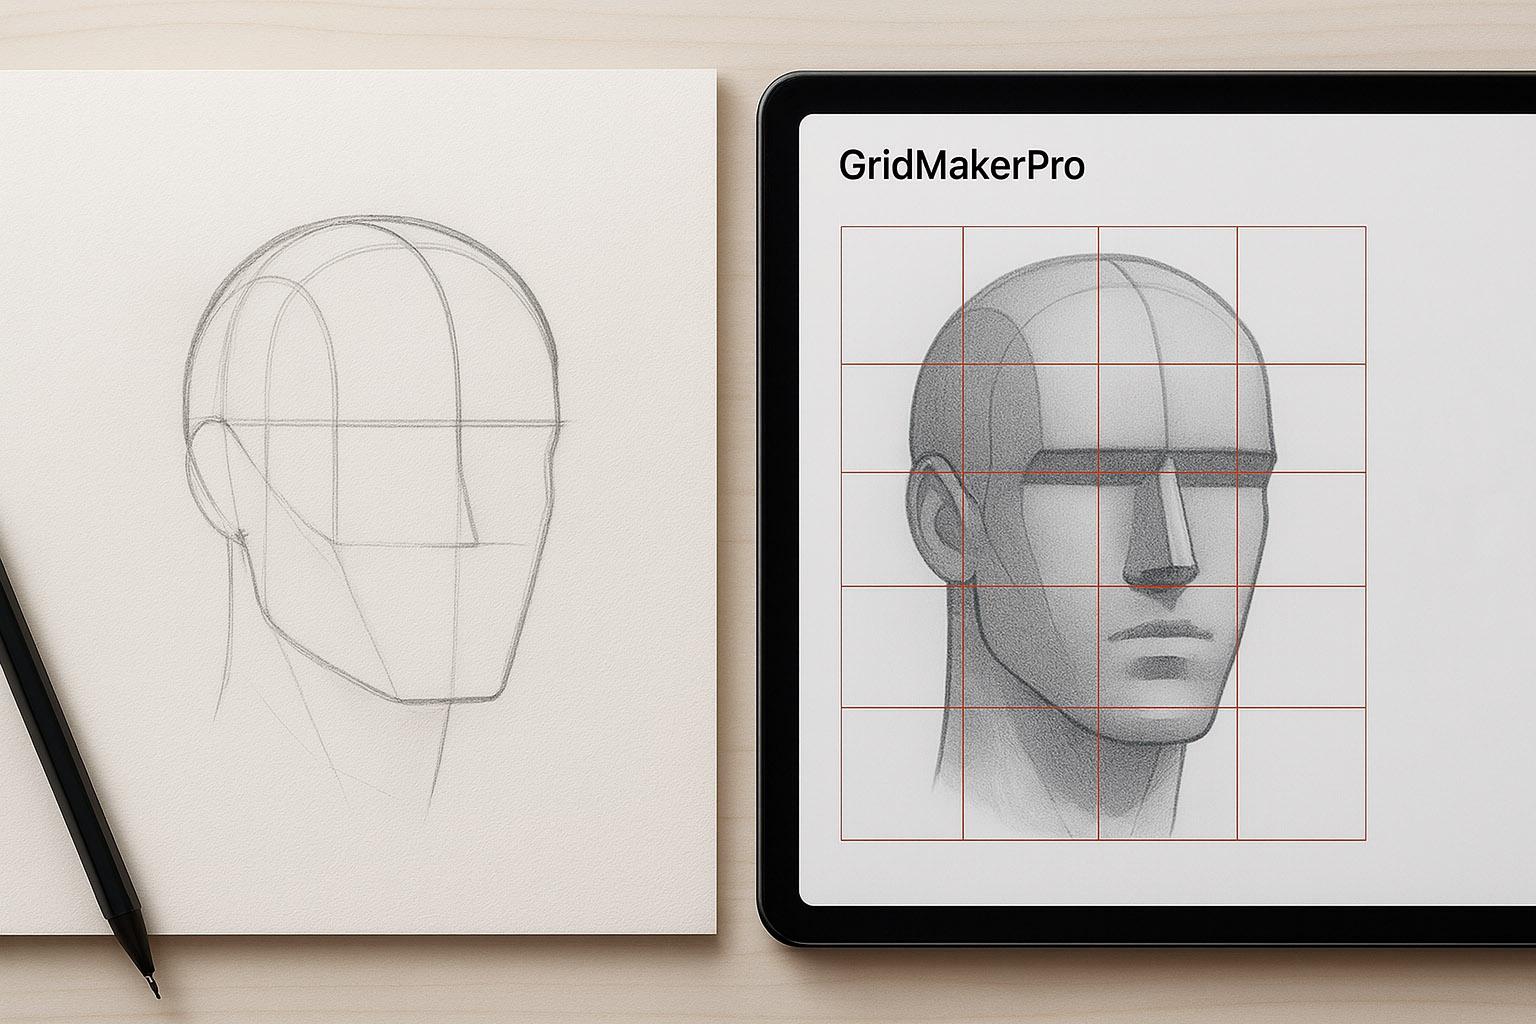
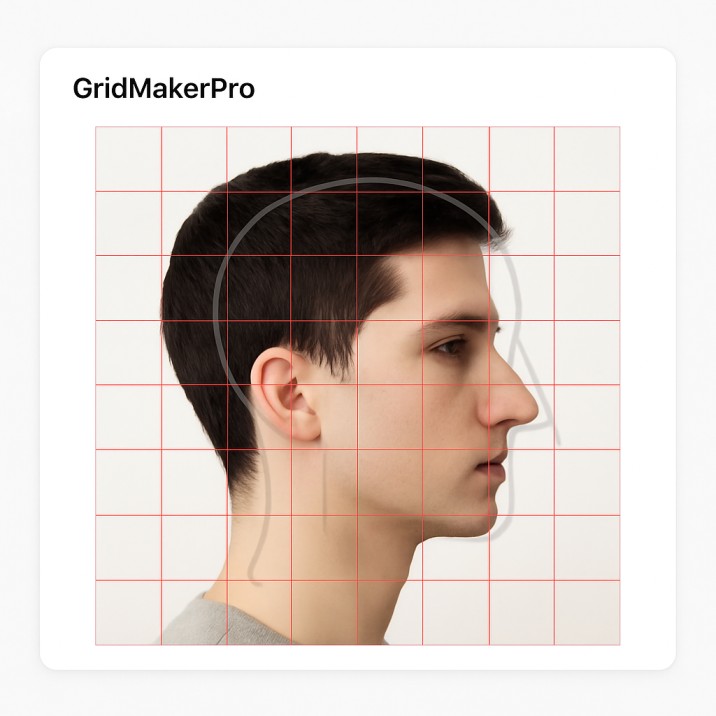
For profile views:
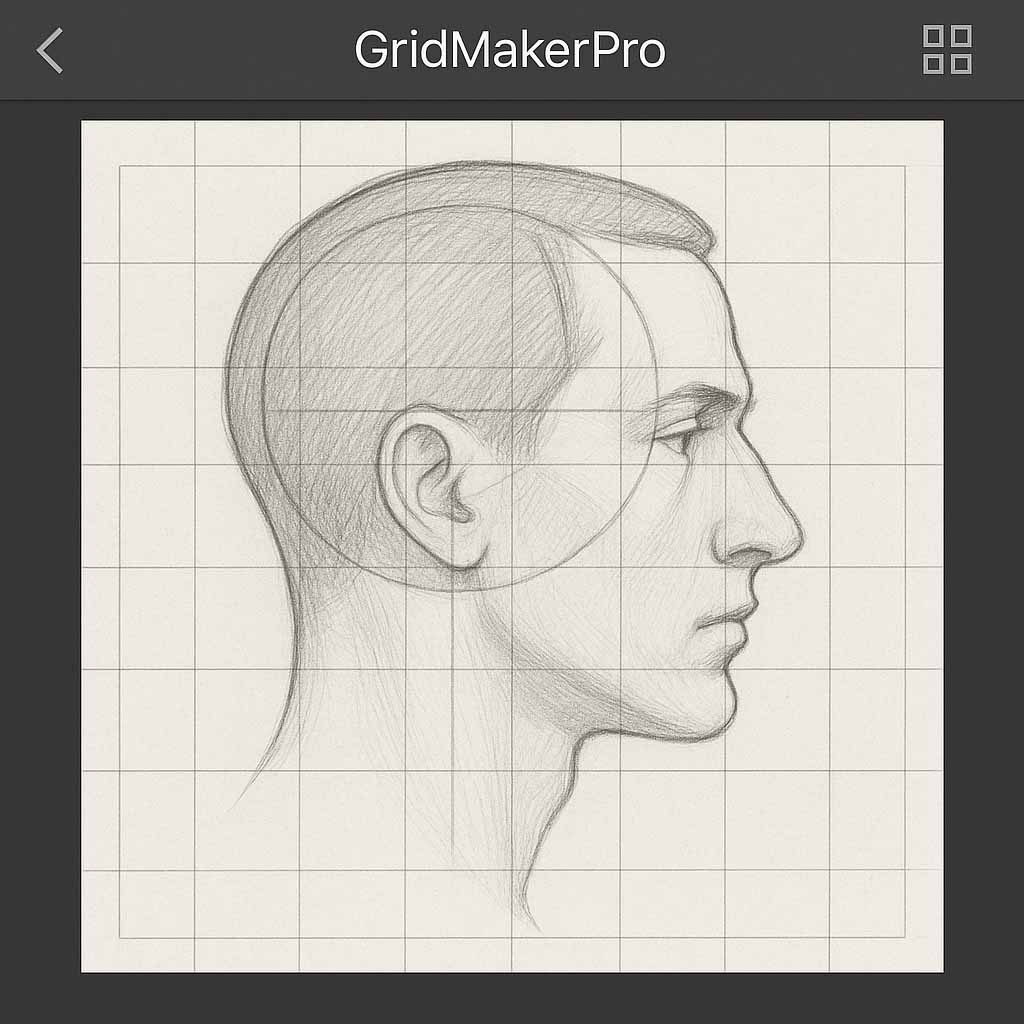
Profile views require different grid configurations:
- Emphasize the front-to-back depth relationships
- Mark the vertical alignment of eye, ear, nose, and chin
- Include guidelines for the Loomis construction sphere and facial plane
A 5×7 or 6×8 grid oriented to capture the profile’s length often works best.
For three-quarter views:
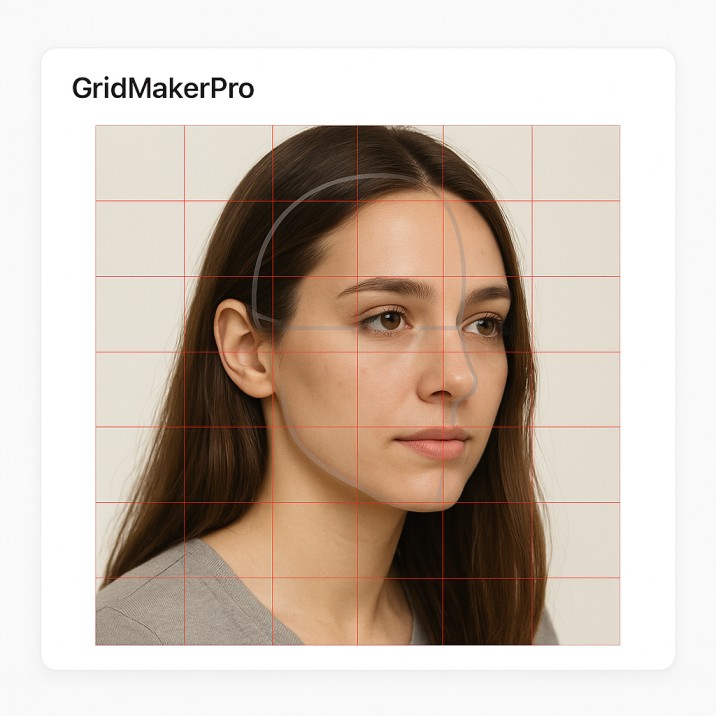
Three-quarter views are the most challenging but also the most dynamic. Your custom grid should:
- Follow the perspective and foreshortening of the head’s rotation
- Adjust the center line to curve with the form
- Account for the compression of features on the far side of the face
Step-by-step workflow
1. Analyze your reference photo
Before applying any grid, identify the key Loomis landmarks in your reference:
- Where does the eye line fall?
- How does the face fit into the sphere-and-plane construction?
- Are there any deviations from ideal proportions that give character to the face?
2. Design your custom grid
In GridMakerPro, create a grid that places lines at the critical Loomis division points. You’re not just creating an even grid—you’re creating a proportional roadmap.
Consider using different line weights or colors to distinguish between major divisions (like the eye line) and minor reference points.
3. Apply the grid to your reference
Overlay your custom Loomis-aligned grid onto your reference photo. This immediately reveals:
- Whether your subject follows classic proportions or has distinctive variations
- Exactly where features align with proportional divisions
- The relationships between different facial elements
4. Create a matching grid for your drawing
Transfer the same custom grid to your drawing surface. This ensures your drawing will maintain the same proportional relationships as your reference—whether they’re ideal Loomis proportions or characteristic deviations.
5. Draw using both Loomis construction and grid reference
Start with the basic Loomis construction (sphere, facial plane, and major divisions), then use your grid to refine specific placements and ensure accuracy. The Loomis method gives you the structure, and the grid gives you the precision.
Advanced applications
Figure drawing
The Loomis method extends beyond heads to full figures. Loomis identified that:
- The ideal figure is 7.5 to 8 heads tall
- The torso from neck to pelvis is roughly 3 heads high
- The legs are approximately 4 heads long
- Arms extend about 3 heads down from the shoulders
Create custom grids that divide your canvas into “head heights” to maintain these proportions consistently.
Character design
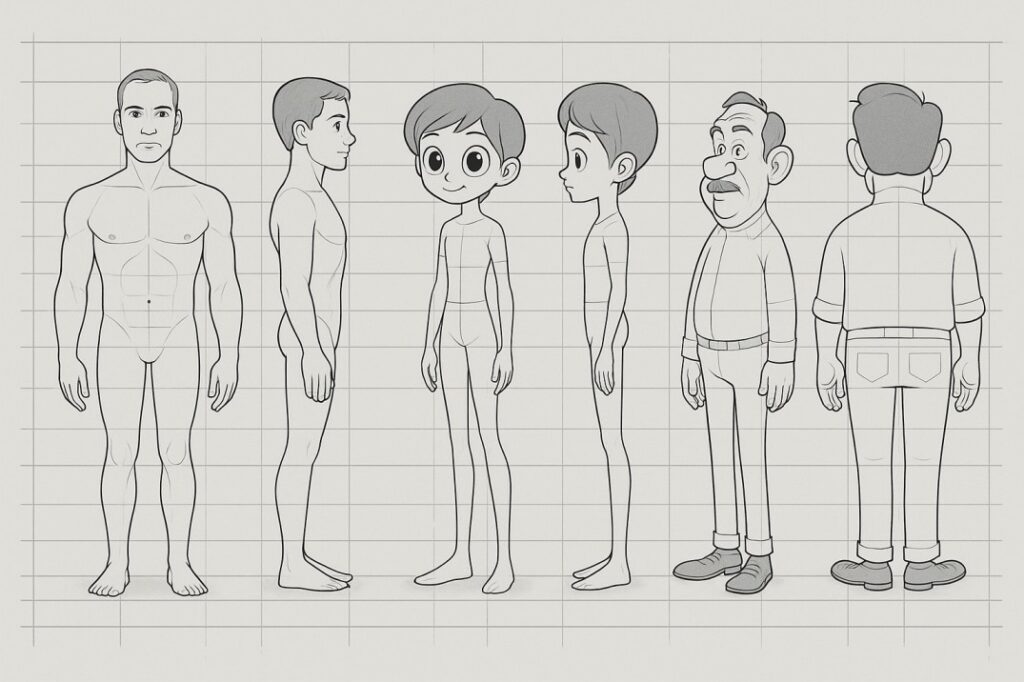
When designing original characters, custom Loomis grids help you:
- Maintain consistent proportions across multiple drawings of the same character
- Deliberately deviate from ideal proportions for stylistic effect (while keeping those deviations consistent)
- Create model sheets showing your character from multiple angles
Caricature and stylization
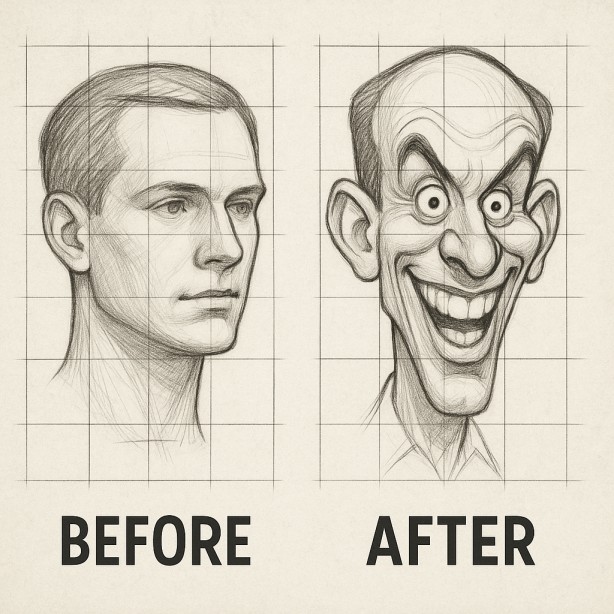
Understanding correct proportions through the Loomis method is essential before you can effectively exaggerate for caricature. Custom grids help you:
- Identify which features to exaggerate
- Maintain structural integrity even with wild proportional changes
- Keep your stylized characters believable and well-constructed
Common proportional mistakes and how custom grids prevent them
Eyes placed too high: One of the most common errors. A horizontal grid line at the true halfway point immediately shows you where eyes should sit.
Head too narrow or wide: Vertical divisions showing the “5 eyes across” rule (eye, eye-space, eye, eye-space, eye) prevent this mistake.
Features misaligned: Grid lines running through key features (like ensuring both eyes sit on the same horizontal line) catch alignment issues early.
Incorrect feature spacing: The grid reveals at a glance if you’ve made the distance from nose to mouth different than your reference or ideal proportions.
Practicing with custom Loomis grids
Exercise 1: Grid an ideal head
Start by creating a custom grid that matches ideal Loomis proportions. Draw this generic head multiple times until the proportions become second nature.
Exercise 2: Compare references to ideal proportions
Apply your ideal Loomis grid to various reference photos. Notice how different faces deviate from the ideal—this is what gives them character and individuality.
Exercise 3: Draw from photos with custom grids
Select portrait references and create custom grids that align with both Loomis principles and the specific proportions of your subject.
Exercise 4: Draw from imagination with grid guidance
Create a custom Loomis grid on blank paper and use it to construct a head from imagination, ensuring your invented face has correct proportions.
Tips for success
Start with clear references: Use photos with good lighting and frontal or clear three-quarter views when you’re learning.
Don’t be a slave to the grid: The grid is a guide and verification tool, not a mandate. Once you’ve placed major features correctly, trust your eye for refinement.
Adjust for perspective: When the head is tilted or viewed from above or below, your custom grid needs to account for perspective foreshortening.
Practice without grids too: Regularly draw without grids to develop your intuitive sense of proportion. Use grids to check your work afterward.
Study real anatomy: The Loomis method is built on anatomical truth. Understanding the underlying skull structure makes the proportional relationships make sense.
Why this combination works
The Loomis method gives you a deep understanding of why proportions work the way they do—it’s not just “the eyes go halfway down” but “the eyes sit at the equator of the cranial sphere.” This understanding is crucial for drawing heads in any position or from imagination.
Custom grids from GridMakerPro translate that understanding into a practical, verifiable tool. They create a bridge between the idealized constructions in Loomis’s books and the real-world faces you want to draw.
Together, they form a complete system: conceptual understanding from Loomis, practical verification from custom grids, and with practice, internalized proportional sense that eventually lets you draw confidently without either.
Getting started today
If you’re new to the Loomis method, start by studying his books (many are now in the public domain). Learn the basic head construction and proportional divisions.
Then, open GridMakerPro and create your first custom Loomis grid. Apply it to a frontal portrait reference and simply observe—where do the features actually fall? How close is your subject to ideal proportions?
As you practice this analysis, you’ll develop both technical accuracy and artistic understanding. The combination of Loomis construction and custom grids is one of the most powerful approaches available for mastering human proportions.
Proportion doesn’t have to be a mystery. With the Loomis method as your foundation and GridMakerPro’s custom grids as your verification tool, accurate, proportional drawings are within your reach.