You’ve found the perfect reference photo. Your palette is ready, your brushes are clean, and your blank canvas waits on the easel. But there’s one problem: translating that beautiful image onto your canvas while maintaining accurate proportions feels impossible. You start sketching freehand, but the eyes end up too close together, the nose sits too high, or the entire composition tilts awkwardly to one side.
This is where grid techniques for acrylic painting become your secret weapon.
Many acrylic painters struggle with proportion accuracy when transferring reference images. Freehand drawing skills can take years to develop, but you want to create successful paintings now. The grid method bridges that gap, giving you a proven technique for capturing perfect proportions while you develop your observational skills.
In this comprehensive guide, you’ll learn multiple grid techniques specifically adapted for acrylic painting—from traditional pencil grids to innovative string methods and modern digital tools. You’ll discover which approach works best for your painting style, surface choice, and project scale. More importantly, you’ll understand how to use these techniques strategically without becoming dependent on them.
The grid method isn’t a shortcut or “cheating”—it’s a centuries-old technique used by Renaissance masters like Leonardo da Vinci and Albrecht Dürer. Modern hyperrealist artists like Chuck Close continue this tradition, proving that professional artists at every level use grids strategically. You’re learning from artistic heritage, not taking a shortcut.
By the end of this guide, you’ll be able to confidently transfer any reference image onto your acrylic painting surface with perfect proportions, troubleshoot common grid problems, and choose the right method for each project. Let’s start with the fundamentals.
Understanding the Grid Method: Foundation for Acrylic Painters
Before diving into specific techniques, you need to understand the fundamental principle behind grid drawing and why it works so effectively. This foundation helps you adapt the method to different acrylic painting scenarios and make informed decisions about when to use grids versus freehand approaches.
What Is the Grid Method?
The grid method is elegantly simple: you draw a grid over your reference image, create a proportional grid on your painting surface, then transfer the image square by square. Think of it like creating a roadmap—you’re breaking a complex journey into manageable segments rather than trying to navigate the entire route at once.
Here’s how it works in three steps:
Step 1: Draw evenly spaced grid lines over your reference photo, creating squares of equal size. Label these squares with letters across the top (A, B, C…) and numbers down the side (1, 2, 3…).
Step 2: Draw a matching grid on your canvas with the same number of squares. If you’re enlarging your image, the canvas squares will be proportionally larger, but the number of rows and columns stays the same.
Step 3: Focus on one square at a time. Whatever appears in square A1 on your reference gets drawn in square A1 on your canvas. You’re not drawing “a nose” or “a tree”—you’re just drawing the shapes and lines you see within that bounded area.
The historical context adds legitimacy to this technique. Ancient Egyptians used grids to transfer designs onto temple walls. Renaissance masters employed the method for accurate proportions in their masterworks. Chuck Close brought the grid method into contemporary fine art with his massive photorealistic portraits, sometimes leaving the grid visible as part of the final composition.
Why the Grid Method Works for Acrylic Painters
The grid method solves several challenges specific to acrylic painting:
It simplifies visual complexity. A complete portrait or landscape can overwhelm your brain with information. Breaking it into 20 or 30 smaller squares transforms one impossible task into many achievable ones. You focus on accurately drawing shapes within a small area, which feels much more manageable.
It maintains proportions automatically. When your canvas and reference share the same ratio and grid structure, proportions transfer correctly by default. You don’t need advanced measuring skills—the grid does the mathematical work for you.
It’s particularly valuable for acrylics because: Commissioned work demands accuracy that reflects well on your professional reputation. Acrylic’s layering technique benefits from an accurate underdrawing. Photorealistic approaches require the precision that grids provide naturally.
It develops observational skills. Surprisingly, the grid method actually trains your eye. When you focus on one square at a time, you start seeing angles, curves, and negative spaces you might have missed when viewing the image as a whole. Over time, these observational skills strengthen, improving even your freehand work.
When to Use Grid Method vs. Freehand Drawing
Grid techniques aren’t always the right choice. Understanding when to use them strategically makes you a better artist.
Use the grid method for:
- Commissioned portraits or pet paintings where likeness is absolutely critical
- Complex subjects with intricate details like architecture, mechanical objects, or detailed wildlife
- Large-scale acrylic paintings where scaling accuracy really matters
- Photorealistic or hyperrealistic painting styles where precision defines success
- When working under time pressure and you need an accurate initial sketch quickly
Develop freehand skills for:
- Loose, gestural, or abstract painting styles where exact accuracy isn’t the goal
- Plein air painting and quick sketches where setup time matters
- Building long-term drawing confidence and developing your unique artistic voice
- Situations where reference proportions can be interpreted freely or creatively
The professional approach? Many working artists use grid method for initial composition on important pieces, then rely on freehand skills for refinement and details. It’s not either/or—it’s strategic tool selection based on your project needs.
Essential Materials for Grid Drawing on Acrylic Surfaces
Using the right tools for grid drawing on acrylic painting surfaces prevents canvas damage, ensures easy erasability, and sets you up for painting success. Different surfaces require different approaches, and choosing wrong can create frustrating problems.
Drawing Tools for Canvas and Wood Panels
Not all drawing tools work equally well on acrylic painting surfaces. Here’s what works best:
For Stretched Canvas (Most Common Surface):
Your best choice is soft vine charcoal. It glides smoothly over canvas texture, creates visible but light lines, and wipes away easily with a barely damp cloth or kneaded eraser. Charcoal won’t indent your canvas the way pencils can.
If you prefer pencil, use 2B or 4B graphite with extremely light pressure. These softer pencils mark the surface without digging into the canvas weave. Never use mechanical pencils—they’re too hard and will create grooves in your canvas texture.
Important for portrait painters: Avoid using graphite for portraits where you plan to use thin washes or glazes. Graphite creates a gray hue that shows through light paint layers, especially in skin tones. Instead, use colored pencils in terracotta or burnt sienna. These warm tones blend naturally with skin colors and become invisible under your paint layers.
For Wood Panels (Birch, Cradled Panels):
Wood panels have smooth, hard surfaces that accept pencil beautifully. A 2B or HB graphite pencil gives you control and precision. The smooth surface erases more cleanly than canvas, making wood panels forgiving for grid work.
Charcoal works on panels too, though it may smudge more easily on the slick surface. Keep a kneaded eraser handy for quick corrections.
For Canvas Paper/Board:
These economical surfaces work well with 2B graphite pencil. The flatter texture (compared to stretched canvas) accepts pencil marks clearly. Light pressure still matters to avoid indenting the paper backing.
Measuring and Marking Tools
Accurate measurement is critical for successful grid work:
Ruler: An 18-inch clear plastic ruler with grid markings is ideal. Being able to see through the ruler to your canvas surface helps you position lines accurately.
T-square or straight edge: For large canvases (24 inches or larger), a T-square keeps long lines straight and prevents cumulative measurement errors.
Metal yardstick: Essential for very large paintings or murals where you need to span long distances.
Erasers: Keep multiple options on hand. Kneaded erasers work perfectly for charcoal. Vinyl erasers handle graphite. A slightly damp cloth lifts charcoal without any eraser at all.
Optional but helpful: Drafting tape holds your ruler steady on canvas without leaving residue. Pushpins and string enable the advanced string grid method we’ll cover later.
Reference Image Preparation
Your reference needs proper preparation before you can grid it:
Printed photos: Print at 8×10 inches or larger on plain paper (not photo paper) so you can draw directly on it. Smaller prints make grid lines too cramped to work with comfortably.
Digital devices: Load your reference onto an iPad or tablet with a grid app installed. This approach saves printing costs and lets you adjust grid density on the fly.
Acetate sheets: These transparent plastic sheets let you draw grids over your reference without marking the original. Available at art supply stores, they’re perfect when you want to preserve your reference photo or use it for multiple paintings.
Grid Method Fundamentals: Ratio Mathematics Made Simple
Understanding ratio ensures your transferred image maintains perfect proportions without distortion. Don’t worry—the math is simpler than you think, and I’ll walk you through it step by step.
Understanding 1:1 Ratio (Same Size Transfer)
The simplest scenario happens when your reference photo and canvas are the same size. If you’re working from an 8×10-inch photo onto an 8×10-inch canvas, your grid squares are identical on both surfaces.
For example, if you create 1-inch squares on your 8×10 reference (giving you 8 columns and 10 rows), you draw exactly the same 1-inch squares on your canvas. No calculations needed beyond measuring equal intervals.
This approach works perfectly for studies and practice paintings. It’s also the best way to learn grid technique before tackling enlargements.
Calculating Enlargement Ratios
Here’s the golden rule that prevents distortion: Whatever you multiply one dimension by, multiply the other dimension by the same number.
Let’s work through common scaling examples:
Example 1: You have a 5×7-inch photo and want to paint on a 10×14-inch canvas.
- 5 inches × 2 = 10 inches (height)
- 7 inches × 2 = 14 inches (width)
- This is a 2:1 ratio—your canvas is exactly twice the size of your reference
Example 2: You have a 4×6-inch photo and want to paint on a 12×18-inch canvas.
- 4 inches × 3 = 12 inches
- 6 inches × 3 = 18 inches
- This is a 3:1 ratio
Once you know your ratio, calculating grid square size becomes simple. If your reference has 1-inch squares and you’re working at 2:1 ratio, your canvas gets 2-inch squares. If your reference has 0.5-inch squares at 3:1 ratio, your canvas needs 1.5-inch squares.
Matching Canvas Sizes to Reference Photos
Most pre-stretched canvases come in standard sizes. To avoid distortion, match your reference photo ratio to available canvas sizes. Here’s a quick reference chart:
| Reference Photo Size | Compatible Canvas Sizes |
|---|---|
| 4×6 inches | 8×12″, 12×18″, 16×24″, 20×30″ |
| 5×7 inches | 10×14″, 15×21″, 20×28″ |
| 8×10 inches | 16×20″, 24×30″, 32×40″ |
| 11×14 inches | 22×28″, 33×42″ |
| Square photos | 6×6″, 12×12″, 16×16″, 24×24″ |
Pro tip: If your reference photo doesn’t match standard canvas ratios, crop the photo to match rather than accepting distortion. Most photo editing software allows custom cropping to specific ratios.
Verification Check: Am I Doing This Right?
Before you invest hours in transfer work, verify your grid setup with these three quick checks:
1. Count squares: Do you have the same number of rows and columns on your reference and canvas? If your reference has 8 columns and 10 rows, your canvas must too.
2. Check squareness: Are your grid squares actually square (equal height and width), or did they become rectangles? Measure a few randomly—they should all be the same.
3. Measure samples: Pick three random squares on your canvas and measure them. Are they all the correct calculated size?
If yes to all three, you’re ready to transfer. If not, find and fix the error now. It’s much easier to correct an empty grid than a partially transferred image.
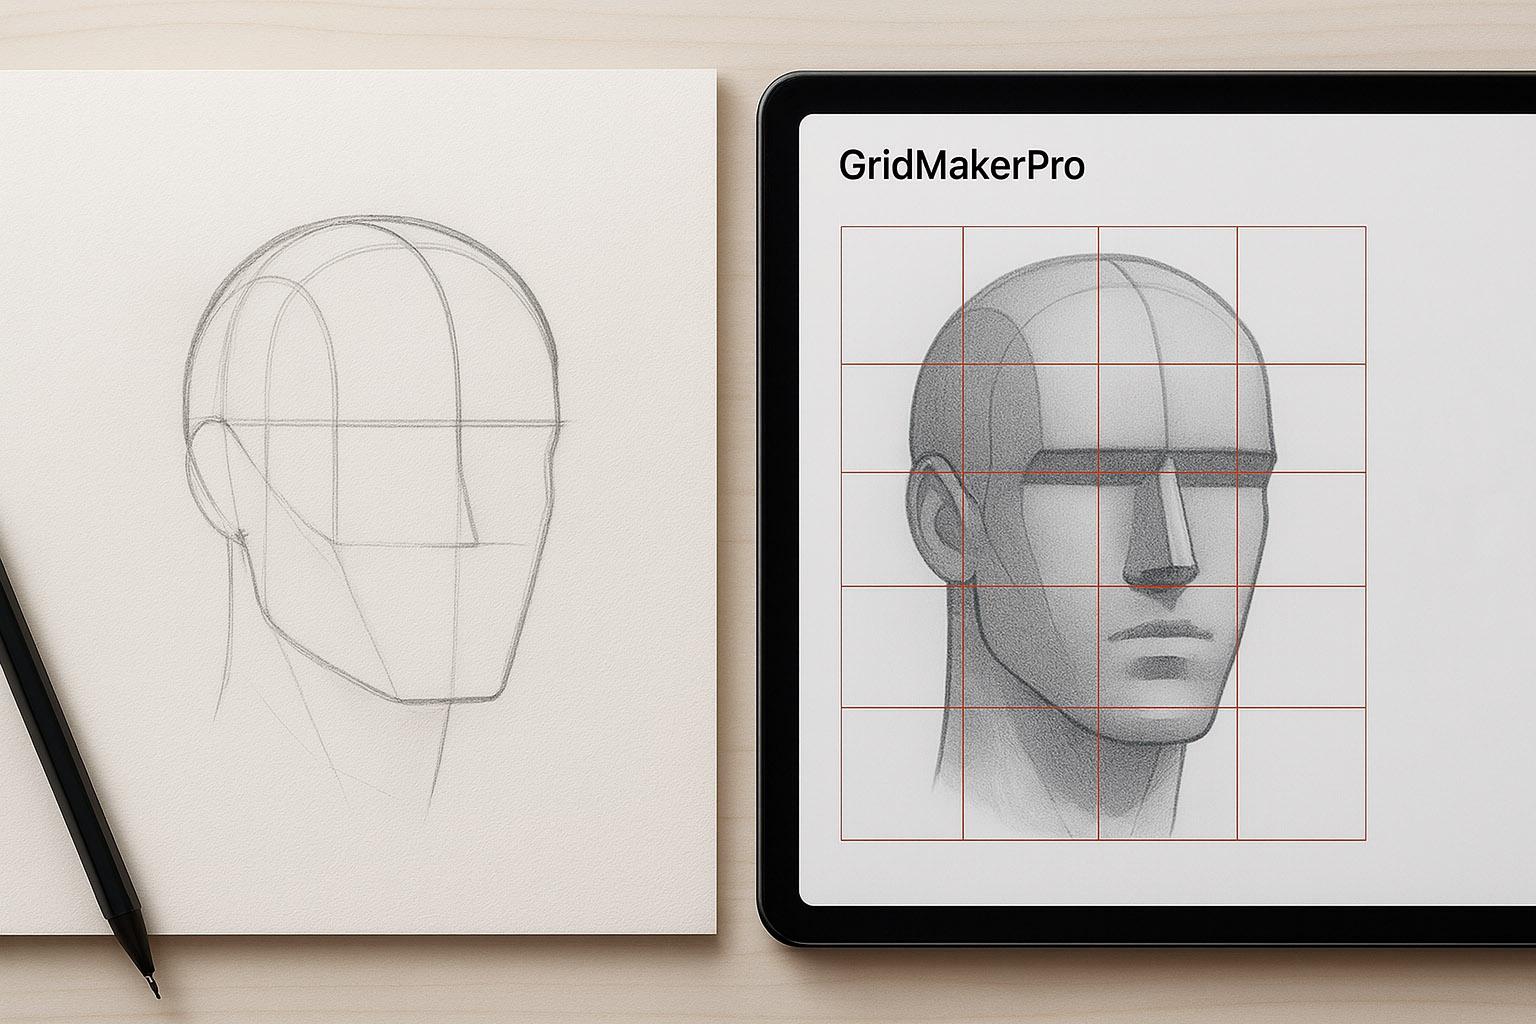
Traditional Pencil/Charcoal Grid Method: Step-by-Step
This foundational technique is where most artists start. Master this approach and you’ll have a reliable method for any acrylic painting project, regardless of complexity.
Preparing Your Reference Photo
You have two main approaches for preparing your reference:
Option 1: Physical Printed Photo
Print your reference at a workable size—8×10 inches or larger gives you room to draw clear grid lines. Using a ruler, measure and mark grid intervals along all four edges of the photo. The interval size depends on your image complexity:
- Simple subjects with large shapes and minimal detail: 1.5 or 2-inch squares
- Medium complexity: 1-inch squares
- High detail like portraits or intricate subjects: 0.5-inch squares or smaller
Connect your marks with light pencil lines using your ruler as a guide. Take your time here—accuracy in this step determines accuracy in your final painting. Label the rows with numbers (1, 2, 3…) and columns with letters (A, B, C…). These labels become your navigation system during transfer.
Option 2: Digital Grid Overlay
Open your reference image in photo editing software or a grid app (I’ll cover specific apps later). Add a grid overlay with your desired number of squares. Print the gridded image for reference.
Benefits of the digital approach: You never mark your original photo, you can easily adjust grid density, and you can save multiple versions for future paintings at different scales.
Creating Grid on Your Canvas
Now comes the critical step—creating your matching grid on canvas.
Step 1: Gather everything you need. Have your prepared canvas (with acrylic gesso primer), ruler or T-square, charcoal or light graphite pencil, and kneaded eraser within arm’s reach.
Step 2: Calculate your grid square size. If you have 1-inch squares on a 5×7-inch reference and you’re painting on a 15×21-inch canvas, that’s a 3:1 ratio. Your canvas squares need to be 3 inches (1 inch × 3).
Step 3: Mark grid intervals carefully. Starting at the top left corner, measure and mark intervals along the top edge. Move to the bottom edge and repeat. Then mark down the left side and finally the right side.
Critical technique point: Measure from the edge of your canvas for each mark, not from your previous mark. Measuring from mark to mark compounds errors—if you’re off by 1/16 inch on your first mark, that error multiplies across your entire grid.
Step 4: Connect the marks. Place your ruler connecting your top and bottom marks. Draw a very light line from top to bottom—so light you can barely see it. Repeat for all vertical lines. Then connect left and right marks for horizontal lines.
Why so light? These lines need to disappear under your paint or erase easily. If you can see your grid lines from across the room, you’re pressing too hard.
Step 5: Label your grid. Write small numbers along the left side (1, 2, 3…) and small letters across the top (A, B, C…). Keep these labels tiny and light—they’re just reference markers, not part of your painting.
Transferring the Image Square by Square
This is where the magic happens. You’re about to see how breaking a complex image into small squares makes accurate drawing achievable.
Start in the top left corner at square A1. Look only at that square on your reference photo. What do you see? Not “an eye” or “a tree branch”—you see specific shapes, lines, and curves that intersect your grid lines at specific points.
Identify where the lines, shapes, and forms in that square intersect the grid lines. Maybe a curved line crosses the top grid line about one-third of the way across. Perhaps a straight line runs diagonally from the bottom left corner to intersect the right grid line about halfway up. Draw exactly those same intersections in square A1 on your canvas.
Work systematically. Complete A1, then move to A2. Work left to right across the entire top row. Then start row B, again working left to right. Continue this pattern until you reach the bottom right corner.
Key techniques for accurate transfer:
Focus on shapes, not objects. In square C5, don’t think “this is part of a nose.” Think “this is a curved shadow shape that intersects the grid lines here and here.” This mindset shift dramatically improves accuracy.
Use grid intersections as landmarks. Note precisely where subject lines cross your grid lines. These crossing points are your reference anchors.
Pay attention to negative space. The empty areas around your subject are as important as the filled areas. A common mistake is focusing only on the subject and ignoring the background spaces that define its edges.
Work lightly at first. Your initial sketch should be tentative. You can darken key lines later once you’ve verified proportions across the entire canvas.
Step back frequently. Every 3-4 squares, walk back 6-8 feet from your canvas. Assess the overall proportions from this distance. It’s much easier to catch errors early than to fix them after you’ve transferred 20 squares.
Common pitfalls to avoid:
Skipping around randomly makes it easy to lose your place and miss entire sections. That systematic left-to-right, top-to-bottom approach keeps you oriented.
Drawing what you think you know rather than what you actually see. Your brain will try to fill in details based on assumptions. Resist this—trust only what appears in each individual square.
Pressing too hard initially makes erasure difficult and damages canvas texture. Remember: barely visible is perfect at this stage.
Focusing too long on one area without checking overall proportions. That beautiful detailed eye means nothing if it’s positioned incorrectly on the face.
Forgetting which square you’re working in. This is why labeling matters—when you lose your place, those letters and numbers guide you back.
Refining Your Initial Grid Transfer
Once you’ve transferred all squares, step back and assess the overall proportions. Does something feel off? Compare carefully to your reference.
Walk around your canvas, viewing it from different angles. Sometimes proportion errors become obvious from side views that aren’t apparent from straight on.
Identify any areas that don’t feel right and compare them closely to the reference. Often, the problem traces back to a single square where a key intersection point is slightly off.
Darken your main subject lines with slightly firmer pressure now that you’re confident in the proportions. These darkened lines will guide your painting.
Add key details within your transferred outline, but don’t go overboard. You’re creating a sketch foundation, not a finished drawing. Save the detail work for your painting layers.
Leave your lighter construction lines visible until you start painting. They’ll help you remember how shapes relate to each other as you build up your acrylic layers.
String Grid Method: An Advanced Acrylic Painting Technique
The string grid method solves the biggest frustration acrylic painters face with traditional grids: lines that won’t erase or show through paint. This elevated technique creates a raised grid above your canvas surface, letting you paint freely underneath while maintaining proportion reference.
What Is the String Grid Method?
Instead of drawing grid lines directly on your canvas, you use pushpins and string to create a grid that floats about 1/4 inch above your painting surface. The strings are elevated, allowing your brush to move freely underneath while the grid remains visible throughout your entire painting process.
Contemporary artist Nancy Reyner developed and popularized this technique for scaling paintings. It’s particularly valuable for large paintings where checking proportions throughout the process matters, complex subjects requiring long painting sessions where grid visibility helps, and expensive canvases you don’t want to mark permanently.
Think of it like painting through a raised screen door. The screen (string grid) is there for reference, but it doesn’t touch your painting surface.
Materials Needed for String Grid
You’ll need specialized materials for this technique:
Stretched canvas with gallery-wrapped edges (at least 1.5-inch depth on the sides). The deep sides give you space to insert pushpins.
Long pushpins (5/8 inch or 16mm metal pushpins minimum). Standard thumbtacks are too short—you need length to create elevation.
String or thin twine (non-stretch type). Light-colored string provides better visibility against your canvas. Avoid elastic materials that sag.
Hammer for inserting pushpins firmly into canvas sides. They need to hold taut string without pulling loose.
Ruler and pencil for marking pushpin placement positions accurately.
Reference photo with grid prepared using the methods described earlier.
Creating a String Grid: Step-by-Step
The setup takes longer than traditional grid drawing, but the payoff is worth it.
Step 1: Mark pushpin positions. Calculate your grid square size using the same ratio math as traditional method. Using your ruler and pencil, make small marks along the top, bottom, left, and right edges of your canvas where pushpins will go.
If your canvas has deep enough sides (1.5 inches or more), place marks on the side edge of the canvas, not the front face. For thinner canvases, marks go on the front face very close to the edge.
Step 2: Insert pushpins strategically. Hammer pushpins into the canvas at each marked point. Here’s the critical technique: insert at a 45-degree angle pointing away from the canvas face. This angle creates the elevation that lets string float above your painting surface.
Pushpins should be firmly inserted but not driven all the way in. Leave about 1/4 inch exposed for string wrapping. For front-face insertion on thin canvases, push through the canvas into the stretcher bar or wood beneath.
Step 3: String the grid. Starting at a corner pushpin, tie your string securely with a double knot. Wrap the string around each pushpin in the first row, keeping it taut but not overly tight—you don’t want to warp your canvas.
Continue wrapping until all vertical lines are complete, then tie off with a secure knot at the final pushpin. Repeat the process for horizontal lines. Where strings cross, they should be slightly raised above the canvas surface.
Step 4: Verify accuracy. Check that all squares are equal size and that strings are evenly spaced and taut. Confirm strings are elevated enough (about 1/4 inch clearance) for your brush to pass underneath. Label your grid using the same numbering system as your reference photo.
Painting with a String Grid
Now for the unique advantage of this method—you can paint with the grid in place.
For initial sketch transfer: Dilute acrylic paint with water or medium to create a very thin wash. Use a light neutral color like yellow ochre, raw umber, or thinned titanium white. Paint the general outline of your subject under the strings, using the grid as your guide.
Your brush should easily pass under the raised strings. Paint the basic shapes and major lines square by square, just like with traditional grid method, except you’re painting rather than drawing.
For actual painting layers: Once your sketch is complete, begin building up your acrylic layers normally. The strings remain in place throughout your painting process. The grid provides continuous reference for proportions and placement—particularly valuable for complex subjects where you need to verify relationships multiple times during painting.
Removing the string grid: Wait until your painting is substantially complete (at least 80-90% finished). Carefully cut the strings where they wrap around pushpins. Remove all string pieces, then carefully remove the pushpins.
If pushpins were on the sides, your painting surface has no marks at all. If pushpins were on the front face, you’ll have tiny pushpin holes that are easy to touch up with paint.
Advantages: No erasure needed, grid visible throughout painting, canvas remains unmarked, ideal for large-scale works, works beautifully with acrylic’s layering technique.
Disadvantages: More setup time, requires deep-sided canvas or tolerance for tiny holes, string can occasionally interfere with brushwork, not practical for small paintings under 12×12 inches.
Digital Grid Methods: Apps and Tools for Modern Acrylic Painters
Digital tools can dramatically speed up your grid process while offering features traditional methods can’t match. Understanding the best apps and how to integrate them with your physical painting workflow gives you flexibility and efficiency.
Top Grid Apps for Acrylic Painters (2026)
The app landscape changes constantly, but these tools have proven reliable for acrylic painters:
For iOS users: ArtGrid by Jackson’s (free) offers a clean, simple interface perfect for beginners. GridPainter ($3.99) includes advanced features like value studies and multiple grid styles. Grid! by Grid Studio (free with in-app purchases) provides solid basic functionality with customizable options.
For Android users: GridArt (free with in-app purchases) stands out with measurement-based grids that specify dimensions in millimeters, centimeters, or inches. Grid Drawing (free with ads) packs in features including effects filters and 50x zoom capability.
Web-based options: GriDraw and ArtistAssistApp work in any browser without installation. They’re perfect for quick projects or when you’re working on a computer rather than mobile device. ArtistAssistApp offers a complete painting assistant suite including color mixing and value studies beyond just gridding.
The best choice depends on your workflow. If you primarily work from tablets while painting, iOS or Android apps make sense. If you edit photos on your computer anyway, web-based tools integrate smoothly into that process.
Digital-to-Physical Workflow
Here’s how to bridge digital convenience with physical painting:
Method 1: Print gridded reference. Upload your reference photo to a grid app, add grid overlay with your desired square size, export the gridded image, and print at full size (8×10 inches or larger). Use this printed gridded reference with your traditional physical grid on canvas.
Advantages: Your reference always shows the grid. You don’t need to keep a device powered and charged. You can mark up the printed reference with notes. It works in any lighting condition without screen glare.
Method 2: Use device as reference. Load your reference with grid overlay on an iPad or tablet. Prop the device at your easel or on a nearby table. Create your traditional grid on canvas, then work from the digital reference, matching your canvas grid to the screen grid.
Advantages: No printing costs or waste. You can zoom in for detail work. You can adjust grid density on the fly if needed. Brightness and contrast adjustments help you see details more clearly.
Method 3: Hybrid approach. Use a free web-based tool to create your gridded reference. Screenshot or download the gridded image. Display it on a second monitor while working, or print it as needed. Create your traditional grid on canvas to match.
Advanced Digital Features Worth Using
Beyond basic gridding, many apps offer features that enhance your acrylic painting process:
Value and tonal studies: Apps like GridPainter convert your reference to grayscale, letting you study tonal values before painting. This is crucial for successful acrylic paintings—understanding your value structure before mixing colors prevents muddy results.
Identify the lightest lights and darkest darks within each square. Plan your value structure independently of color. This analysis dramatically improves your final painting.
Custom grid patterns: Some apps offer diagonal grids (useful for the triangular method I’ll explain next), golden ratio overlays for compositional analysis, and irregular grids for specific subjects.
Measurement tools: Apps like GridArt provide exact cell measurements, which proves useful for large-scale paintings where precision matters. You can convert between units (inches, centimeters, pixels) to match your working preference.
Image manipulation: Crop to specific aspect ratios before gridding to ensure your reference matches your canvas. Adjust brightness and contrast to see details more clearly in shadows or highlights. Flip or rotate your reference to view from different angles. Apply filters to simplify overly complex images.
When Digital Beats Traditional (and Vice Versa)
Use digital grid tools when: You’re working with photos stored digitally (no printing costs), you need to quickly try different grid configurations, you want value studies and color analysis alongside your grid, you’re painting outdoors or traveling without printing access, or you’re creating multiple paintings from the same reference (save multiple grid versions at different scales).
Use traditional grid when: You prefer tactile, hands-on process, your reference is already printed, you have no device available or prefer a tech-free painting environment, you’re teaching students (physical grids are easier to understand initially), or you want to mark up your reference with notes and observations.
Best of both worlds: Use digital tools to create your gridded reference, print the gridded reference, create traditional physical grid on canvas. You benefit from digital flexibility plus the comfort of traditional workflow.
Alternative Grid Techniques for Acrylic Painters
The standard square grid isn’t your only option. Alternative gridding methods work better for specific situations and can elevate your acrylic painting practice.
Acetate Overlay Method (Non-Permanent Grids)
The acetate overlay method lets you draw grids on transparent plastic sheets that overlay your reference photo without marking the original.
Purchase acetate sheets (clear plastic) from art supply stores. Cut sheets to match your reference photo size. Tape the acetate over your photo at the top only, creating a hinged overlay. Draw your grid on the acetate using fine permanent marker or grease pencil. Label grid squares same as you would on the photo itself.
Now you can lift the acetate to view your clean reference, or lower it to see the gridded version. This approach is perfect when you don’t want to mark borrowed or valuable photos, when planning multiple paintings at different scales from the same reference, or in teaching settings where students share references.
Canvas overlay variation: Create an acetate grid matching your canvas size. Tape it at the top of your canvas to create a hinged overlay. Look through the acetate to see both grid and canvas simultaneously. Draw key landmarks on canvas while viewing through the acetate grid. Lift the acetate out of the way while painting.
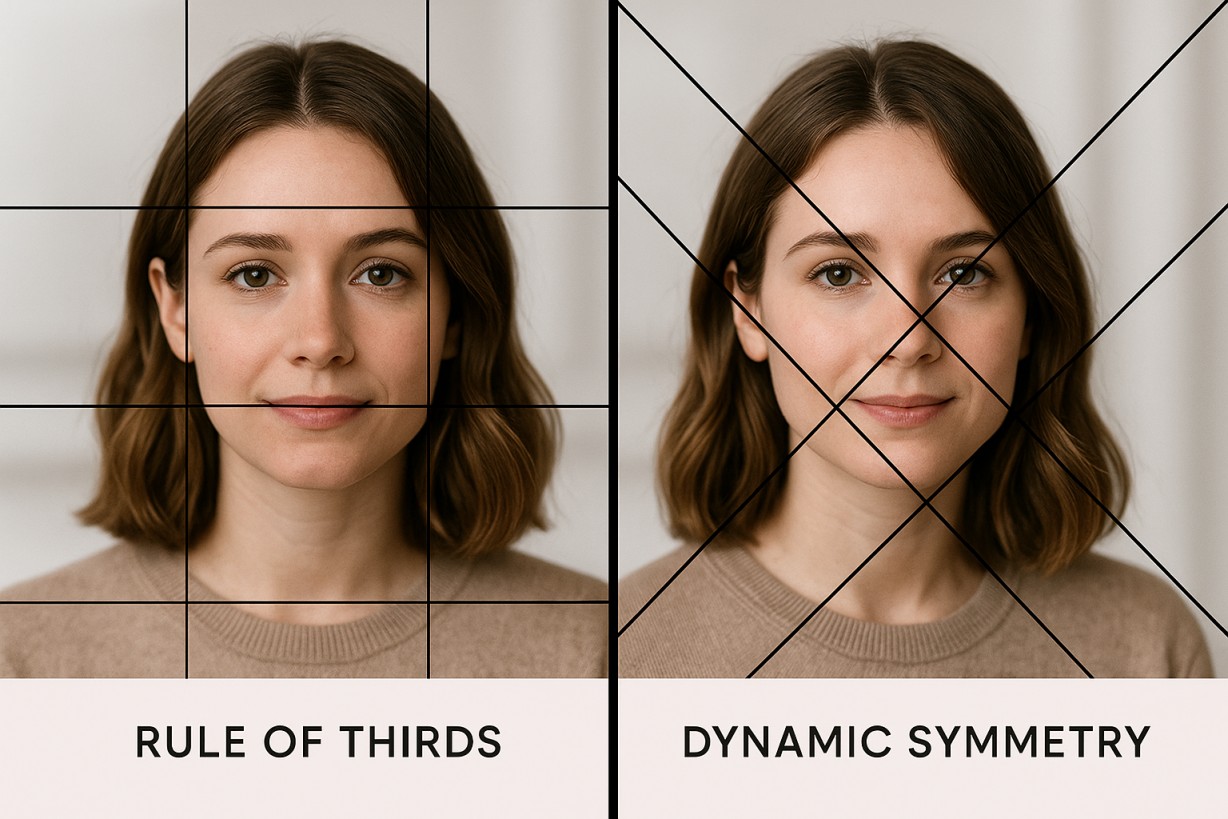
Diagonal/Triangular Grid Method
Instead of standard squares, this method uses diagonal, vertical, and horizontal lines that create triangular sections. It’s particularly effective for portraits and organic subjects.
Start by drawing a line from one corner to the opposite corner (diagonal). Draw a second diagonal from the other corners, creating an X. Draw a vertical line through the center where diagonals cross. Draw a horizontal line through the center. You now have four sections.
Repeat this process within each of the four sections. Continue subdividing until you achieve adequate grid density. Number the resulting triangular sections for reference.
Why use triangular grids? They provide more reference points than square grids with the same number of lines. Diagonal lines naturally align with perspective and organic forms. They’re especially useful for portraits (follows facial structure), animals (captures angles better), and landscapes with strong diagonal elements.
Artist Adebanji Alade discovered this technique in sculpture classes for clay relief work—it translates beautifully to acrylic painting.
Squiggle/Doodle Grid Method (Muralists’ Technique)
This unconventional approach uses freeform grids with irregular lines, dots, and shapes. The random pattern grid is unique to each project and works brilliantly for very large acrylic paintings or murals.
On your wall or large canvas, draw irregular squiggle lines—long lines with curves, dots, and shapes. Fill the entire area with a connected squiggle pattern. Photograph the squiggle grid. Import the photo into your computer or tablet. Overlay your design artwork on top of the squiggle grid photo using layers. Adjust opacity to see both the squiggle grid and your artwork. Use this merged image as reference—paint by matching squiggle landmarks to your artwork.
Why does this work? It provides reference points without geometric rigidity. It’s more artistic and less mechanical looking than straight grids. The landmarks are unique and easily identifiable. The grid can remain partially visible in abstract work without looking out of place.
Working with Different Acrylic Painting Surfaces
Not all surfaces accept grid lines equally. Knowing surface-specific techniques prevents frustration and damaged substrates.
Stretched Canvas (Most Common)
Stretched canvas has a textured tooth from the canvas weave, slight give when you press on it, and gesso priming that makes it slightly absorbent.
Best tools: Soft vine charcoal (first choice) wipes off easily with a damp cloth. As an alternative, use 2B or 4B graphite with light pressure only. Avoid hard pencils, ballpoint pens, and fine-point markers.
Application tips: Draw ultra-light lines—barely visible is perfect. For stretched canvas, place cardboard behind the area you’re drawing to prevent pressing through the canvas to the stretcher bars. Charcoal lines may smudge, so spray with workable fixative if you’re concerned. Always test erasability in a corner before committing to a full grid.
Erasure strategy: Before painting, gently wipe charcoal with a barely damp (not wet!) cloth. For graphite, use a kneaded eraser with gentle dabbing motion. Many acrylic painters prefer to paint over grid lines with thin wash rather than erasing—the grid naturally disappears under subsequent layers.
Wood Panels (Birch, Cradled Panels)
Wood panels offer a smooth, hard, non-porous surface (if gessoed) with no texture or give. This stability makes them excellent for precise gridding.
Best tools: Graphite pencil (2B or HB) is your first choice—the smooth surface accepts pencil beautifully. Charcoal works as an alternative, though it may smudge more easily on the smooth surface. Avoid pressing too hard, as indentation becomes permanent on hard surfaces.
Application tips: Your ruler glides smoothly, making it very easy to draw straight lines. You can achieve very precise, thin lines. Grid lines erase more cleanly than on canvas thanks to the smooth surface. Consider using a clear gridded ruler to see through to the panel surface while drawing.
Erasure strategy: Wood panels wipe clean with a slightly damp cloth (gesso on wood seals well). A vinyl eraser works perfectly for graphite. Kneaded eraser handles charcoal. The panel surface can handle firmer erasure pressure than canvas.
Canvas Paper/Boards
Canvas paper/boards have a paper substrate with acrylic gesso coating, slight texture but flatter than stretched canvas, and more absorbency than traditional canvas or wood panel.
Best tools: 2B graphite pencil (first choice), or vine charcoal as alternative (though it may be harder to control on the flatter surface). Avoid heavy pressure that can dent the paper backing.
Application tips: This surface works similarly to drawing paper. Lines show clearly on the gesso surface. Provide firm backing underneath (like a drawing board) while gridding. These boards are very economical for practicing grid method.
Erasure strategy: They erase similarly to drawing paper. Use a kneaded eraser for gentle lifting, or vinyl eraser for stubborn marks. Always test first—some canvas boards are more absorbent than others.
Common Grid Method Problems & Solutions for Acrylic Painters
Every acrylic painter encounters these challenges. Having solutions ready prevents you from abandoning the grid method in frustration.
Problem: Grid Lines Won’t Erase
Cause: You pressed too hard, used the wrong tool for your surface, or paint has already absorbed into the canvas.
Solutions: Prevention is best—draw ultra-lightly from the start. If you can barely see the lines, you’re doing it right. For stubborn charcoal, try a damp (not wet!) cloth or paper towel with very gentle rubbing motion. For graphite, use a kneaded eraser first (gentle dabbing), then vinyl eraser if needed.
The nuclear option: Paint over with thin titanium white wash, let it dry completely, then redraw a lighter grid. But the best professional solution? Accept that the grid will partially remain and build up acrylic layers to cover it. Most professionals use this approach.
When grid shows through paint: This usually only happens with very thin acrylic washes or glazes. Build up opacity in your base layers before adding glazes. For portraits, use terracotta or sienna colored pencil instead of graphite—it blends with skin tones. Paint subsequent layers slightly heavier in areas where the grid remains visible.
Problem: Image Distorted/Stretched
Cause: Your canvas and reference photo have different ratios.
Symptoms: Your subject looks too tall or short, too wide or narrow. Everything feels “off” but you can’t pinpoint why.
Solutions: Verify your ratio math. Do canvas dimensions ÷ reference dimensions = the same number for both height and width? Recount your squares—do you have the same number of rows and columns on canvas as reference? Measure your squares—are they actually square (equal height and width), or did they become rectangles?
If distortion is slight, you might adjust your drawing within squares to compensate. If you have major distortion, you may need to regrid your canvas with the correct ratio. Learn from the mistake for next time.
Prevention: Always calculate and verify ratio before starting. Use the reference-to-canvas size chart provided earlier. When in doubt, count squares and measure—numbers don’t lie.
Problem: Lost Track of Which Square I’m In
Cause: You didn’t label your grid or you’re working unsystematically.
Solutions: Always label—number rows and letter columns on both reference and canvas. Use a systematic approach, working left-to-right and top-to-bottom consistently. Keep your finger on the reference, pointing to the square you’re working. Take breaks to step back and regain orientation every 3-4 squares. Mark completed squares lightly on your reference as you finish them.
Advanced tracking: Use colored tape or small post-it flags to mark your current row. Cross off completed squares with light pencil marks on your reference.
Problem: Proportions Look Wrong After Transfer
Cause: You drew what you think you see rather than what’s actually there. You rushed through squares. You didn’t check your work frequently enough.
Solutions: Step back frequently—view your canvas from 6-8 feet away every few minutes. Try the squint test: squint at both reference and canvas. Do dark and light masses match? Check key relationships in portraits: distance between eyes, width of nose versus face width. Study negative space—do empty background areas match the reference?
Focus on shapes rather than objects. Stop thinking “this is an eye” and just draw the exact shapes and angles you see in that square.
Correction: Identify the problem area—which square looks off? Erase that square and carefully redraw it, comparing closely to your reference. Check adjacent squares too—errors often extend beyond the obvious problem area.
Problem: Grid Method Taking Too Long
Cause: Your grid is too dense for your project needs. You’re being perfectionist. You chose the wrong method for your project scale.
Solutions: Adjust grid density—use larger squares (1.5 or 2 inches instead of 1 inch) for simpler subjects. Consider string grid method, which has longer setup but eliminates erasure time. Use digital grid reference to save time creating the grid on your photo. Remember that practice makes you faster—your first grid takes longest.
Time-saving workflow: Focus on a light sketch for proportions only. Don’t render details during grid transfer. Grid only the major shapes and key landmarks. Refine and add details during painting, not during grid transfer.
Beyond Accuracy: Using Grid Method to Develop Acrylic Painting Skills
The grid method isn’t just about accuracy—it’s a powerful learning tool. Understanding how to leverage it for skill development prevents dependency and accelerates your growth as an artist.
How Grid Method Improves Observational Skills
The grid method teaches you to see shapes instead of objects. Within each square, you stop seeing “nose” or “tree” and start seeing abstract shapes, angles, and curves. You begin understanding negative space—empty areas become as important as filled areas. You recognize value relationships by comparing darks and lights within bounded areas. You grasp spatial relationships—distance, proportion, and positioning become measurable.
Active learning approach: Don’t zone out during transfer. Stay mentally engaged. Self-quiz before drawing each square—predict where lines will intersect the grid. Compare constantly, looking back and forth between reference and canvas, noting differences. Analyze mistakes—when a square doesn’t look right, identify why (angle off? intersection point wrong?).
Progressive Weaning Strategy: From Grid to Freehand
Phase 1: Dense Grid (Beginner Stage) — Start with small squares (1 inch or smaller). This gives maximum support and reference points, builds confidence, and develops understanding of proportions. Use this for your first 3-5 paintings with grid method.
Phase 2: Medium Grid (Developing Stage) — Increase to 1.5-2 inch squares. Fewer reference points force more independent observation. You still have structure but you’re developing more skill. Use this for your next 5-10 paintings.
Phase 3: Sparse Grid (Advanced Stage) — Use very large squares (3-4 inches) or minimal grid (just halves or quarters). This relies heavily on your developed skills. The grid provides checkpoints rather than continuous reference. Use this for your next 10+ paintings as you gain confidence.
Phase 4: Strategic Grid Use (Professional Stage) — Use grid only for specific challenges like complex perspectives or critical likenesses. Develop freehand skills for general painting. The grid becomes a tool you choose consciously, not a crutch you need constantly.
Parallel skill development: While using grid for finished paintings, practice freehand sketching regularly. Do sketch studies without grids for 10-15 minutes daily. Gradually you’ll rely on the grid less and less.
When to Skip Grid Method (Building Freehand Confidence)
Skip the grid for: Loose, expressive paintings where grid makes you too tight and precise. Quick studies and sketches where time investment doesn’t justify precision. Abstract or non-representational work where accuracy isn’t the goal. Plein air painting where practical setup has limitations. Creative composition where you’re interpreting reference freely.
Freehand skill building exercises: Practice daily gesture drawings—2-3 minute quick sketches without grid. Try the envelope method—draw a bounding box, then place key features by relationship. Learn sight-size drawing by comparing actual size relationships (hold pencil at arm’s length). Practice negative space drawing by focusing on empty spaces rather than subjects.
The goal: Use grid method when accuracy serves your painting goals. Use freehand when speed, expression, or skill development is the priority.
Key Takeaways
The grid method for acrylic painting maintains perfect proportions through mathematical ratio matching. Your canvas dimensions divided by reference dimensions must equal the same number for both height and width—this prevents distortion.
You have multiple technique options. Choose traditional pencil or charcoal grid for general use, string grid method to eliminate erasure issues, digital apps for speed and flexibility, or alternative methods like acetate overlay and diagonal grids for specific scenarios.
Take a surface-specific approach. Use soft charcoal on stretched canvas (erases easily with damp cloth), 2B graphite pencil on wood panels (smooth surface works perfectly), and avoid hard pencils or excessive pressure on any acrylic painting surface.
Tool selection matters, especially for portraits. Use terracotta or flesh-toned colored pencil instead of graphite to prevent gray hue showing through paint layers. This is critical for successful portrait work with acrylics.
Apply the grid strategically. Use it for commissioned work where accuracy is critical, complex subjects requiring precise proportions, large-scale paintings with dramatic scaling, and as a learning tool to develop observational skills—not as a permanent crutch.
Next Steps for Acrylic Painters
Start with a simple project. Choose a reference photo with straightforward proportions—a simple still life or single-subject composition gives you the best learning experience.
Gather proper materials before you begin. You’ll need a ruler, appropriate drawing tool for your surface (charcoal for canvas, graphite for panel), reference photo, and canvas or surface matching your reference ratio.
Practice grid creation with focus on accurate ratio calculation and precise grid measurement. Time invested here prevents proportion disasters later. Rushing through grid setup is the most common mistake beginners make.
Work systematically during transfer. Move square by square, left to right, top to bottom. Maintaining a consistent approach prevents losing your place and missing sections.
Develop parallel skills. While using grid for finished paintings, practice freehand sketching 10-15 minutes daily to build independent drawing skills. The grid is training wheels, not a permanent requirement.
Explore variations once you’re comfortable. Try the string grid method to eliminate erasure issues. Experiment with digital tools for different workflows. Test the diagonal grid approach for portraits.
The grid method is a tool, not a shortcut. It provides structure and accuracy while you develop observational skills and painting technique. Use it strategically to serve your artistic goals, not as a replacement for skill development. Over time, you’ll use grids less frequently as your freehand abilities strengthen—but you’ll always have this reliable technique available when a project demands precision.